Scripting with ISE: Adding new LUN’s, part 2
When we left off last time, we had a small script that:
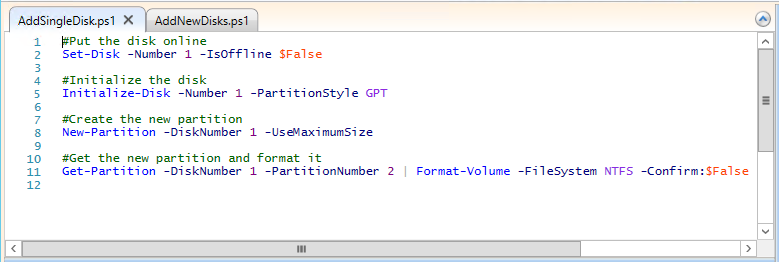
- Put an offline disk (disk #1) online
- Initialized the disk
- Created a new partition on that disk
- Formatted a new volume from that partition
The script looked something like this:
But that’s a pretty poor script, because it only runs if the disk & partition numbers line up (otherwise you have to edit each line to match what you’re working with). So let’s try to “generalize” this script for more universal application.
Start at the beginning–the first line of our script. How could we select or “Get” just the disks that are “Offline,” and pipe the result into our first “Set-Disk” command, putting them online?
Get-Disk [SOMETHING] | Set-Disk IsOffline $False
It turns out, we can do [SOMETHING] like this. That [SOMETHING] is: the Where-Object command. Remember–we just want to select those disks that have an IsOffline status of $True. In order to do that, we can always utilize the “Where-Object” command. Like this:
Get-Disk | Where-Object IsOffline -EQ $True
If I want to, I can take the output of this command and “pipe” it into the Set-Disk command we used earlier, where we will be able to switch the -IsOffline property to $False. Like this:
Get-Disk | Where-Object IsOffline -EQ $True | Set-Disk -IsOffline $False
As you type commands into the ISE scripting window, you will notice that context menus pop-up to help you finish your intended pattern. You can hit “tab” on your keyboard to complete the most likely selections as you move along.
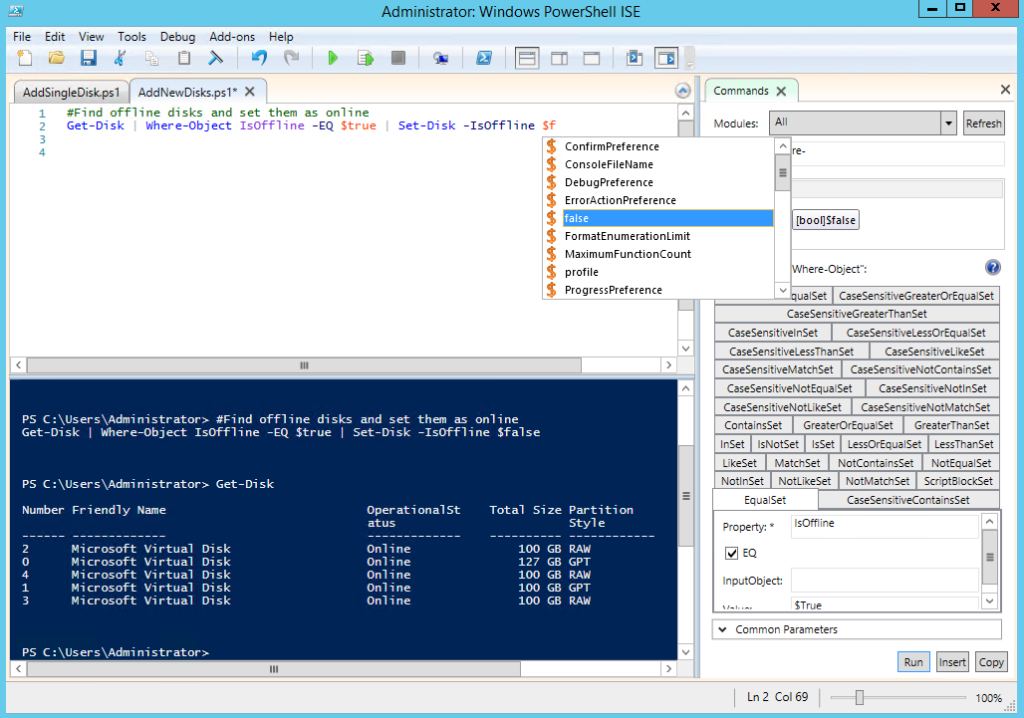
Just to verify it worked, Get-Disk reveals that all of our disks have now been switched to “Online.” Awesome! But wait, we’d be pretty disappointed with ourselves if we stopped there. In Disk Management, we can see that our disks have not even been initialized yet, nor do we have any partitions!

Again, let’s return to Get-Disk, and figure out how we might select only the new (uninitialized) disks.
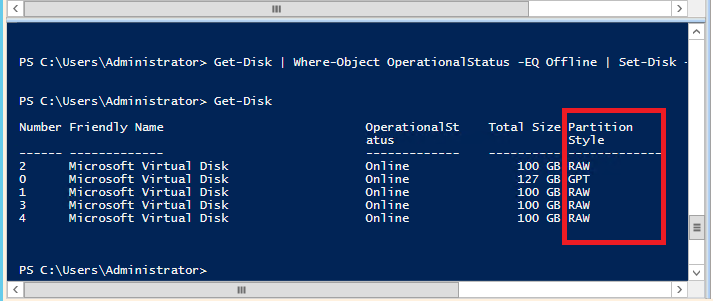
Ah-ha–it looks like any disks that have not yet been initialized/formatted will have a “RAW” Partition Style.
Working with Variables
Now I want to explore another way of getting & filtering a set of objects, then working with that sub-selection. Similar to what we did above, let’s use Get-Disk and Where-Object, but this time, let’s store the result into a variable.
A variable is just a placeholder. It starts with a dollar symbol ($) and can have any name at all behind it. Like this:
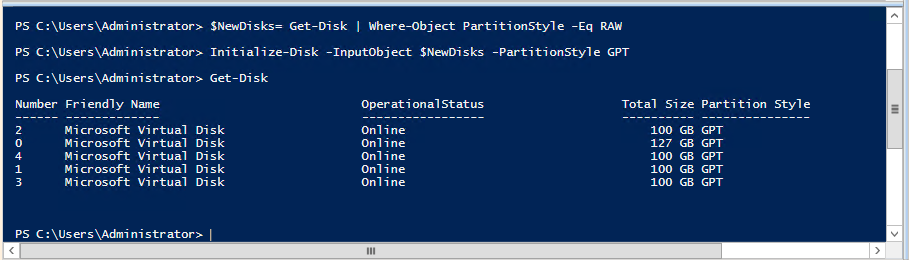
$NewDisks= Get-Disk | Where-Object PartitionStyle -Eq RAW
Now, this variable which we named “$NewDisks” can be called upon over and over again later on in our script. Let’s see an example in action.
Find Initialize-Disk again, since that was our next task, and let’s just fill out the form it provides us. Instead of using “ByNumber”–like we did last time–flip to the InputObject tab instead, and use the variable as the InputObject. Copy this and paste it into your script.
Initialize-Disk -InputObject $NewDisks -PartitionStyle GPT

Let’s run that line, and then Get-Disk once more to confirm that a Partition Style of GPT has been set.
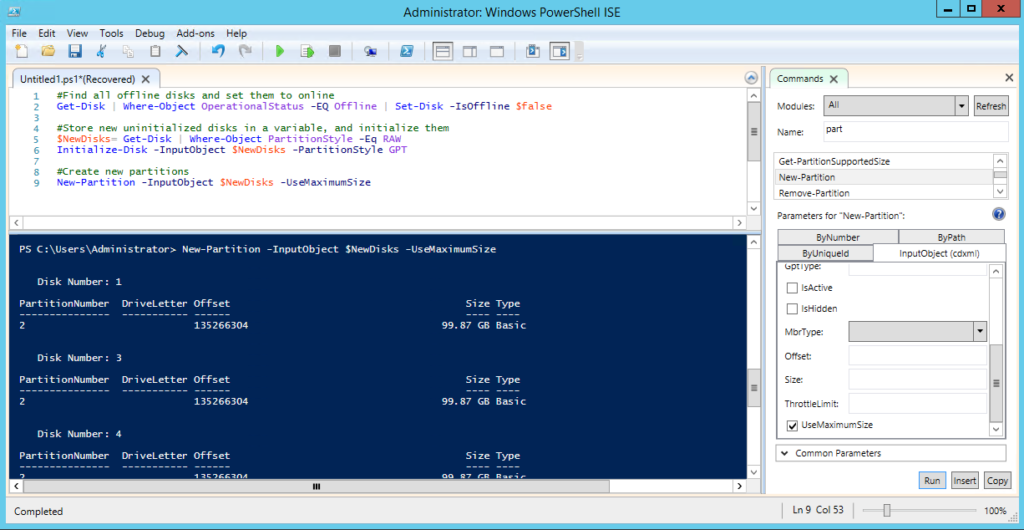
Next: We make partitions. Searching for “partition” quickly brings up the “New-Partition” cmdlet. Again, we can use the InputObject option with our saved variable–how about that?!
New-Partition -InputObject $NewDisks -UseMaximumSize
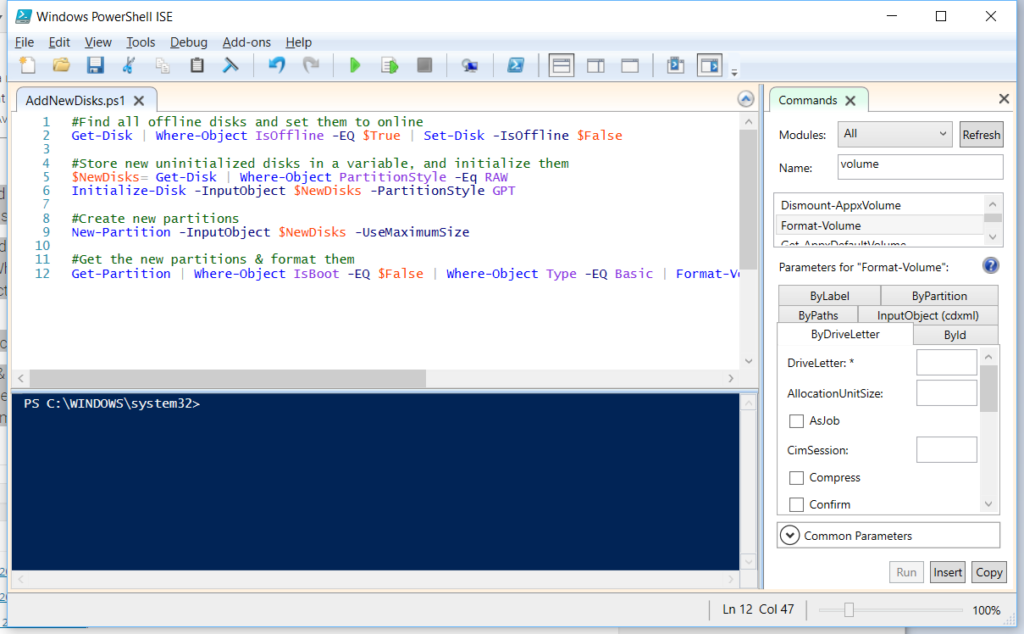
Last, we have to figure out how to get some new volumes out of all this work–again we want them formatted as NTFS volumes. If you’ve already returned to the Format-Volume cmdlet, you might have noticed that you were unable to use the $NewDisks variable again. That’s because Format-Volume is not looking for disks; it wants to work with partitions instead, remember? We need:
Get-Partition [SOMETHING] | Format-Volume -FileSystem NTFS -Confirm:$False
So let’s find that [SOMETHING] that is common to all of our newly minted partitions. Examine the output of:
Get-Partition | fl
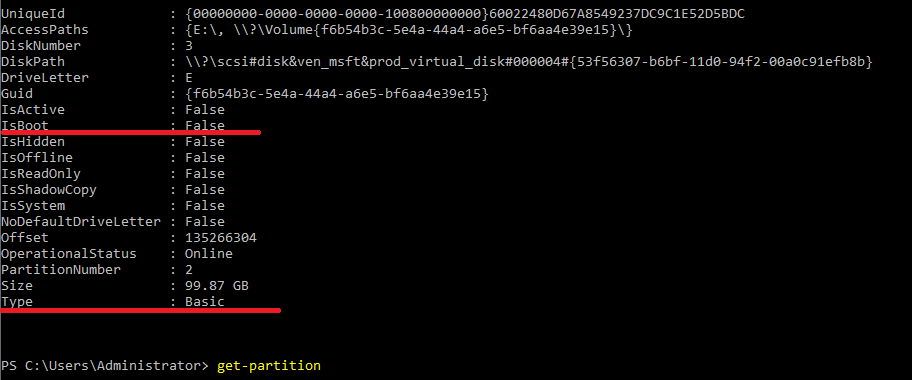
Instead of listing everything as a table, this command will display all of the properties of an object in list format. You will notice that every partition we would like to select has the IsBoot property set to False (so we do not select C:\). Additionally, we do not want to select a Reserved/Recovery partition–so it should say “Basic” instead. Therefore, we can select those partitions as follows:
Get-Partition | Where-Object IsBoot -EQ $False | Where-Object Type -EQ Basic
And that is how we will select the partitions that will be formatted as volumes. Do not forget: if you were to run the Format-Volume command now, you would receive a confirmation prompt, like this one:
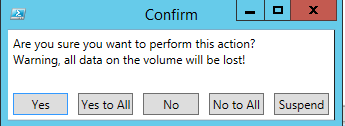
We want to avoid these kinds of interruptions in our script, so let’s add the Confirm switch to the end:
Get-Partition | Where-Object IsBoot -EQ $False | Where-Object Type -EQ Basic | Format-Volume -FileSystem NTFS -Confirm:$False
And just like that, we have successfully scripted a fairly non-trivial set of tasks in generalized form.
Keep going!
This is not a perfect script, and it could be improved (think about it–and try to manipulate it for your own purposes).
Maybe you’d like to assign drive letters here, or maybe these disks will not require drive letters–for example, perhaps you are adding them as Cluster Shared Volumes (CSV)’s into a failover cluster, like this:
#Add Cluster Storage & Create CSV’s
Get-ClusterAvailableDisk | Add-ClusterDisk
Get-ClusterResource | Where-Object OwnerGroup –EQ “Available Storage” | Add-ClusterSharedVolume
Whatever the case, you can continue building on your script, and save it using this tool (File, Save As). You might not think this is a time saver at first, but that’s just because you’re still learning. It might hit you when you are running this script for the umpteenth time–it takes seconds and you do not have to open Disk Management or click through a bunch of different screens and confirmation prompts.
ISE is not only fun to use, it is a massive time-saver, too! I hope you’ll agree. Soon I will share how I used this tool to create an automated setup & deployment process for a two-node Hyper-V cluster (we sell a lot of them since they are such a great, cost-effective way to provide High Availability on-premises).
Summary of this script:
#Find all offline disks and set them to online
Get-Disk | Where-Object IsOffline -EQ $True | Set-Disk -IsOffline $False#Store new uninitialized disks in a variable, and initialize them
$NewDisks= Get-Disk | Where-Object PartitionStyle -Eq RAW
Initialize-Disk -InputObject $NewDisks -PartitionStyle GPT#Create new partitions
New-Partition -InputObject $NewDisks -UseMaximumSize#Get the new partitions & format them
Get-Partition | Where-Object IsBoot -EQ $False | Where-Object Type -EQ Basic | Format-Volume -FileSystem NTFS -Confirm:$False
Leave a Reply