How-to Verify Your Domain with Office 365
So this is a very common task when provisioning new Office 365 accounts. You can obtain a free trial here. I recommend the E3 trial, even if you only plan to buy the Exchange Online plan ultimately. The licensing can be changed out seamlessly, and in the meantime you can try out some of the other cool features.
If you do not already have a domain, you will be given the option to set one up with Office 365 directly (at the time of this writing the domain registrar is handled by GoDaddy.com). I assume for the majority of users, you will already have a domain name, which means you will need access to the login for managing DNS records (or a support contact who can make the necessary changes at your hosting provider).
After you walk through a simple wizard to let Microsoft know who you are, alternate email address, etc., you will be able to login to the portal at https://portal.office.com. I usually create a global administrator account such as “azureadmin@<domain>.onmicrosoft.com” and assign it a trial license to start. After the domain is verified, you can set this account login to “azureadmin@<domain.com/net/org>.”
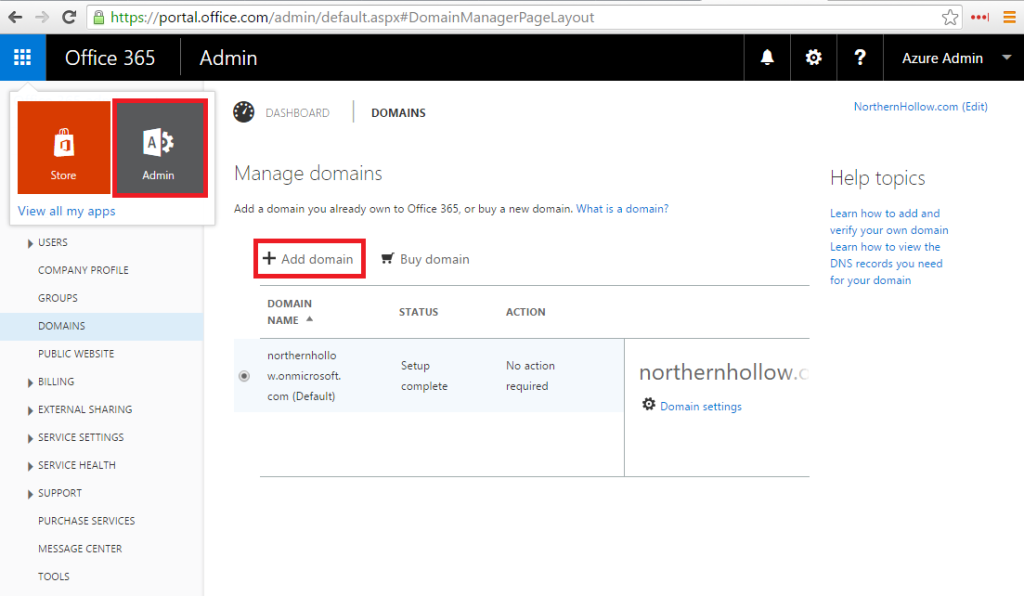
Once you’re logged into the portal, you’ll want to navigate to the (classic) Admin portal and select “Domains” from the left. Click on Add domain.
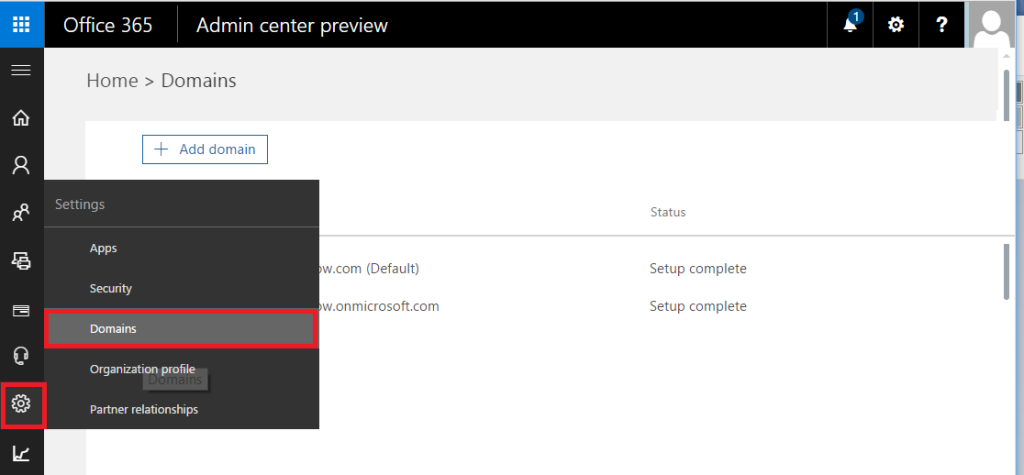
In the new Admin center, you can find Domains under Settings.
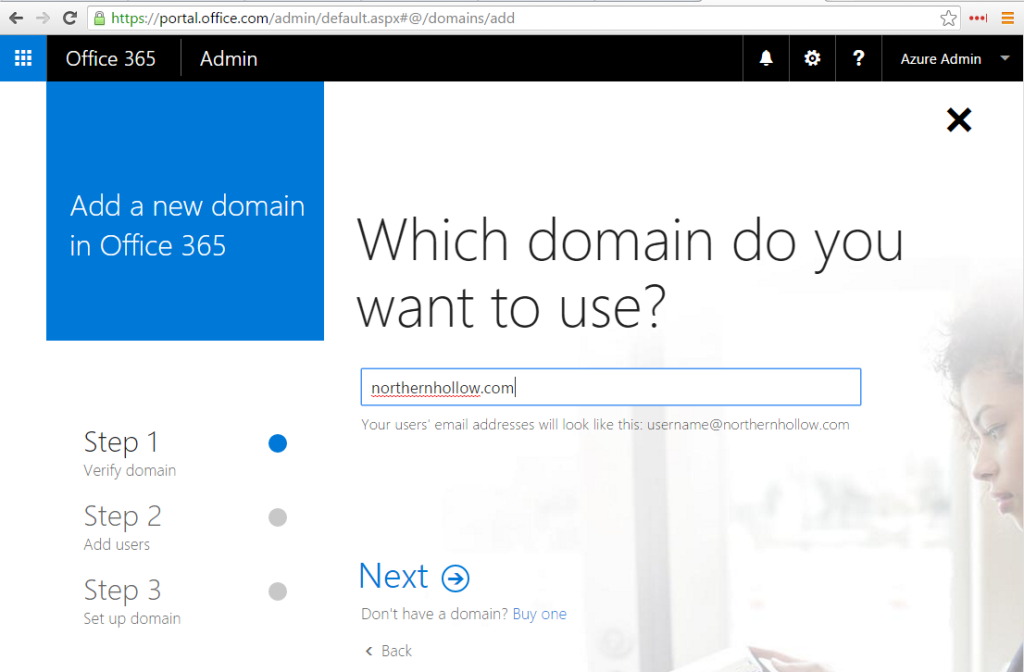
You will step through the wizard and add your domain name. Eventually it will give you a “TXT” record to add to your DNS zone file.
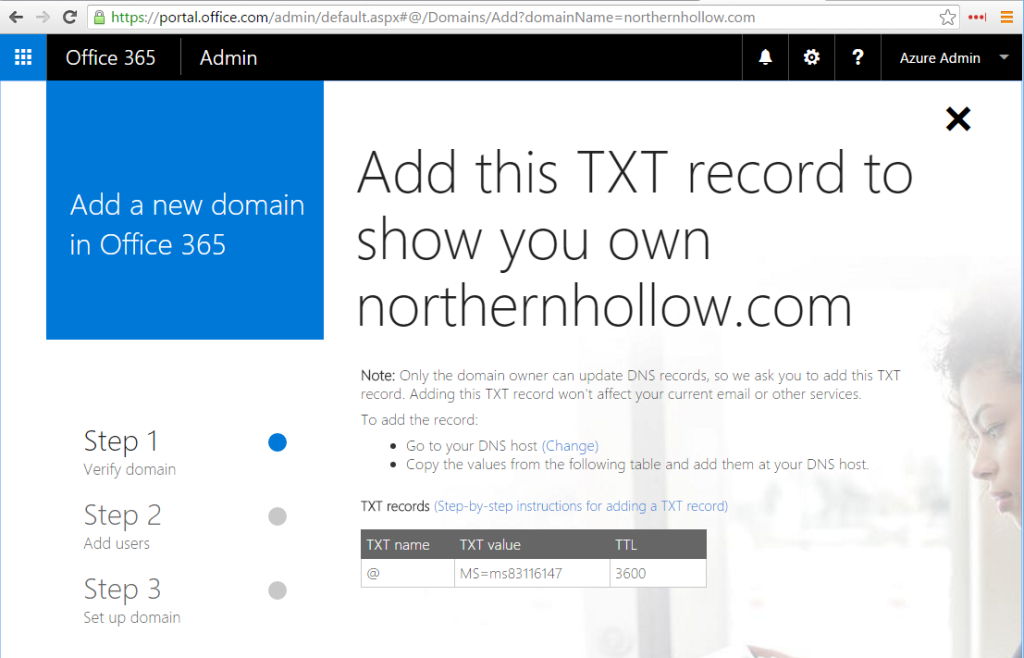
You can copy and paste this value into your DNS zone editor, or send it to your support contact to carry out. Eventually you will be able to return to this page and verify the record (it can take a few minutes for the record to show up).
For the purposes of this tutorial, you can simply exit out of the process at this point and see the status of your domain at this time (you don’t need to add any users or change DNS records yet):
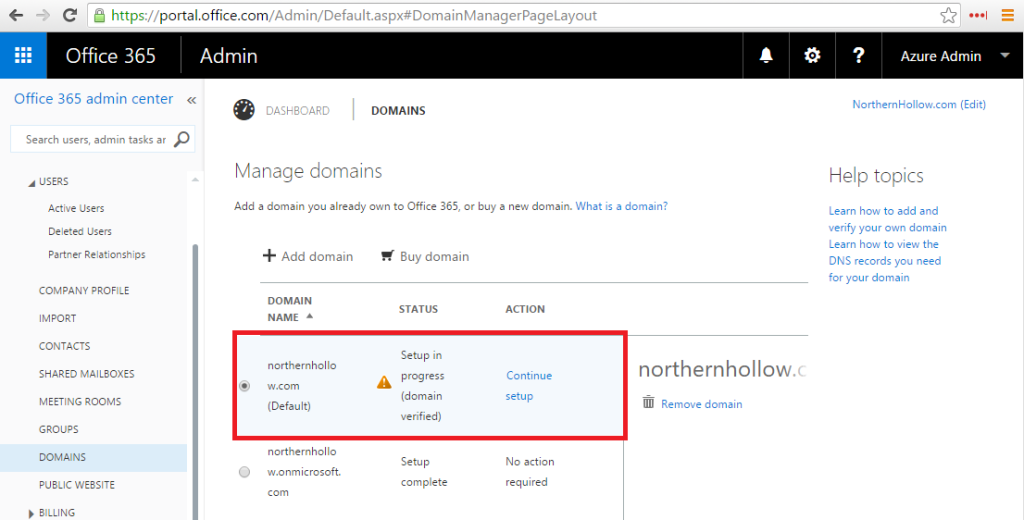
You will have the chance to add more DNS records later by returning to this screen and choosing “Continue Setup”–for example, after you have migrated Email accounts. If this is a brand new domain, and you do not have any existing Email data to migrate, then you can proceed with the rest of the setup, and add the remaining DNS records. Otherwise, it is recommended that you stop here until Email data migration is complete.
At this point you are able to do things like synchronize your on-premises domain controller using Azure AD Connect or enable integration through the Windows Server 2016 Essentials Dashboard.
Adios! Until next time.
Leave a Reply