(Mis)Adventures with Conditional Access in Azure Active Directory Premium (P1)
I have been playing with Azure Active Directory Premium (P1) features a lot lately. And I love to try as hard as I can to break things. Turns out, it isn’t that hard to do with Conditional Access. But, having brushed up against a few obstacles, I can now share some very helpful tips, if you are considering implementing Conditional Access in your own environment.
Conditional Access is a powerful feature-set that enables administrators to define conditions which must be met, before access can be granted to resources such as Office 365. For example, it is possible to require that users enable MFA and provide a second factor to login under certain circumstances (but not all circumstances, which is the default behavior of MFA without Azure AD Premium). Here are some other examples of what would be possible to do with Conditional access:
- Require MFA, but only if users are signing in from a web browser (we will demonstrate this example)
- Require MFA, except from trusted IP addresses / known locations (we will also demonstrate this)
- Block access outright for certain countries/regions
- Require devices to meet certain conditions such as being enrolled in Device Management, and being up-to-date
- And there are many other combinations you can play with
Default Conditional Access Policy for Admins
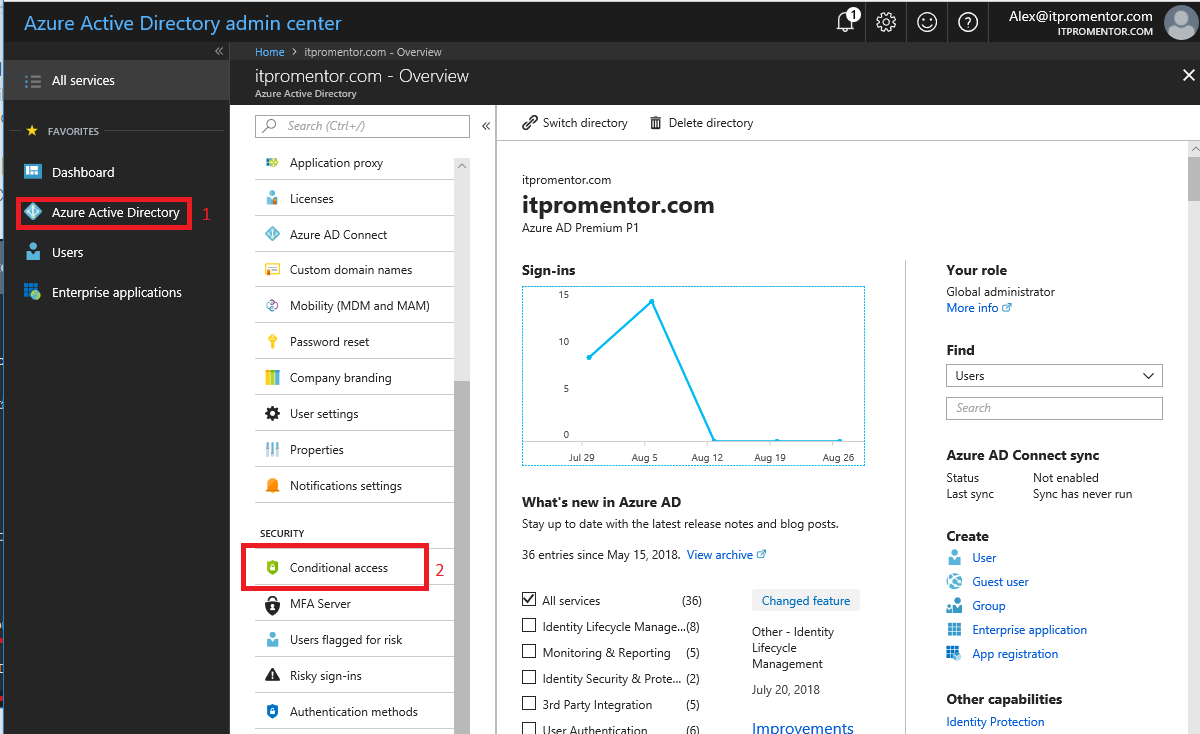
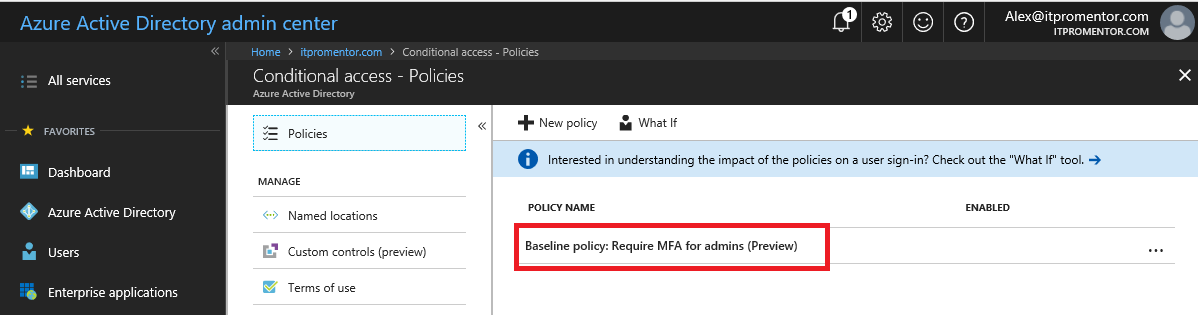
There is a default Conditional Access policy that is now added to all Office 365 subscriptions (and it does not require Azure AD Premium). Let’s take a look at what it does. First navigate to the Azure AD admin center. Click Azure Active Directory then find Conditional access under Security.
Find and select the Baseline policy: Require MFA for admins.
Here it shows us what the policy does (requires multi-factor authentication for admins), as well as some options for opting out. Right now this rule is set to Automatically enable policy in the future, but eventually Microsoft will enable this for all tenants, unless you manually switch it to Do not use policy. Or, you can just Use policy immediately. The next time your admins sign-in, they will be prompted to setup MFA.
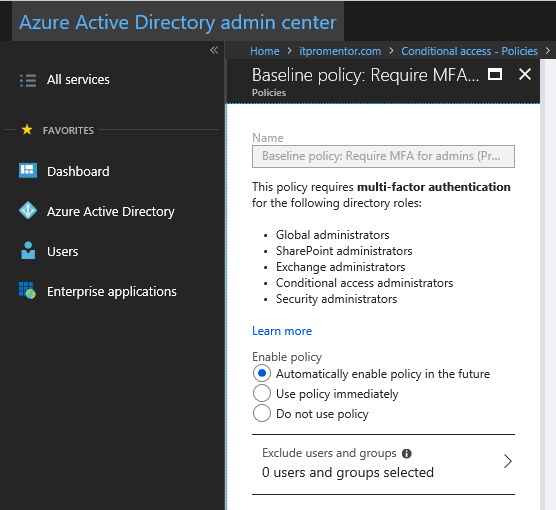
It is recommended to enforce MFA for all admins.
Example policy: Require MFA for web browsers accessing OWA
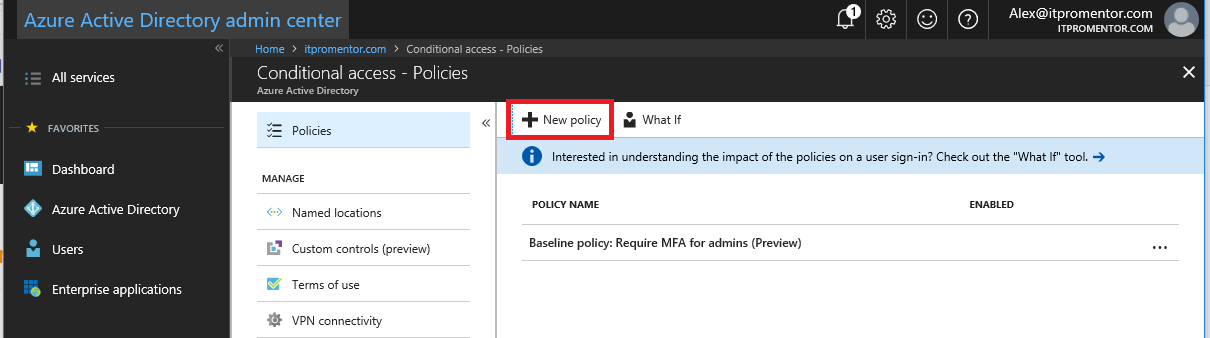
An important note about these polices before we begin. Remember that it is possible to enforce MFA on a per-user basis in Office 365 (which does not require Azure AD Premium). However, if you do that, then MFA will be enforced across the board, for every application, and every location, on each user account that you enable. Azure AD Premium’s Conditional Access allows you to dial this in to specific scenarios and places, and you don’t have to enable it on every individual account (you can target a security group for example). Let’s configure one example policy to show you how this works. Start by clicking New Policy.
Let’s give it a name like Require MFA for web browsers accessing OWA.
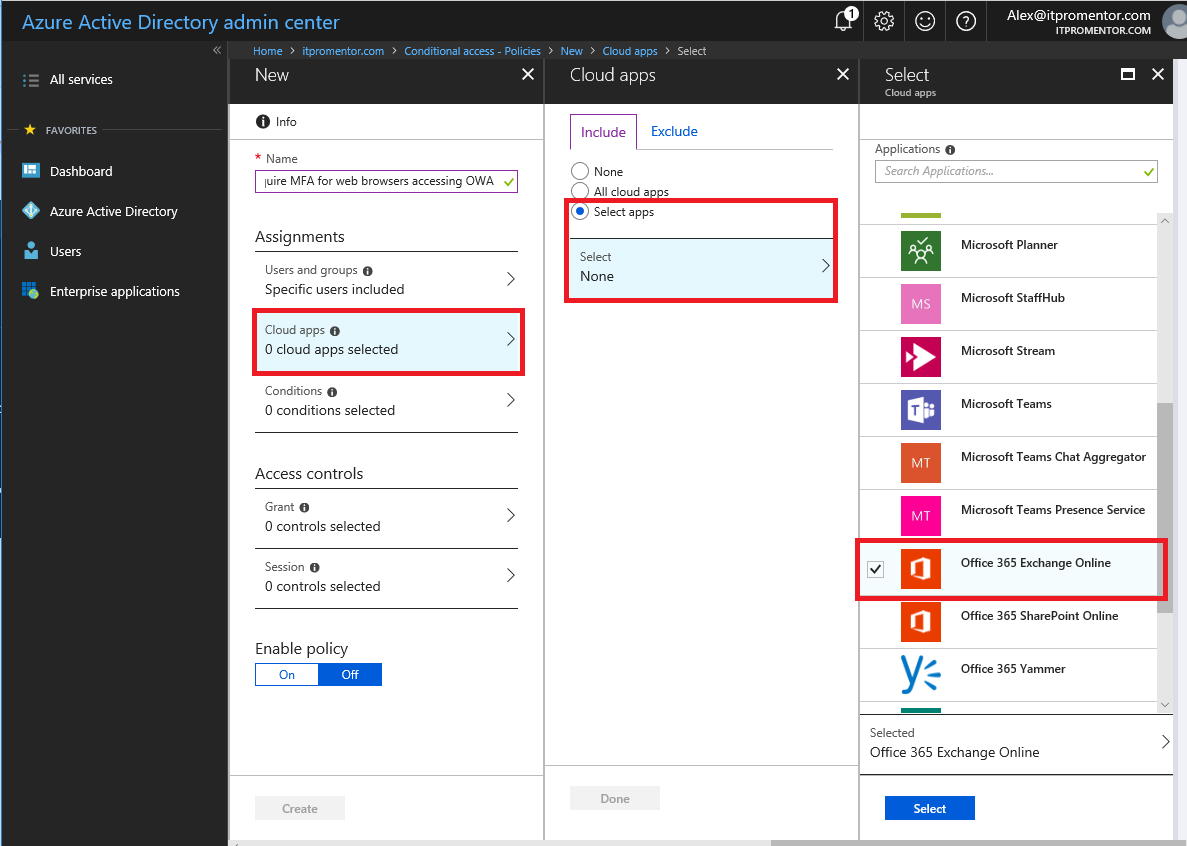
Under Users and groups, I recommend specifying a security group or test user at first. Then you can choose Cloud apps > Select apps, and Office 365 Exchange Online.
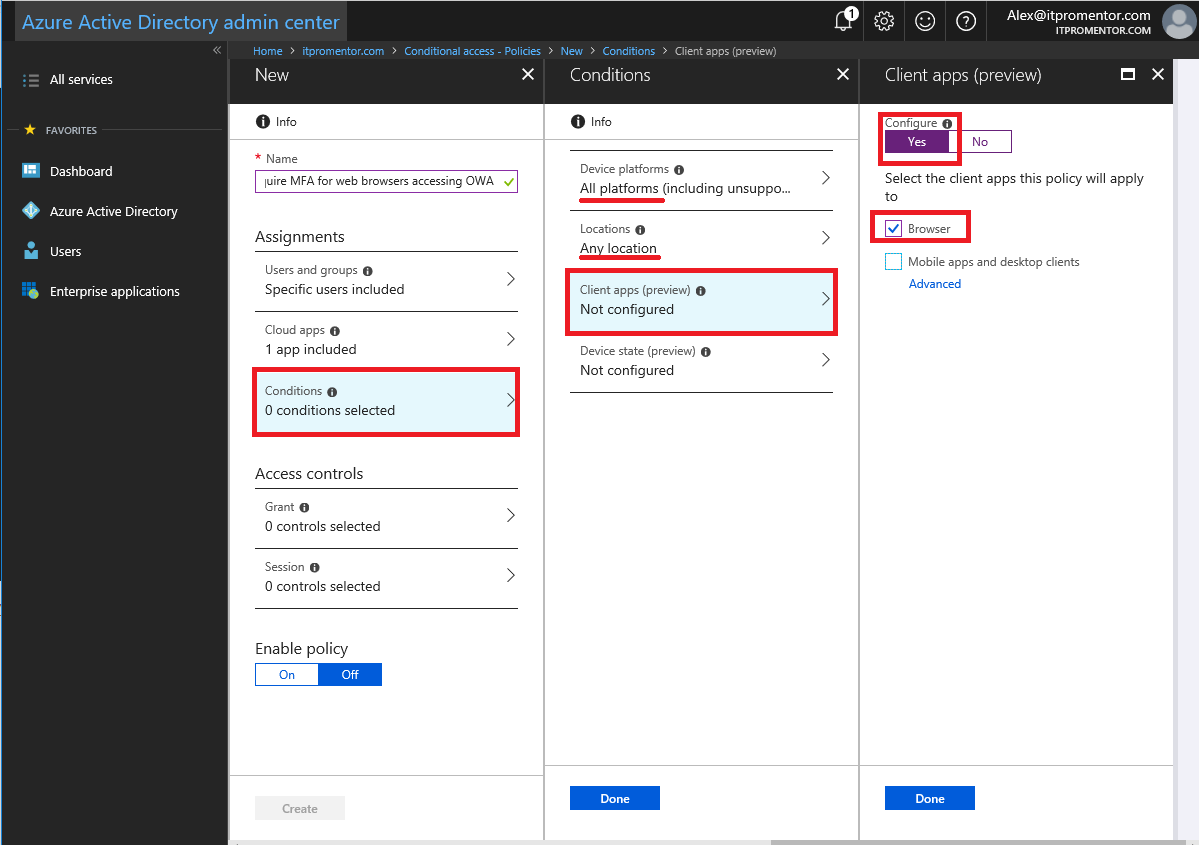
Next we can specify our Conditions. I selected All platforms under Device platforms, Any location under Locations and for the Client apps, I selected: Browser (but not Mobile apps and desktop clients). I did not configure Device state.
Under the Access controls section, we will choose to Grant access and Require multi-factor authentication. Choose Select.to finish.

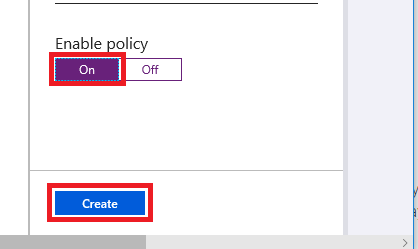
Now, you just have to Enable the policy by switching it to On and click on Create.
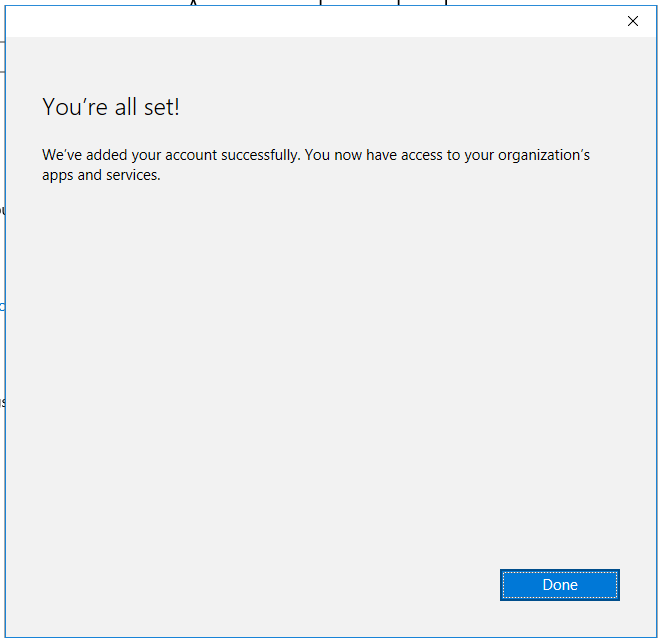
Test it out: go to the OWA login page e.g. https://mail.office365.com:
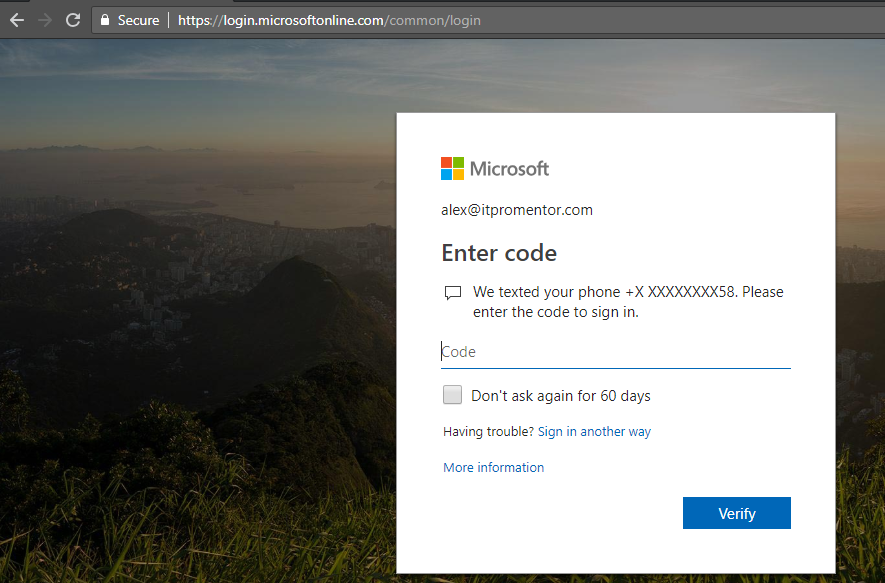
Success.
Exclude trusted locations
With Azure AD Premium, it is also possible to specify trusted locations by IP address, so you could add your on-premises external IP ranges, for example, to allow users who are located within your “four walls” to bypass MFA prompts (this is a very popular request). Here is how you would accomplish this (two ways to do it actually, for an MFA policy).
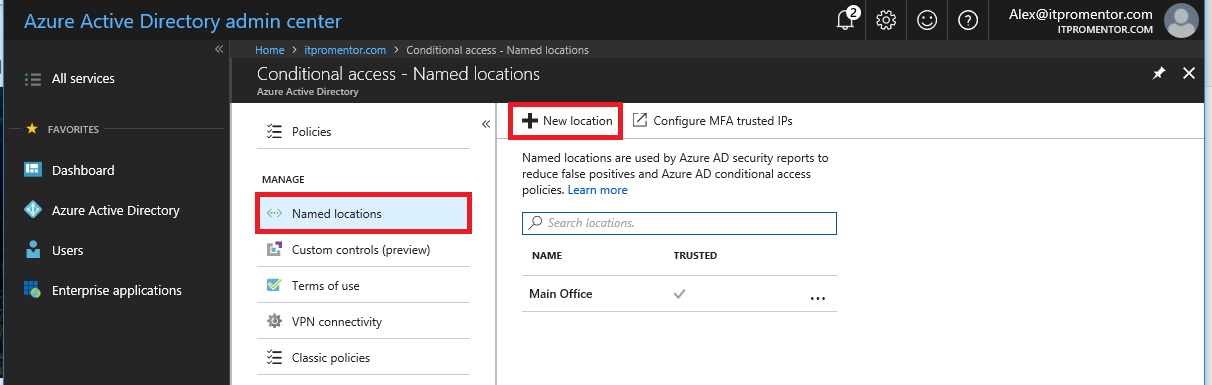
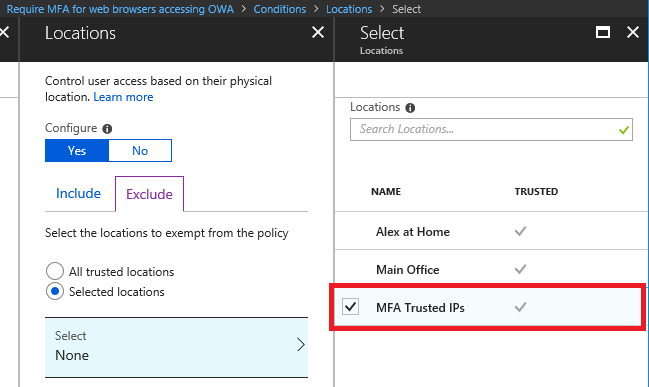
First way: you should add some known locations. Go to Named Locations > New location. (You will notice the other way to accomplish this on the same page–Configure MFA trusted IPs–we will come back to this, but these locations we are creating here will be available to any policy–not just applicable to MFA).
Name your location, and add your IP ranges (notice how you can also create location objects for entire countries/regions if you intend to create a policy that blocks this type of access, for instance). NOTE: you must use proper CIDR notation, even for a single IP address (use /32). Another interesting aside: I often see folks listing “internal” IP addresses here… I assure you: Azure AD has no idea what your internal (private) IP scheme is; since you are behind a NAT, only the external (public) IP of your router or firewall is visible on the Internet.
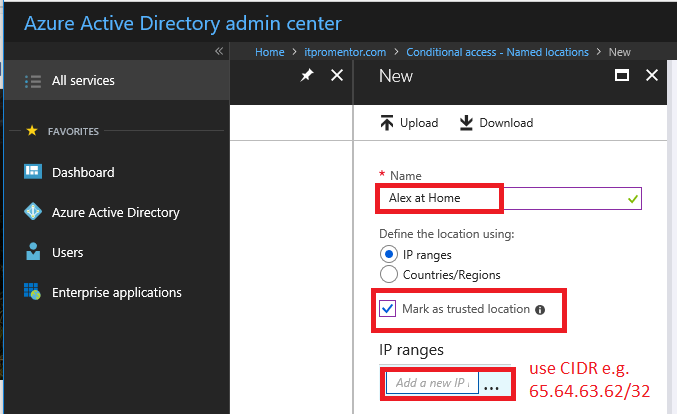
When you save the policy, you can also choose to Mark as trusted location.
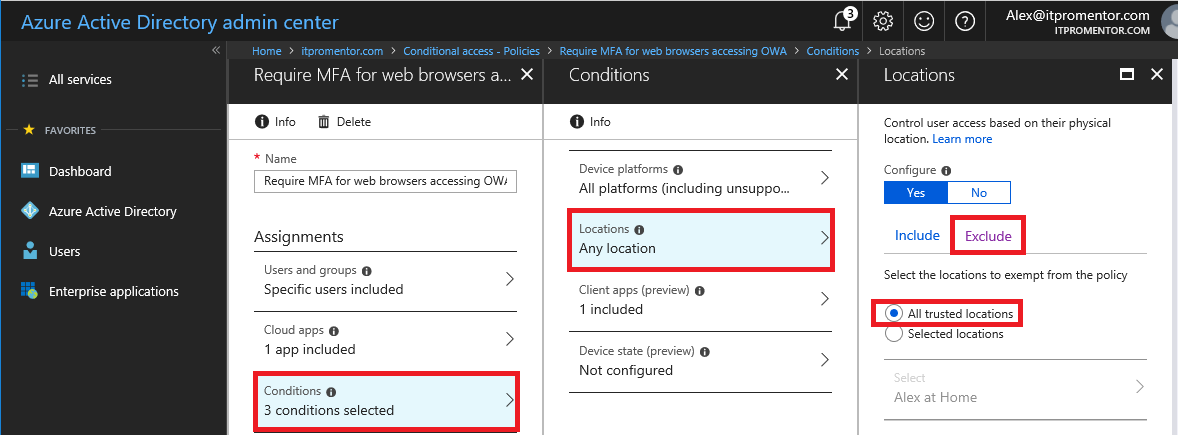
Once you’ve got that done, go back to your policy and make the following edits to accomplish the exception: Conditions > Locations > Configure > Exclude > All trusted locations.
Test again, and you should not be prompted for the MFA from your trusted location(s).
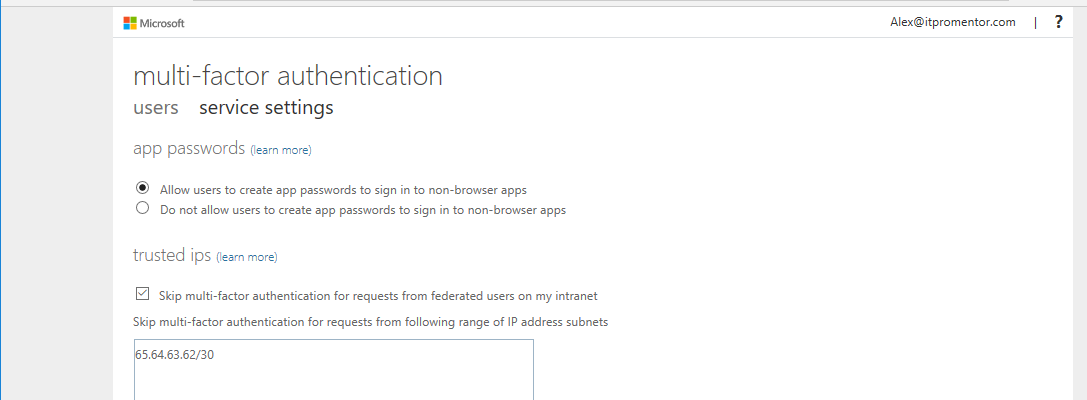
Now, with that out of the way: you can also just select that option to Configure MFA Trusted IPs from the Named locations area. Again, I wanted to show you the first way, since that is handy for policies that don’t necessarily call out MFA specifically. But here, you can see that it is possible to Skip multi-factor authentication requests from following range of IP address subnets (up to 50 IP ranges). A nice feature that many an Enterprise will request.
Doing this will also automatically add another location to your list of options when working in any given policy.
Now, onto the rest of my story.
My big misadventure with Conditional Access
This blows my mind. But, I learned that it is possible to accidentally and completely block all access to Azure AD, and anything behind it (including Office 365). Here is how I did it.
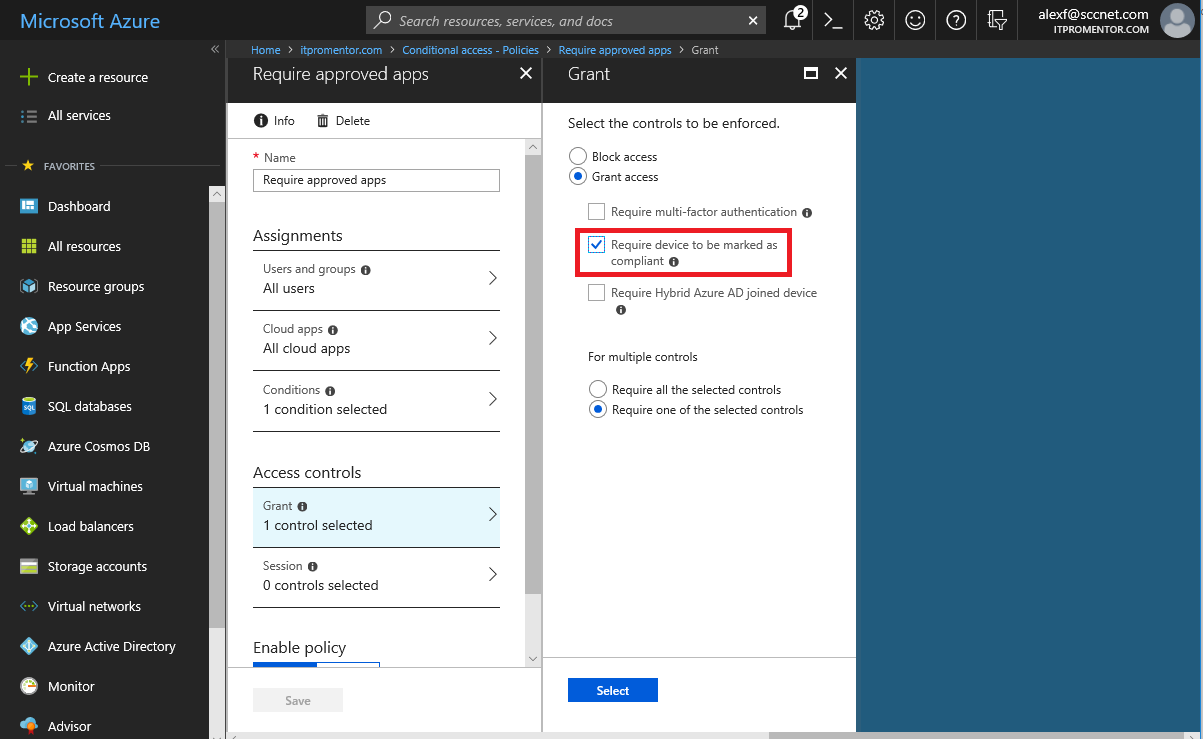
First, I just wanted to test what would happen if I required device compliance. So I made the selections:
- All users
- All cloud apps
- Under Conditions, I included All client apps (not just browser)
- Under Access controls, I chose Require device to be marked as compliant in Intune
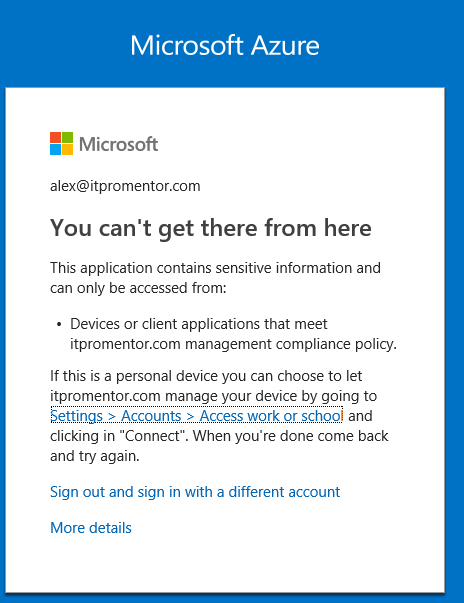
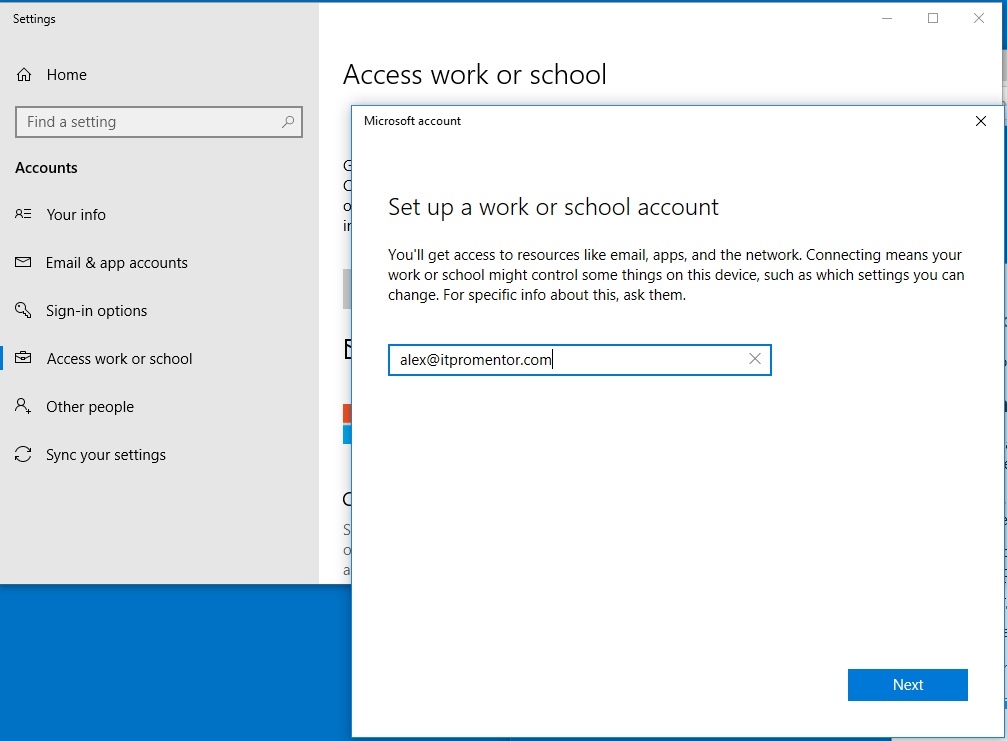
When testing sign-in via a browser on my dummy Windows 10 virtual machine, I was first met with this message: You can’t get there from here with the subtext This application contains sensitive information and can only be accessed from: Devices or client applications that meet itpromentor.com management compliance policy. The note below that explains further: I need to actually add my device to Azure AD by connecting it in Settings > Accounts > Access work or school.
So I did.
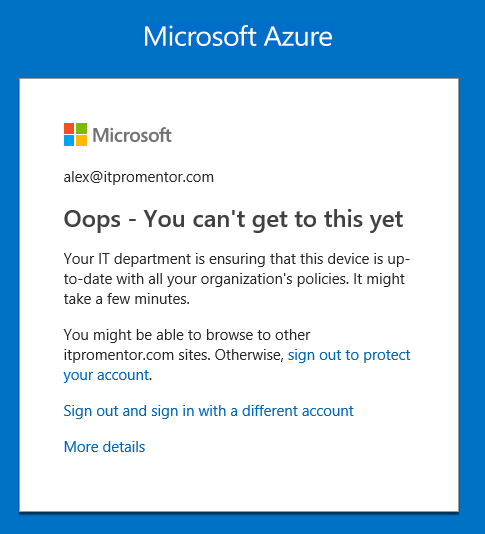
Ah-ha, but this is a brand new virtual machine, and I bet you anything it doesn’t have all its updates. While this was true, it was not the only reason I was seeing this message: Oops – You can’t get to this yet, with the subtext: Your IT department is ensuring that this device is up-to-date with all of your organization’s policies. It might take a few minutes.
I rebooted numerous times for updates, etc. and still no luck. I realized I hadn’t actually configured an Intune policy, so I wondered if that could be the culprit. At this point, I decided to modify my policy, and remove the requirement for device compliance and then save the policy. I simply cleared the Require device to be marked as compliant selection.

Here is where things get interesting. The new error message reads as follows:
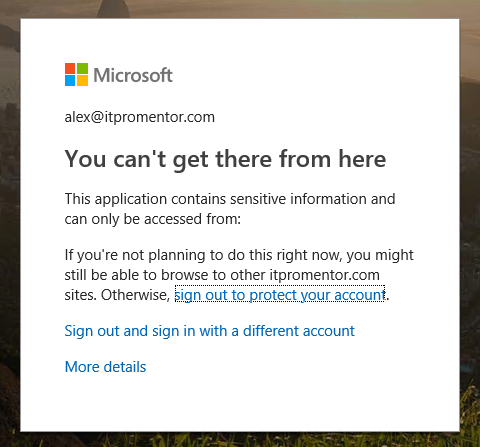
So it still says You can’t get there from here and This application contains sensitive information and can only be accessed from:
… Nothing. So in other words, my modification to the policy (Grant access but require no access controls) basically left me with zero possible access methods.
Why is this even possible, Microsoft?!
So note: If you do not specify at least one, you will receive no warning, and then it will be impossible to sign-in to anything–just a heads up on that. Because I had applied this policy to All Users, even my admin accounts fell under this policy. So why was I blocked from access without (apparently) any way to remedy the situation? I called Microsoft. Turns out, if you don’t make a selection here, then it is literally impossible to meet the conditions for granted access (because there are no access conditions). WOW.
So how do you fix this? Well, Microsoft support apparently has a backdoor, but you will need to provide them with some error information from a failed login attempt, as well as one administrator account that you would like removed from the policy, and the name of the policy that they need to edit from the back-end (NOTE: this also means they have a back-end way to access your Azure AD instance and the objects within it… which is… interesting?). Last note: be forewarned, it can take up to two business days for them to complete this task (for me it was about 28 hours later).
Lessons learned
I think there are a few important take-aways here:
Test first: I was just playing around in a demo tenant of my own, so I didn’t care about this that much. But in production, you should ALWAYS scope these polices to a security group, and keep only test accounts in that group until you are ready to deploy it to other users once you are POSITIVE the policy is working correctly.
Keep an admin account free of these policies: With the exception of their default policy for admins, you should probably keep an admin account free of other “protections” in Conditional Access, because they do add a layer of… complexity shall we say? If you have a conditional access policy that you planned to deploy org-wide, strongly consider this: do not apply it to the All Users group. Instead use a security group, with all user accounts added to it, but leave at least one admin account out of it. You’ll thank yourself if something like this ever happens, even accidentally, to this policy.
Be cautious and be warned: Conditional Access, like any additional security layer, can mean that you are adding “friction” to the user experience. It can be VERY frustrating to users if they attempt to go check their email, and find that they have to reboot their device once, twice or three times (or more), before it allows them access.
Specify conditions carefully: Oh yeah, and don’t forget that you can’t meet no conditions (facepalm).
ONE MORE NOTE: Up to 50 seats of Azure AD Premium is now available to non-profit customers for free via an EMS E3 donation (this works out to $1,500.00 USD annually–the Non-profit price for EMS E3 is $2.50 USD/user/month)
Comments (3)
Fabulous writeup, thank you so much. Your articles have saved my bacon before, and this has again.
As part of the testing procedure, any new policy should be put into ‘report only’ mode and tested for an adequate amount of time to see how your users will be impacted. Microsoft provides logging that will give you all the information you need to see who is impacted by a given conditional access policy.
Thanks for the comment! Note that this article was written way back before “Report only” ever existed. Note also that the Report only mode may still have some impacts for certain device platforms and conditions. But yeah, we are far past learning the hard way. Pilot groups are still recommended when rolling out new features or policies, even when report mode exists.