Scripting with ISE: Adding New LUNs, part 1
In this series, we are getting familiar with Windows PowerShell ISE. My hope is that thru working in this application, more IT professionals will come to view PowerShell as a truly accessible (and indispensable) tool. Remember that the point of technology should include making your job easier–to allow you to leverage capabilities that you would otherwise not have, freeing up valuable time and capacity in your day, so that you can focus on the things that matter most.
Learn a common task
Today we will consider a common task: adding new disks to a Windows Server. In our example, I have exposed four new & identical logical disks from a SAN. What does an admin normally do when they have added new disks into a server? Why they open Disk Management, of course!
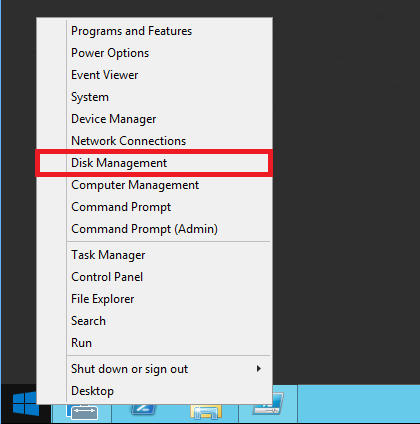
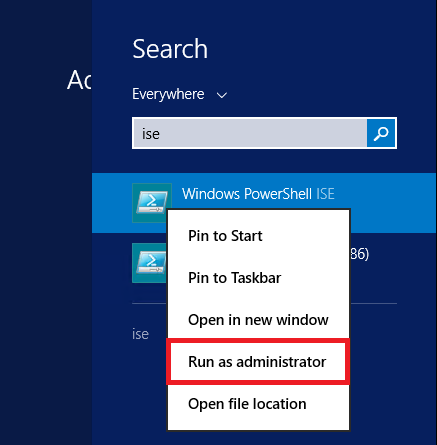
From there, it is common to “online” the disks, initialize them, and create new partitions. But, let’s avoid all that GUI business. Instead, I want us to open PowerShell ISE (and be sure to run it as Administrator).
Now just type the word “disk” into the search bar on the right to see what we can come up with.
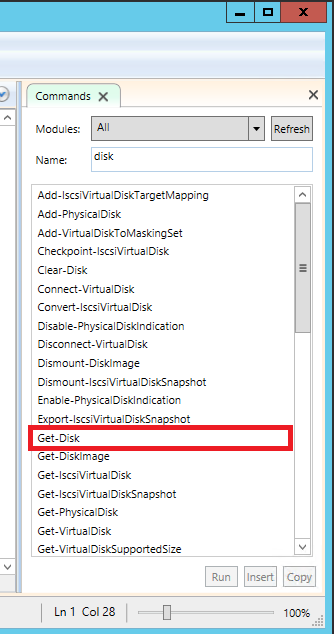
Wow, look at all those choices–where to start?! A general rule of thumb when you first start playing with the various PS cmdlets: don’t overthink it. Let’s start with something very simple. The universal cmdlet for “getting” basic information about any object that you plan to work with is: Get-ThatThing.
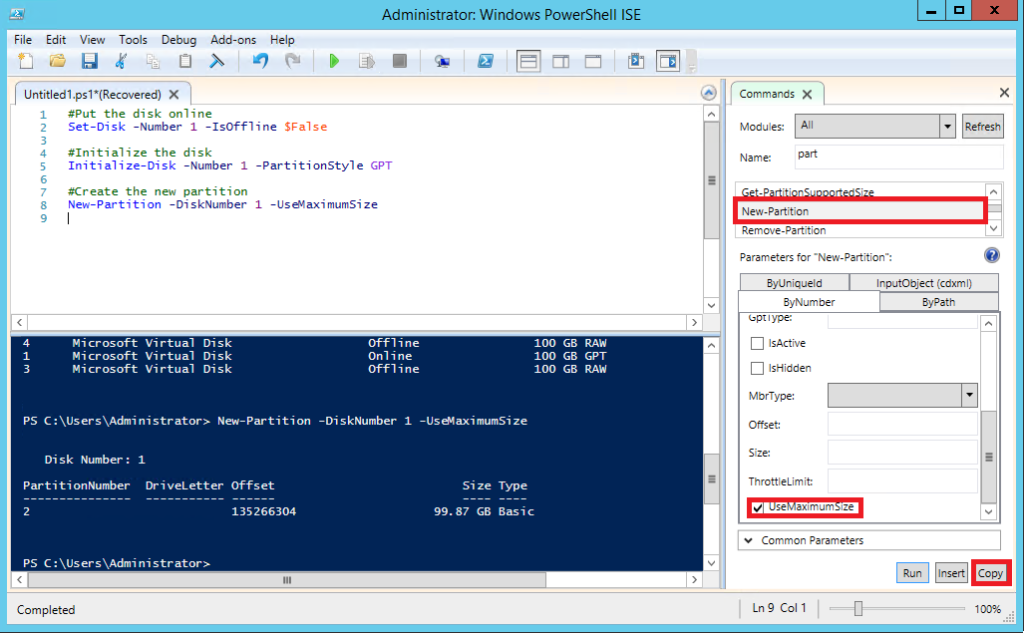
Choose Get-Disk and click Run.
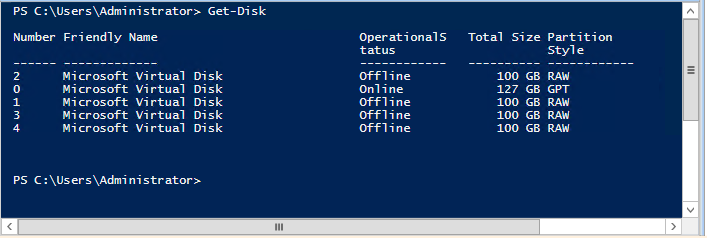
As we can see, a number of disks appear with various properties listed in a “table” format. One of these properties says “OperationalStatus”–my four new disks appear as “Offline.” The first goal would be to bring these “Online.” Go back to the right side menu, and find the “Set-Disk” command, click on Show Details for more clues.
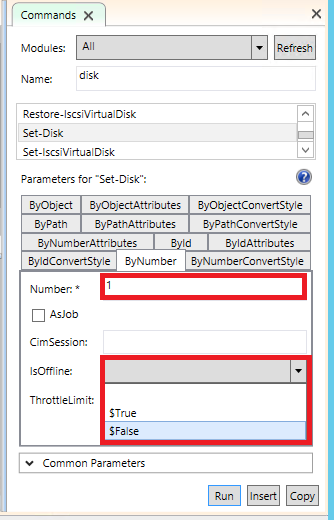
Quite easily, we can see a way to accomplish this task. We first notice several ways of “selecting” disks–or defining which ones we’d like to work with–we are looking at ByNumber here. All we have to do is specify which disk number, and set the property for IsOffline to $False.
In our example (recall the output of Get-Disk from above), let’s say we want to work with just disk #1 for now. Fill out this form on the right menu to that effect, then click Copy, and paste it into the scripting window.
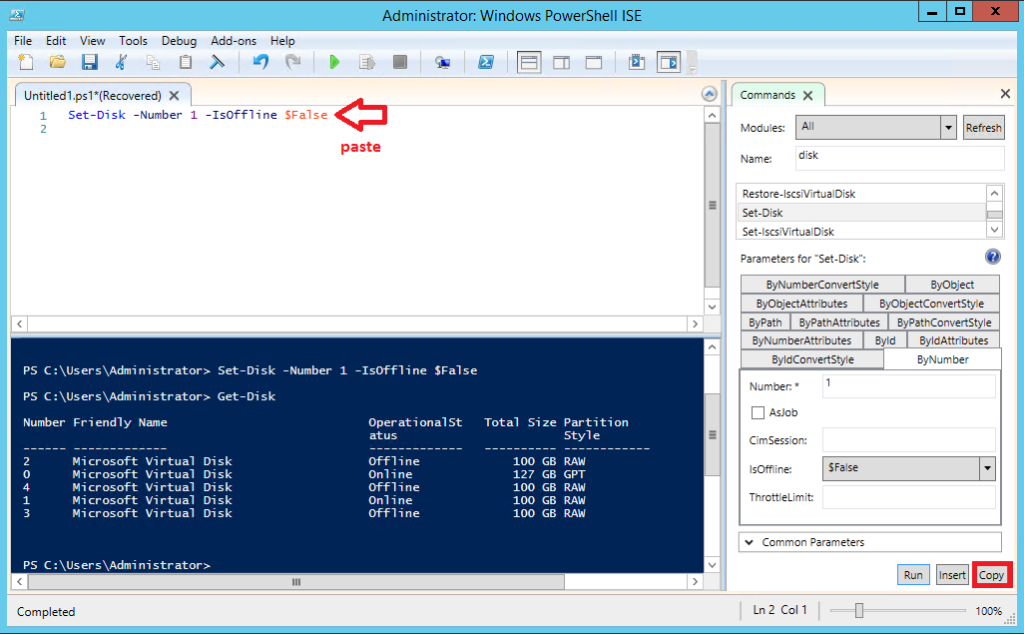
After we run this task, the new output of Get-Disk shows that Disk 1 has an OperationalStatus of Online–how about that?! Let’s continue on–we still need to initialize this disk and create a new partition. Start typing “init…” into the search on the right-hand Commands window.
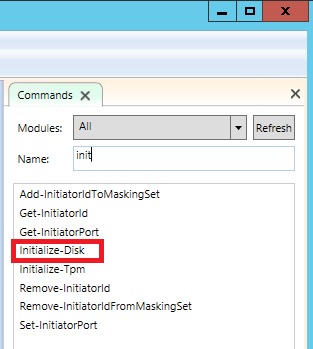
Huh, it’s got to be Initialize-Disk, right? Just fill out the form, same as we did before–you can click Run to execute the command immediately, or Copy & Paste it into the script and then run it from there. The new output of Get-Disk shows that our PartitionStyle has changed from RAW to GPT.
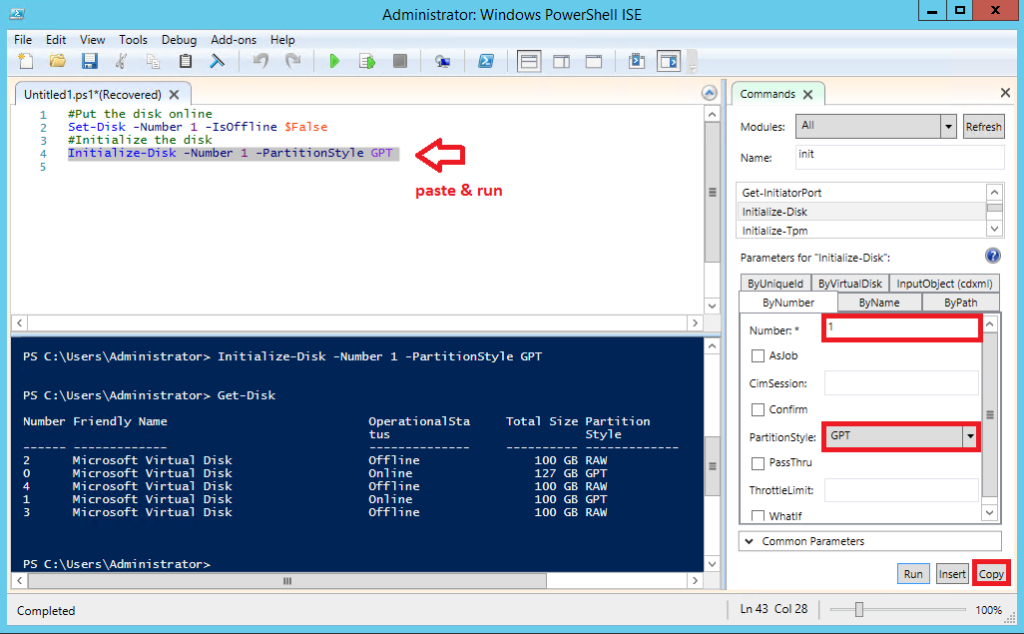
Notice that I also like to leave myself notes in the script; this is also helpful to others who happen across my handy work later on. Just use a hash in front of the line–that’s a signal that tells the shell to ignore the following (#For human reading only).
Next, let’s create a partition. Start again by typing “part” to find the right command: New-Partition. You certainly have the option to assign a drive letter here, but in my case I will skip that for now. I also see an option to just utilize the entire space available on the disk, way down at the bottom of the form–UseMaximumSize–I like that option–let’s use it!
Last, we have to actually take this new partition and format it. Search “format” and find “Format-Volume.” Ah-ha! Too bad we did not assign a drive letter–that would have been easy (we could just use ByDriveLetter and specify which drive to format).
That’s okay, there is more than one way to skin a cat. As I fill out the form for ByPartition, I hover over the “Partition” field and notice a curious message–this value can take input from a pipeline.
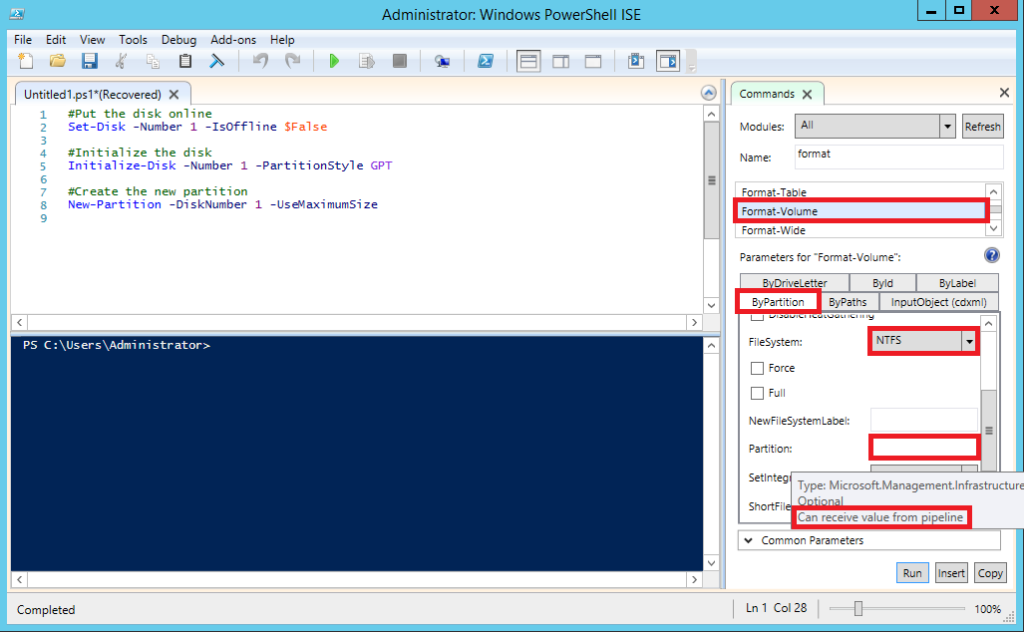
A pipeline is a very common technique that passes output from one command right into another, where it is used as input. If I just copy what I’ve got so far, formatting an unknown partition as NTFS, my script would look like this:
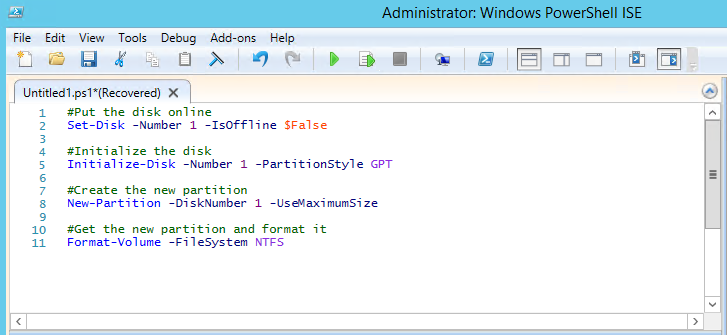
And it wouldn’t do anything. But, if I first “Get” the partition I want to work with, and “pipe” it into this command, we’ll have exactly what we need.
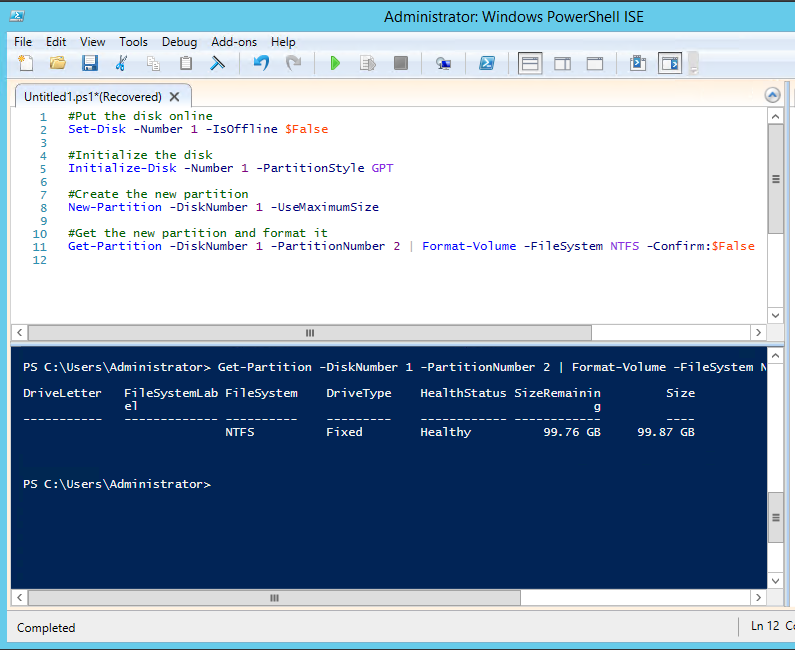
Use the Get-Partition command. We will need to specify our DiskNumber and PartitionNumber (see below). Once you have the partition you need, you can paste it in front of the “Format-Volume” command, and insert a “pipe” | between them, like this:
Get-Partition -DiskNumber 1 -PartitionNumber 2 | Format-Volume -FileSystem NTFS

You will notice that running this command, we are prompted with a confirmation dialogue. If you ever want to bypass a prompt like this, you can optionally add “-Confirm:$False” to the end of your line. Here is the finished product:
Generalize the Task
Now I could save this snippet for later, pulling it out whenever I have to add a new disk in the future. Or better yet, I can work to create a generalized script, so that I could quickly repeat this task, regardless of what disks have been added, to what server, and when.
What if it has been a while since I worked with a server, and I want to add a bunch of new disks without thinking about it too much? We cannot rely on explicit disk and partition numbers, because we might be starting with disk number 1 or 3 or 10 or 50! So we need to have a way to make this script re-usable regardless of disk numbers and other such specifics.
In the next post, we will re-hash this script, and attempt to write a “generalized” form of it, that could in priniciple be used on any new set of disks.
Leave a Reply