No more excuses: 5 Tips & tricks to make Office 365 MFA easier on people
As I’m sure you are aware by now, Multi-factor Authentication reduces your risk of identity compromise by 99.9%. Requiring so called “strong passwords,” by contrast, doesn’t make that much difference at the end of the day. And yet, we’re still beneath 10% of even just admin accounts in Azure AD protected by MFA.
The main reasons are of course fear of change, and an unwillingness to go through the discomfort of making said change. Additional security often implies a bit more inconvenience and little more pain. Also there is a certain amount of distrust; after all, the MFA service can go down. Outages could, you know, theoretically happen.
But, as an admin, you can do a lot these days to make the MFA experience much easier for end users, and indeed, to mitigate the risks of outages at the same time. During the recent outage, which did impact some of my tenants, I hardly even noticed.
So, let’s cover five tips and tricks to leverage when rolling out MFA, so that you can boost your security while also making life easier on your people. You should be able to help them get over those initial hurdles and make the “on-ramp” a bit less daunting. Starting with the free stuff and moving up from there into paid options, here we go!
1. Update: Security defaults
Every subscription includes Security defaults. Azure AD > Properties > Manage Security defaults.

The policy does all of the following:
- Gives your end users a 14-day window to register for Multi-Factor
- Once activated and registered, standard users will only be bothered for MFA if the sign-in is determined to be risky
- Administrators will be challenged for every login attempt
- Users with leaked credentials (found on dark web) will be blocked and required to change passwords.
- Blocks basic authentication
This is pretty dang good all by itself. Especially that 14-day on-ramp–customers love that option. If it is not a convenient time, they can simply bypass the registration until they are ready to complete the process. But, they only get those two weeks. Eventually, they have to do it!

Now there is one big drawback: no exceptions are possible here. It is all or nothing, so when this gets turned on, it is turned on globally for all accounts. That means even guest accounts, service accounts, emergency access accounts, etc. are impacted.
Granted, after registration is complete, an actual MFA challenge should only ever be triggered when there is a problem detected with the sign-in, but still… there is something to be said for exceptions. If you require exceptions you should be looking toward Conditional access, or doing it the old fashioned way by enabling for each account individually.
2. Combined registration for MFA and SSPR
Combined registration is a more “modern” MFA registration experience that I think is much more user-friendly than the classic MFA registration portal (which looks like it was written more than a decade ago). The term “Combined registration” refers to the fact that when you complete the steps to register for MFA, you will also be set up for self-service password reset (SSPR) at the same time. These used to be two separate registrations.
To enable the more modern experience, navigate to Azure AD > Users > User settings and find Manage user preview settings.
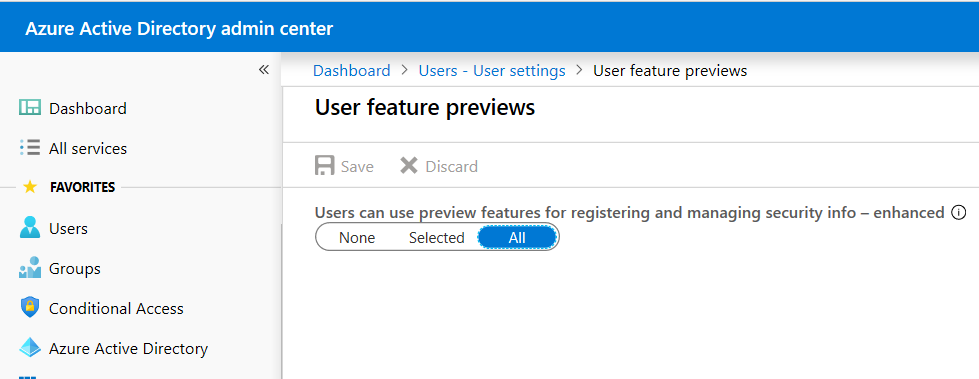
Set this to All or a Selected group of users that you want to pilot the experience. Nobody will be directed to the registration portal unless they are enabled for MFA or compelled to complete an MFA challenge using a Conditional access policy. So turning it on for everyone is pretty low risk.
However, if you haven’t done any registrations for either MFA or SSPR yet, you should also navigate over to the Password reset settings under Users, and modify a couple other values. First under Properties, enable self-service reset for All or Selected users.
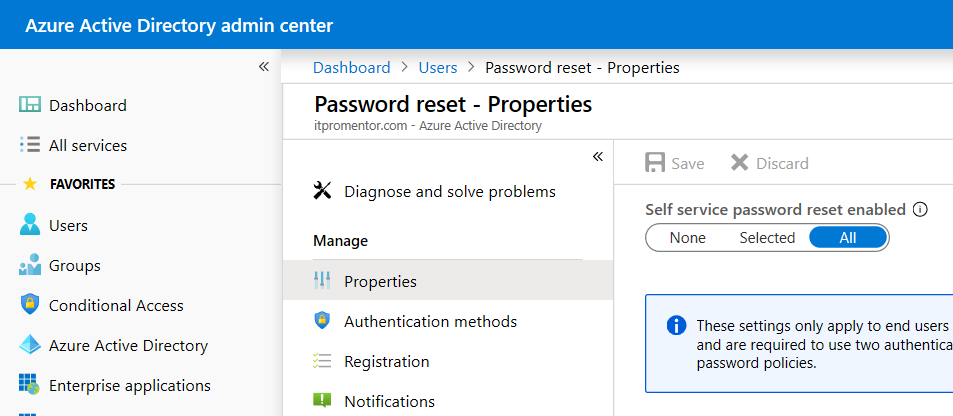
Then, under Registration, set Require users to register when signing in to No (you can roll out registration more carefully with a targeted Conditional access policy).

Aside: I also find that leaving this set to Yes can cause double-prompts, where it loops through the registration process an extra time.
Rolling out the MFA registration experience is a lot easier when you communicate, in advance, with documentation (read: screenshots).

I make templates for this and other stuff available on GumRoad; you can download the Word docs and apply your own branding elements. If they ever change this experience and you find I haven’t updated it, bother me and I’ll get on it.
3. Remembered devices
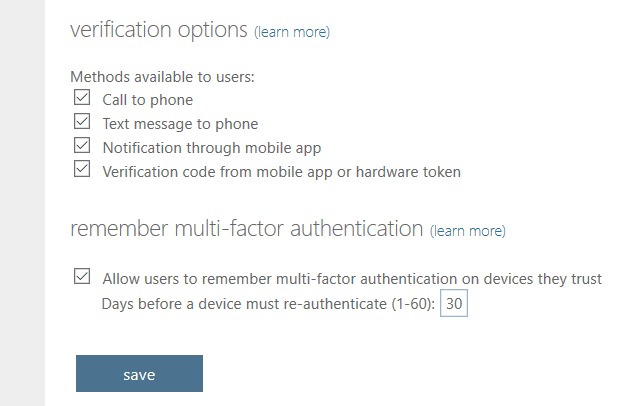
This feature is also available with any Office 365 subscription. Microsoft will allow you to “remember” devices that have already passed an MFA challenge. Navigate to Users > Multi-Factor Authentication and pick service settings. At the bottom you can find remember multi-factor authentication (configurable up to 60 days).
In my best practices checklist, I actually recommend the opposite of this (disable remembered devices)–but that checklist is intended for Microsoft 365 subscriptions, which include Conditional access. In those subscriptions, we can use a custom policy to exclude managed devices. This is considered much stronger than remembered devices.
But for regular old Office 365 without those bells and whistles, this setting could mean the difference between adoption or rejection of MFA. So I say, it’s best if you allow users the option of remembering devices (if it gets them registered and using it).
4. Conditional access based on location and/or device state
As I just mentioned, with a subscription that includes Conditional access such as Enterprise Mobility + Security plans, or any Microsoft 365 plan (not just Office 365), we have even more options to ease the pain while still enforcing a decent level of security.
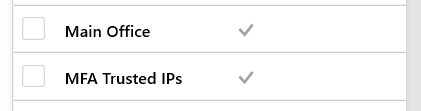
Start by defining your trusted locations first, from Azure AD > Security > Conditional access > Named locations.

You can also follow the link on this page to configure MFA trusted IPs, which brings you back to the MFA service settings area (IPs specified here will be bypassed for MFA prompts). The list corresponds to a named location called MFA trusted IPs that you can select when you create custom CA policies.
Now with that step done, you can also control the MFA on-boarding process, by requiring a trusted location from which users can complete security info registration. Follow the steps in that article, and you’ll be set.
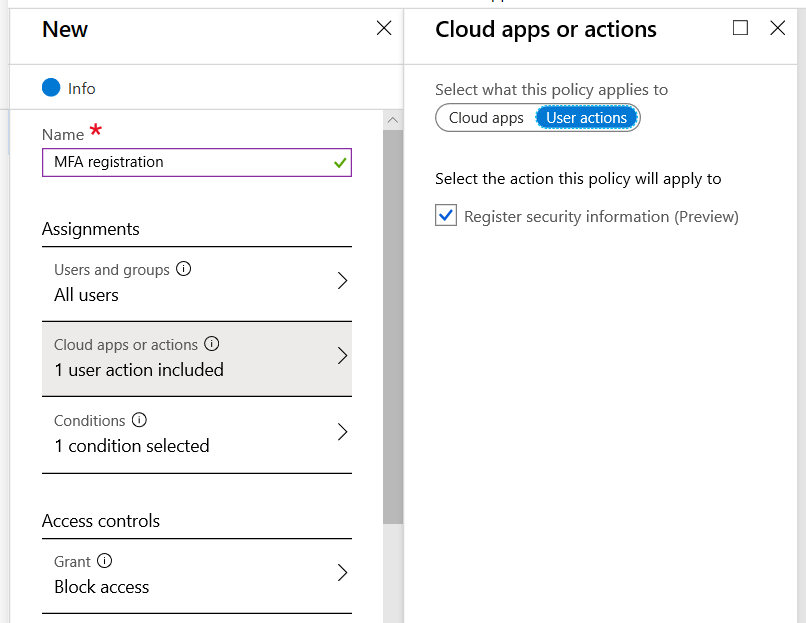
This means that users will not be prompted to register unless they are at one of the trusted locations, such as corporate HQ. If you want to have people present on location so that HR, peers or IT support can help them, then this is a great option. It is also considered safer, because an attacker who has a valid credential cannot complete their own security info registration from just anywhere.
Custom Conditional access policy with device and location-based exclusions
It is also possible to require MFA only in certain circumstances. For example, exclude managed devices and/or trusted corporate locations.
Navigate back to Conditional access > Policies.
Create a new policy called Require MFA in untrusted contexts or similar.
- Target All users, and exclude your emergency access accounts.
- Target All cloud apps.
- Under Conditions:
- Location > Any location, exclude All trusted locations
- Device state > All device state, exclude Device Hybrid Azure AD Joined and Device marked as compliant.
- Access controls: Grant > Require multi-factor authentication.

Save the policy. Enable it when you’re ready, after you have completed registration for all users, for instance.
Note: This policy also provides organizations a “carrot” to get all the devices on-boarded into Intune for Device management, which is another huge security win! (People won’t be bothered for MFA on managed devices).
Also note: When you enforce MFA using a Conditional access policy, you DO NOT have to go enable it on every individual user account. This means less administration effort as well, since you won’t have to make enabling MFA part of the user provisioning checklist.
5. Identity protection
Identity protection is a set of features only included with Azure AD Premium P2 subscriptions (available in EM+S E5 and M365 E5).
However, note that you can obtain a trial of the EM+S E5 license for 90 days. I use this all the time to deliver that 14-day on-boarding experience (also granted by the End user protection baseline which we discussed), but with the ability to exclude specific accounts, which the baseline is missing.
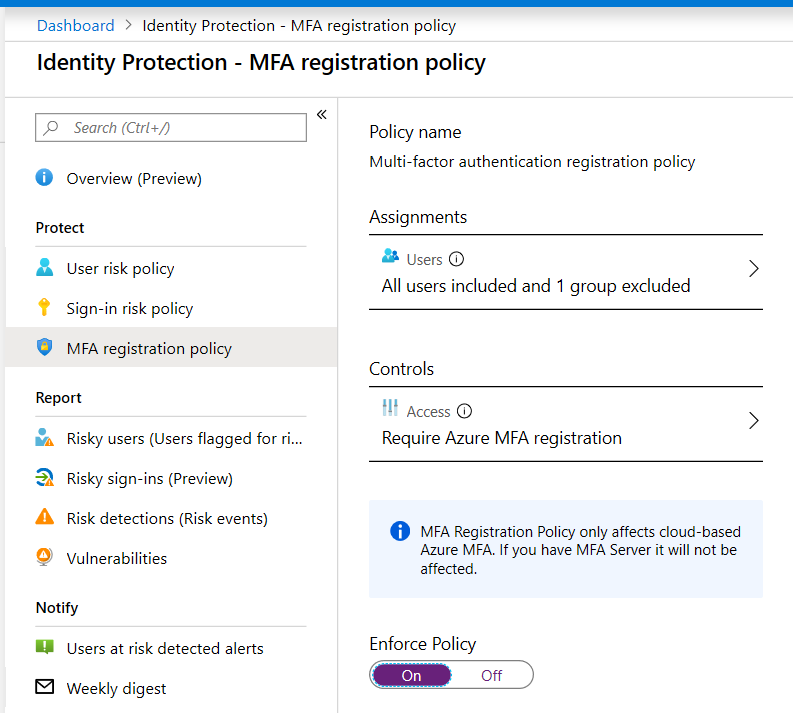
Besides the MFA registration policy, those accounts with a permanent E5 / P2 subscription can also enable a Sign-in risk policy that requires MFA based on sign-in risk rather than other attributes or conditions. If you decide to use this policy I would recommend selecting a sign-in risk at minimum Medium and above.

This again is like the free End user protection policy, but with the important ability to make certain necessary exceptions.
Conclusion: Go do it now
So there you have it, no more excuses. The 14 day on-ramp, a modern registration experience with advance communication, remembered devices, location and device-based Conditional access, and Identity Protection (even if just a trial)!
With proper planning and a careful selection of options, you can roll out MFA without too much friction, and severely reduce your surface area of attack in the process.
Go get ‘er done.

Comments (11)
Great article as usual! I’ll try and find out what’s happening with CA exceptions
Very useful article once again.
We already have MFA via Conditional Access for all admins, and are imminently about to go MFA across the board, but there is one thing that we are contemplating. We are debating whether its even worth bothering some of our users with setting up the Security info methods (text/email/authenticator app) as they will be using trusted devices and as these are excluded from our MFA policies, should never be asked to use MFA. Is this reasonable do you think, or should we still be asking them to fill in this info just incase? Asking users to input their personal email/mobile details could be a tricky subject as many do not have company phones.
Thanks
I think it is valuable to have the MFA registration in place. Especially with the modern/combined registration experience it gives them the ability to use that second factor to reset passwords. If they buy and enroll a new device they will be required to complete an MFA prompt when they first go to enroll it. Once enrolled they shouldn’t be prompted if you have that exception in your CA policy.
Hi Alex,
Your templates for configuring the authenticator app seem to be out of date, or at least different to what my users see when going through the process. Would it be possible to take a look and update?
They are up to date if you have enabled the modern experience (unified registration)–you have to turn that on or you get the classic experience, which is described here, by Microsfot.
If you have named locations excluded from MFA prompt, how will that work with enabling sign in risk policy? Could a sign in from corporate office be considered high risk? If they have to put in MFA on unjoined devices out of the office, won’t they still have to do that if identity protection sign in policy is enabled?
There are a number of things that can trigger higher risk for sign-in and also for user accounts (these are separate). I would not recommend excluding locations for your risk-based policies. The point is to get everyone registered for MFA, regardless of what your policies will be. If you have E5, then you would probably just implement the risk-based approach, but if not then you can set static policies. I no longer recommend location exclusions at all. Instead I focus on good SSO implementation and users are hardly ever prompted. For example I am literally never prompted on my Azure AD Joined machine that is set up for Windows Hello. The Hello counts as MFA, and I do not have to meet another MFA requirement past that on this device. On other devices I am not prompted often, even though I have defined no exclusions (the refresh token will refresh with MFA already satisfied). On other devices it only prompts if I am switching networks or something. New sign-ins would always be prompted.
Does anyone know how you actually get a trial licence of EMS E5 per user, to use the MFA onboarding features/policy? I can’t see any way of getting that. Unless it’s because I’m on a nonprofit tenant, some things are different with purchasing. Or if things have changed since the article.
It could certainly look a little different now, or be different because of non profit, yes. You might be able to use the “try now” links from one of their pages like this:
https://www.microsoft.com/en-us/microsoft-365/enterprise-mobility-security/compare-plans-and-pricing
Is there a way to require registration of MFA with conditional access while still excluding our main office for MFA since it is a trusted location? It looks like you need P2 licenses to accomplish this with enforcing MFA registration policy. Basically what is asked here: https://www.reddit.com/r/sysadmin/comments/pfxlu1/enable_mfa_for_all_users_in_365_with_trusted/
At our main office, we sometimes have new hires that never leave the corporate office so although we enforce MFA for all users, they are always in a trusted location. When we did an audit of our MFA rollout, we realized we had quite a few users who had never completed the registration. We already have Business Premium licenses for everyone, but don’t want to pay extra for P2 for everyone to accomplish this. Anything we’re missing?
Well, I stopped making location exceptions for MFA after I saw a couple demonstrations at a security conference that scared the crap out of me. But, yes what you’re describing is technically a P2 thing. However, what I do for on-boarding new customers who have to register several dozen or hundreds of people is this: I get the trial of P2, and as long as that trial license is assigned to at least one account, then I can activate the registration policy for all users. They get on-boarded within 14 days (it allows you to “skip” registration one day at a time up to 14 days). Then after that I just switch MFA on for everyone, enforced no matter where they are in the world. You can make minor exceptions for items like emergency access accounts and service accounts, etc. This has been a really successful strategy so far, and you aren’t really prompted that often anyway especially on AAD joined devices with a PRT. Additionally, know that even with P1 licenses, you can also implement a policy that allows you to secure the registration experience from trusted locations, and now we can even use a temporary access pass (TAP) from other locations: https://docs.microsoft.com/en-us/azure/active-directory/conditional-access/howto-conditional-access-policy-registration