Tutorial: How to setup and configure Microsoft Azure Backup Server, part 2: configuring
In the previous post, we discussed Microsoft Azure Backup Server, and covered the basic setup/installation process for this software. In today’s article, we will cover configuration of the software.
Pre-requisites
We have covered almost everything in the previous article, but to review, and to begin moving forward with configuration:
- Obviously, you need an Azure subscription
- Provision an Azure Recovery Services Vault (previous article)
- Download the MABS software & credentials for the vault (previous article)
- You should open the requisite Windows Firewall rules on any server where you intend to install the DPM agent (alternatively, you can also install the agent manually and attach it)
Step 1. Add Storage to Microsoft Azure Backup Server
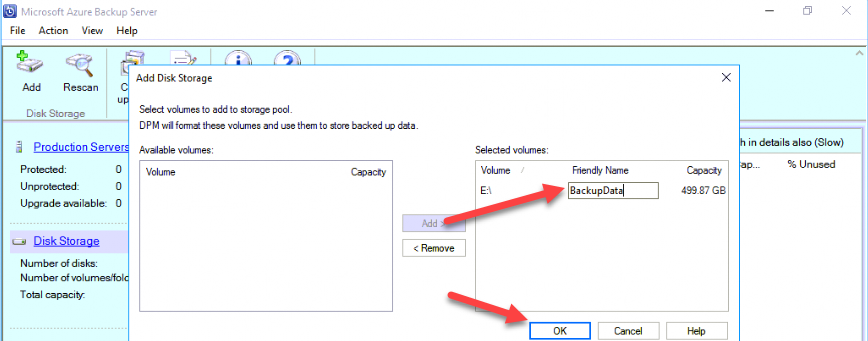
Launch the Microsoft Azure Backup Server software, and go to Management > Disk Storage and click Add.

Slide the available disk(s) over, and name them. Click OK.
Step 2. Add servers to protect
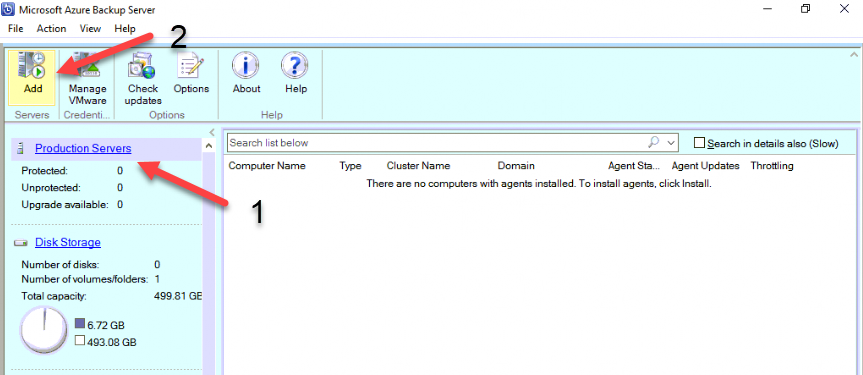
Click on Production Servers and then Add.
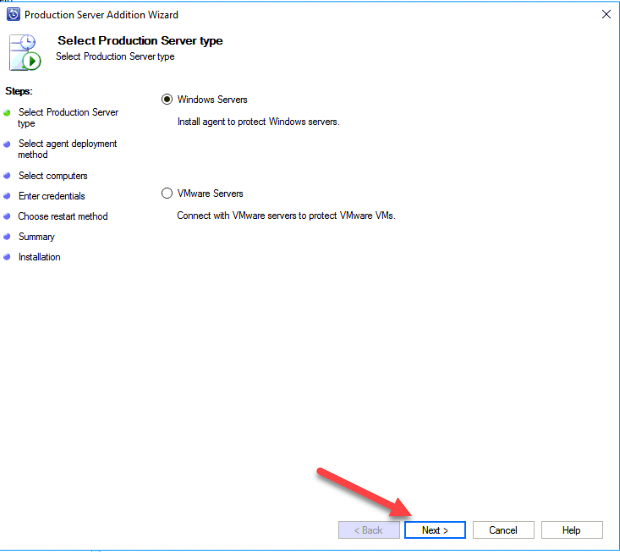
Notice that we can protect VMware servers also. I am keeping Windows Servers as my selection. Click Next.
Depending on how your network is configured, you can either push an agent from this console, or install them yourself and attach them. Most of us will pick the first option for Install agents. Click Next.

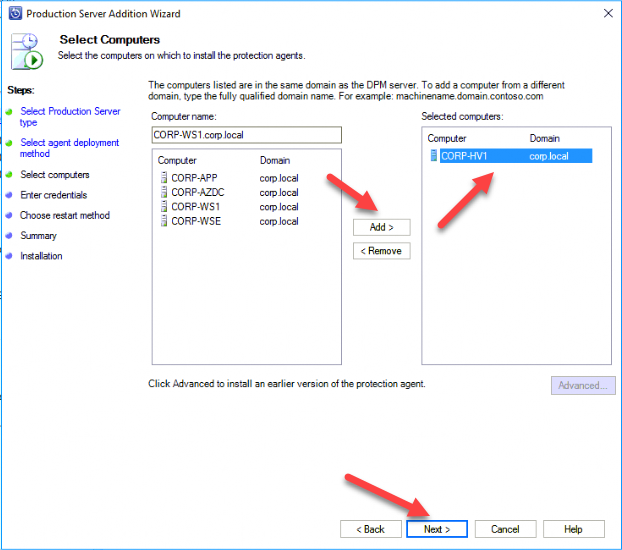
Now on the next screen, find the computer(s) you want to protect from the box on the left, and Add them to the box on the right. In my case, I’m just picking my Hyper-V host server. Next.
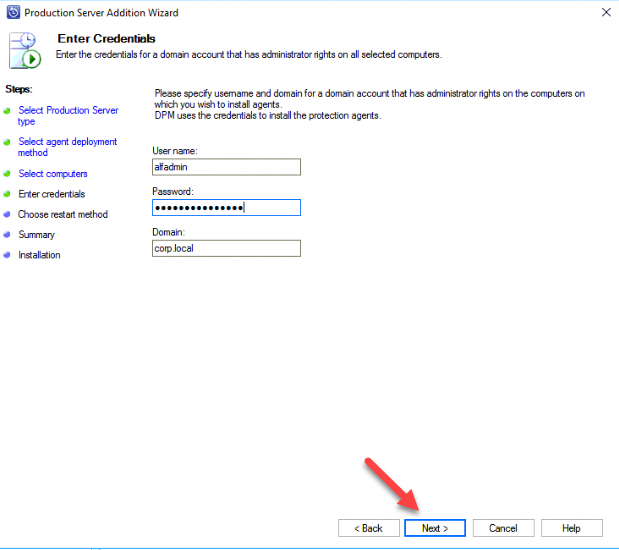
Provide credentials for the install. Next.
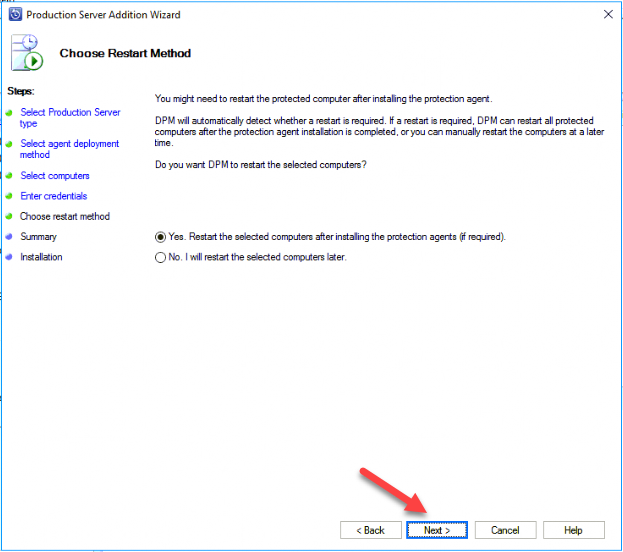
Finally, choose the restart option and proceed to install. Next.
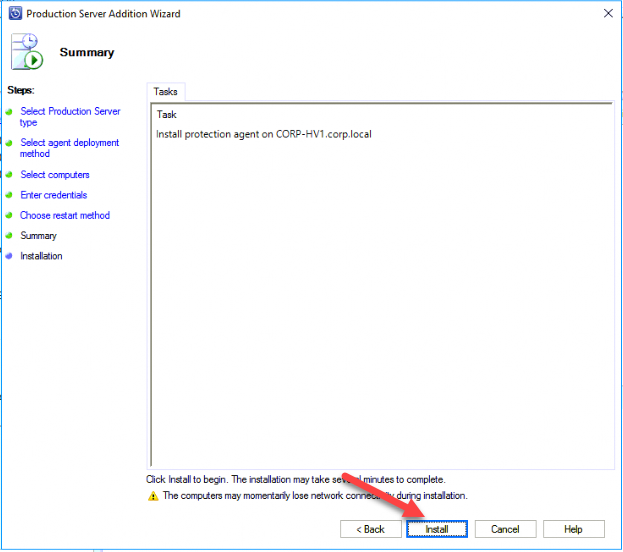
Install.
Close the wizard when it is complete.
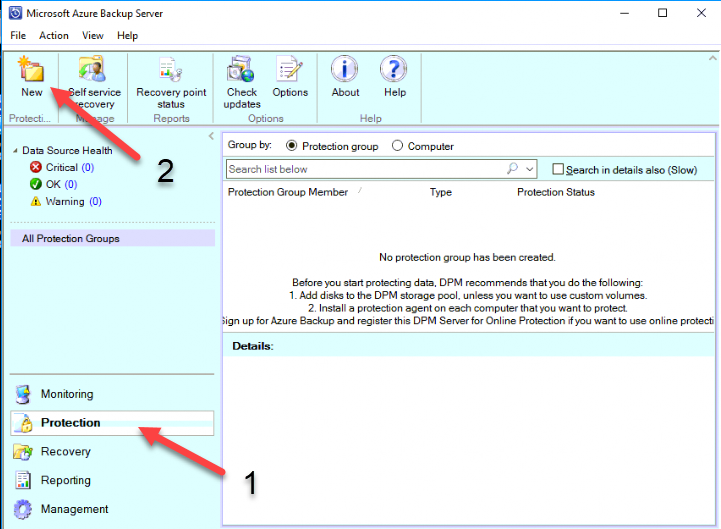
Step 3. Configure protection
Now head over to Protection and pick New from the top menu.
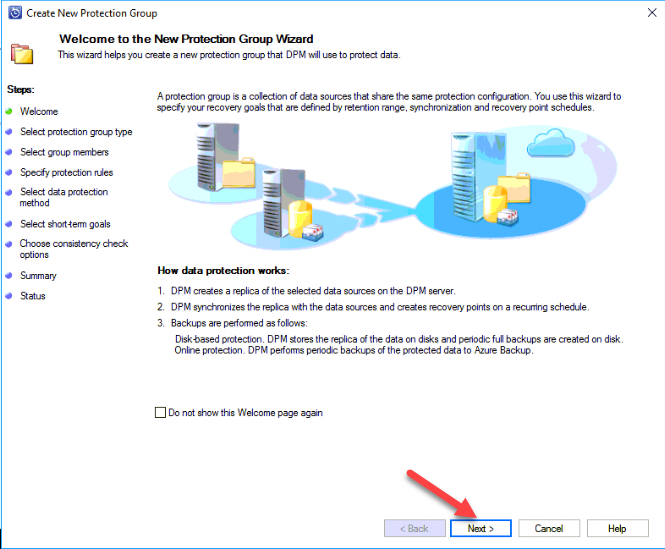
Optional screen describing how protection works. Click Next to begin the Wizard.
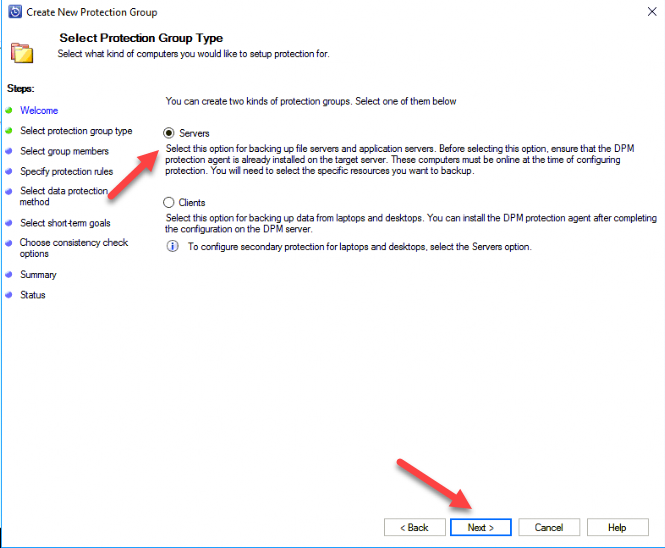
In our example of backing up virtual machines on our Hyper-V host server, we’re just configuring server backups. Click Next.
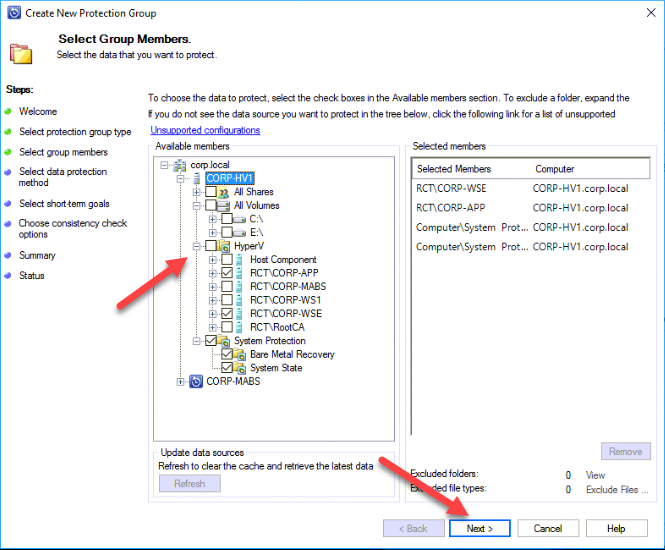
Expand the resources you would like to back up, and make your selections. I am going to backup my App server and my Windows Server Essentials server, as well as enable the Hyper-V host’s system protection. Next.
Fill out a name for your protection group. You can choose disk, cloud or both for protection method (both is recommended).
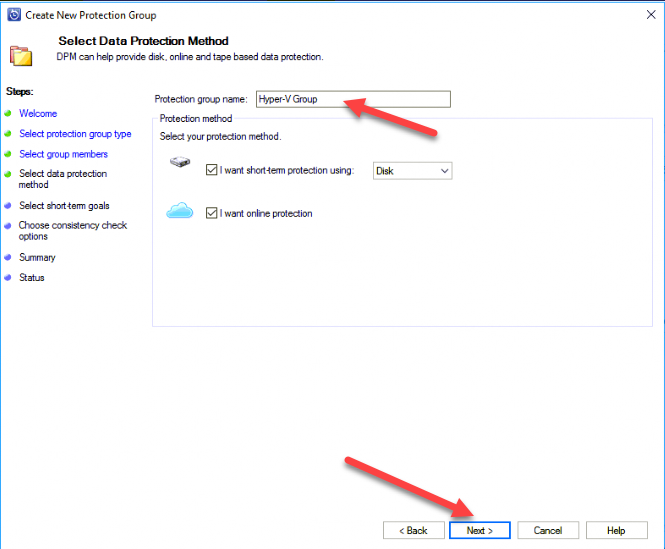
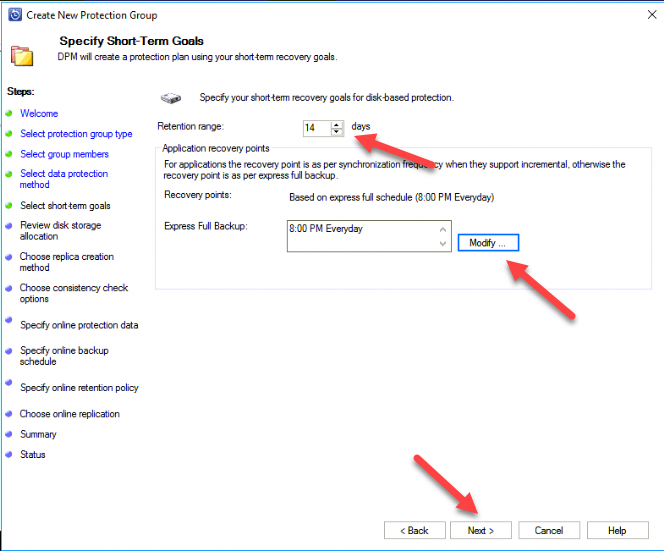
The default retention range (local/disk-based backup) is 5 days, but some prefer to increase this a bit more, to 10 or 14 days. In a Hyper-V or VMware scenario, you don’t want to go too crazy here, because it will be creating checkpoints/snapshots that remain available on the Hyper-V server, for every retention point you keep. This is something to be aware of as you plan for storage requirements. At 5-7 days (recommended) you can budget for about 1.5x of production data. You might need to increase that to 2x or so if you’re doubling your retention points, but that all depends on how much your data is changing day-to-day, also.
You can also Modify the default schedule. It is possible to setup additional express full backups here also (e.g. if you needed to meet an RPO of 4 hours), but know that when we get to the offsite part, you can only transfer images 2x times per day to the cloud, so you will be more limited for your offsite recovery point objective. Next after you make your selections.
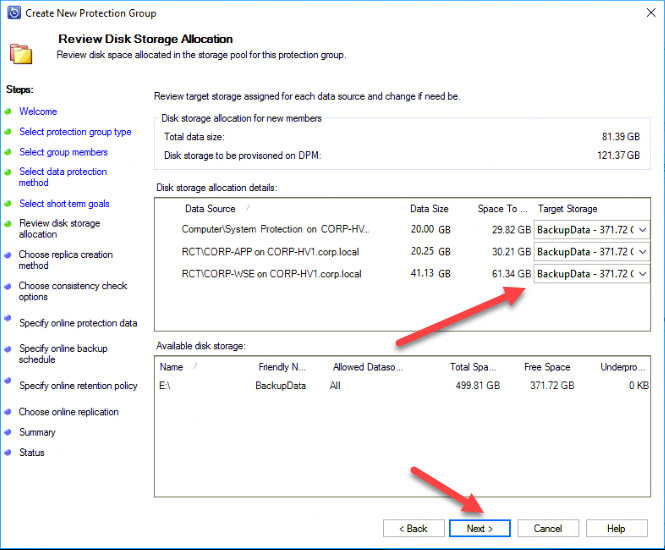
If you had multiple backup storage locations, you could customize them here, otherwise, click Next.
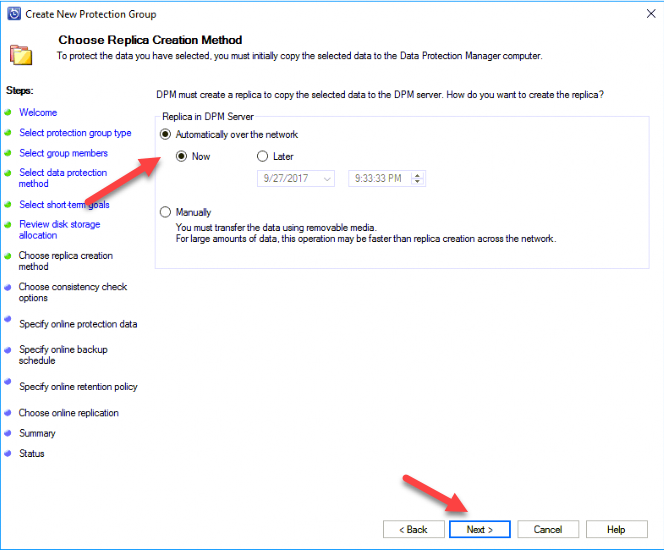
Most of us will probably do a backup over the network, rather than manually. Next.
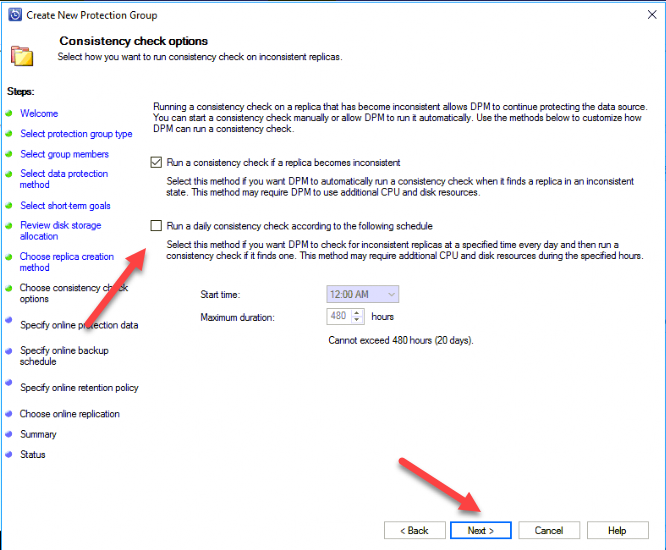
It is optional to enable daily checks, the first option is picked by default. Next.
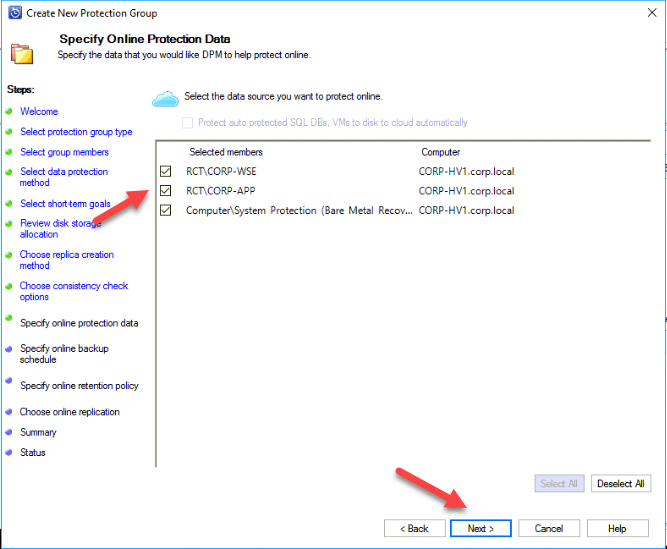
Specify what should be protected online / in cloud. I selected all of the items I previously protected for disk backup, to also be replicated to the cloud. Next.
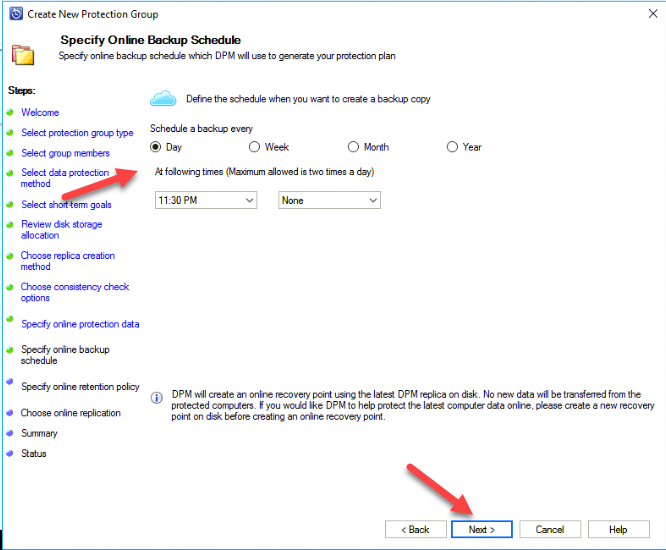
Pick a replication schedule for disk backups to be copied to the cloud. I usually pick daily, but the maximum is twice per day. Be mindful of your local backup time and your cloud backup time. It is possible that your cloud-based images could end up a day “behind” for example, if the on-premise backup does not complete before the next cloud upload happens. Next.
Choose your retention options for cloud storage. They can be much greater than on-premises. Next.

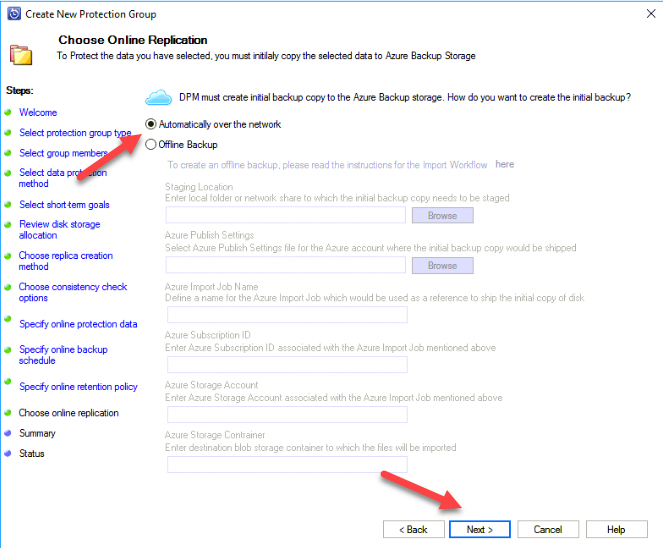
Again, I suggest automatically over the network, but there is a procedure to do an offline backup, also. I cannot comment on this experience. Next.
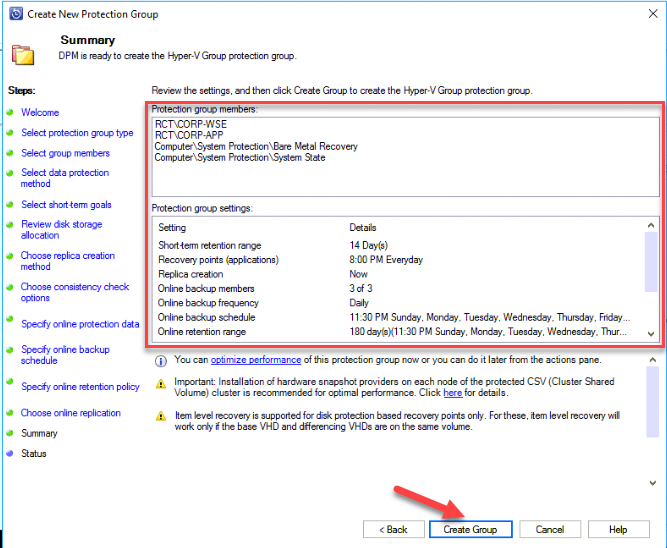
Review your selections one last time, and Create Group.
Close the wizard when it is completed.
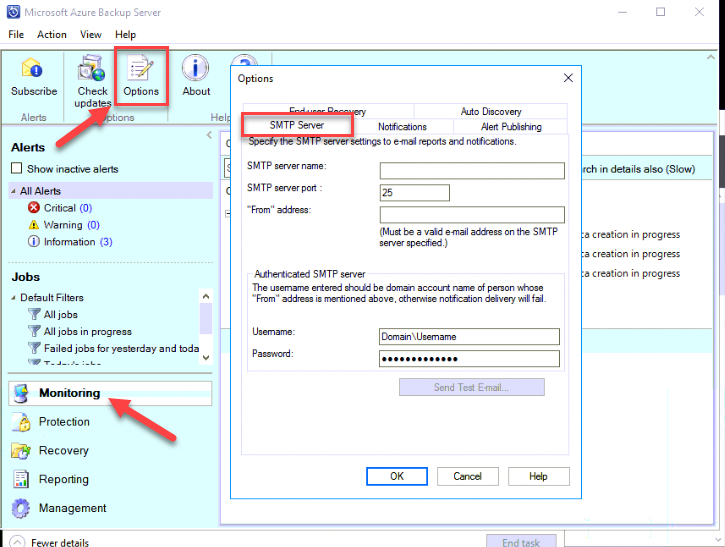
Step 4. Configure notifications
You will probably want to enable email notifications also. Go to Monitoring then Options from the top menu. Fill out your SMTP server settings.
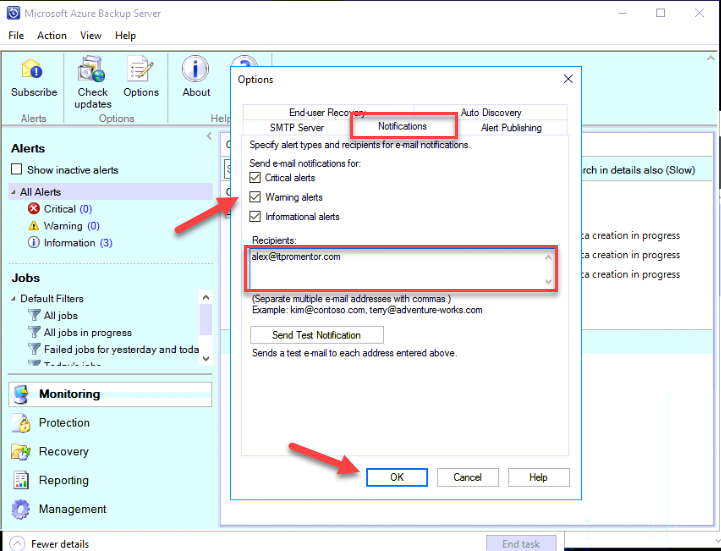
Switch to the Notifications tab, and select the alert levels for which you would like to see notification. Click OK.
The basic setup and configuration is now complete.
Summary
Azure Backup Server is a cost-effective way to enable protection on your small business infrastructure. I especially find it useful for backing up Hyper-V and VMware virtual machines, allowing local/quick restores from disk, as well as offsite storage in Azure with longer retention options.
What does the solution cost? Check out the Azure pricing page for the most up to date figures. In real numbers, let’s say you have 5 VM’s as a small business, totaling about 1 TB after compression, etc. (the data actually sent to Azure). Some instances maybe larger, some smaller. Averaging 10/instance base price + $0.024/GB for LRS storage (locally redundant), this would equate to:
(5 x 10 = $50) + (1,000 x 0.024 = $24) = $74
The cost will climb slightly as data is added. usually a few GB/month. Keep in mind that after the first TB in storage, prices drop slightly, so this is unlikely to grow out of control. Mileage may vary, be sure to run your own numbers.
Other backup products still have their place, and their perks. And for some, their extra features will be a must-have. But it is nice to have some more affordable options, too!
Comment (1)
Nice work!