Password write-back is now supported on Microsoft 365 Business Premium! (And how to setup SSPR for hybrid accounts)
Well, well. Isn’t this a pleasant surprise? Microsoft recently granted another one of my wishes, which I have previously blogged about, here. (1)
Self-service password reset (SSPR) is now supported for hybrid synced accounts on the Microsoft 365 Business Premium subscription. The welcome announcement made on Microsoft’s tech community blog did not do a great job covering all of the necessary steps for implementation, so I took it upon myself to rectify that situation here on my own site :)
Step 1: Configure SSPR in Azure AD
To find the settings that control Self-service password reset (and this pertains to cloud accounts also–so you might already have this in place), head over to the Azure AD portal and find the blade for Password reset.
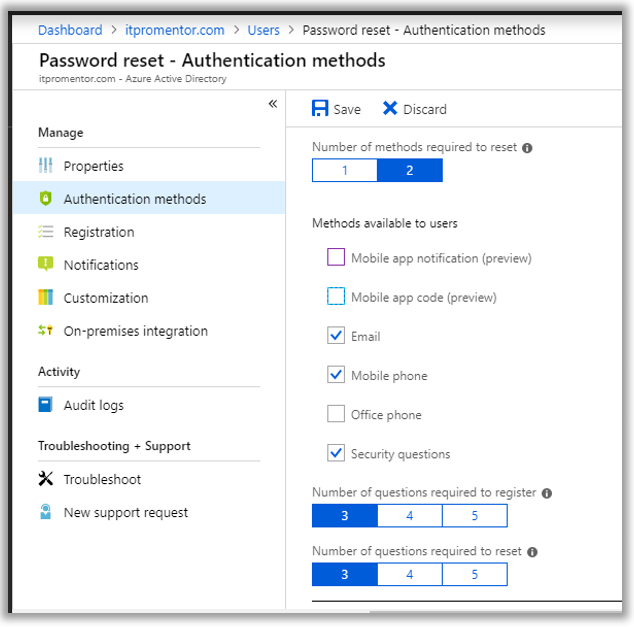
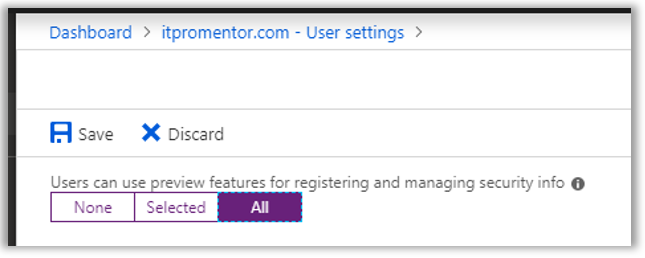
Then, Properties is where you enable or disable the ability for users to self-service reset. Most small businesses will want this set to All so that every user can self-service reset. However, it is also possible to filter this using a Security group.

You also need to configure Authentication methods. It is recommended that you select at least two methods for enhanced security, e.g. Mobile phone or app code, plus security questions.
You can handle registration in a number of ways.
You can force registration for SSPR on the next logon, from the Registration blade. This is probably the easiest method.
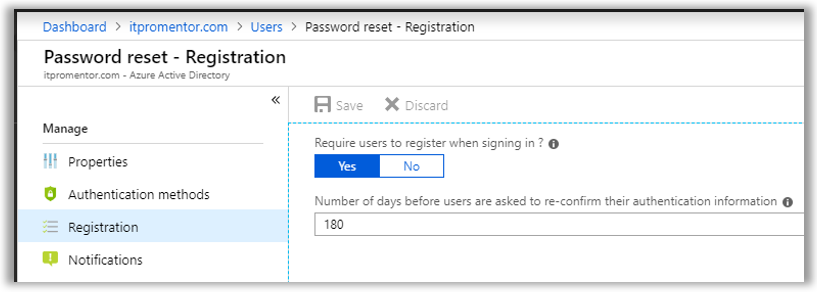
Otherwise, you can send users a link to the registration portal (https://aka.ms/ssprsetup) where they would register at their own leisure (and that means never to most people).
Last, it is possible to pre-populate security info so that users do not have to input it themselves. See here for more details.
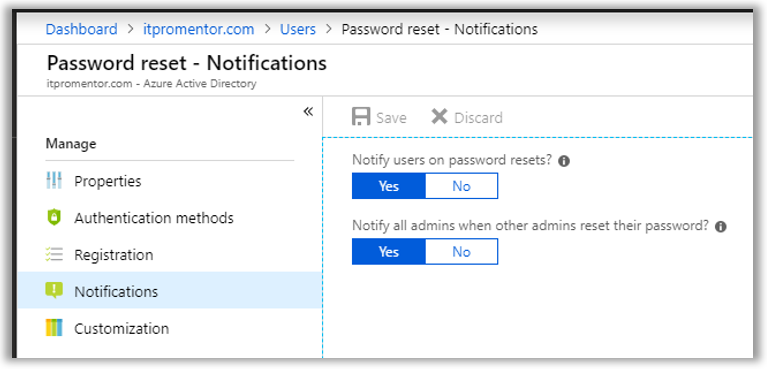
Next take a look at the Notifications blade. I recommend you turn both settings on, so that users and admins are notified when password changes happen in their accounts (and other admins get notified when any admin updates theirs). If the person in question did not initiate the change, then we know that we have a problem with that account.
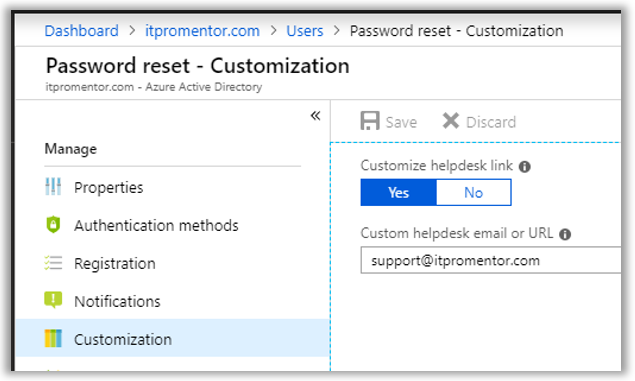
Finally check out the Customization blade. Here you can insert your own custom helpdesk link so that in the event a user runs into an issue, a Contact your administrator link will lead them to your official support email address or web link.
Optional: Configure unified registration
Historically there have been two different registration experiences for Multifactor Authentication (MFA) and Self-Service Password Reset (SSPR). Now you can have users register against both services at once. This feature is still in preview at this time, and is completely optional.
From Azure AD admin center scroll down to find User settings > Access panel > Manage settings for access panel preview features.
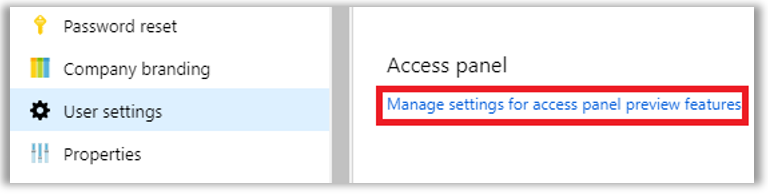
You can enable for All or a Selected group of users.
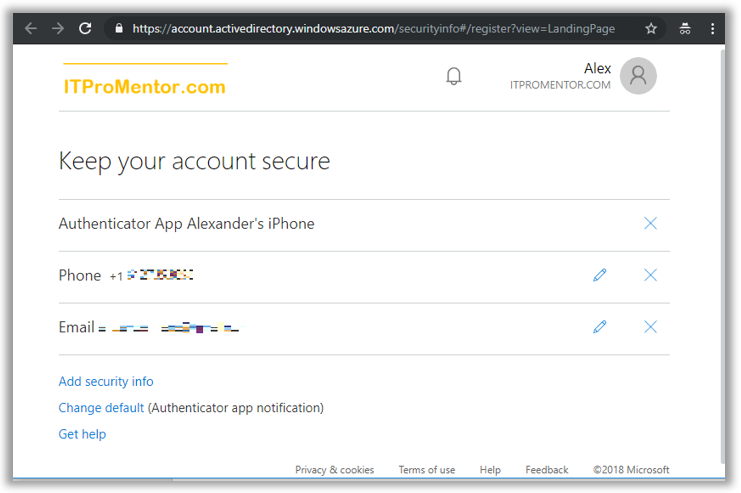
If you enable this feature, and a user has previously setup MFA and SSPR separately, they do not need to register again. However, if they are required to update information for either, they may be prompted to update on next login.
Alternatively, you can send users a link to self-register using the new method at this link: https://aka.ms/setupsecurityinfo
Moving on.
Step 2: Enable password write-back
At this point, “cloud-only” accounts are 100% configured. But you want to have hybrid synced accounts capable of SSPR as well, right? Then keep pushing forward.
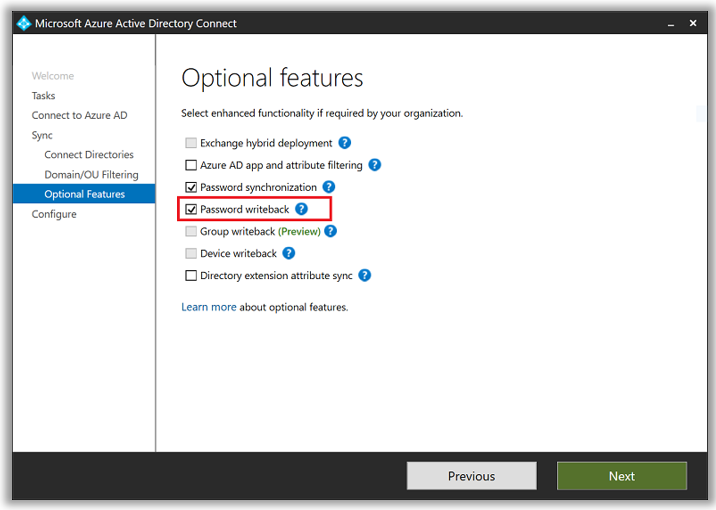
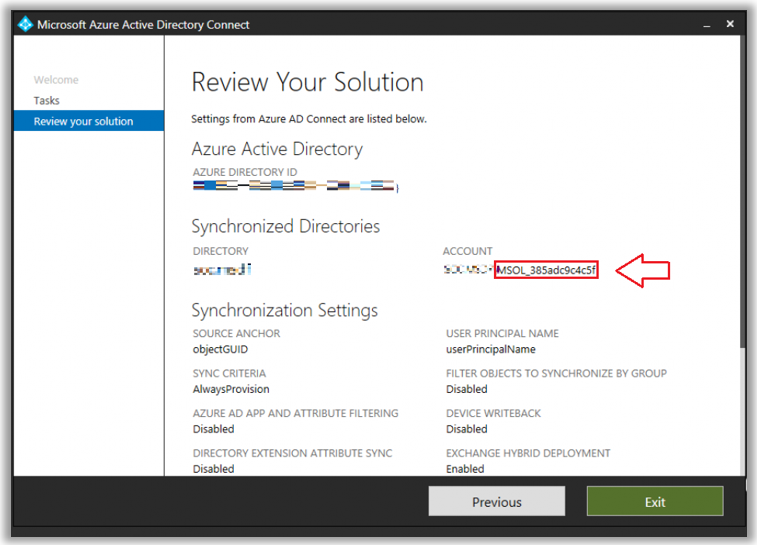
On the server where you have installed Azure AD Connect for synchronizing identities from the on-premises server, launch the Azure AD Connect tool.
From Additional tasks, choose Customize synchronization options then Next. You can just step past the next few screens, providing an Azure AD admin credential, etc. You want to find your way to Optional features, and select the check-mark box for Password writeback, then finish out the wizard to apply the setting change.
Step 3: Delegate permissions in AD
Launch Azure AD Connect again. From Additional tasks, choose the option to View current configuration and click Next. Find the account that is being used by Azure AD Connect. You need to delegate permissions to this account.
From AD Users & Computers, ensure you have Advanced features enabled from the View menu. Then right-click the root of the domain and go to Properties. From the Security tab, click Advanced.
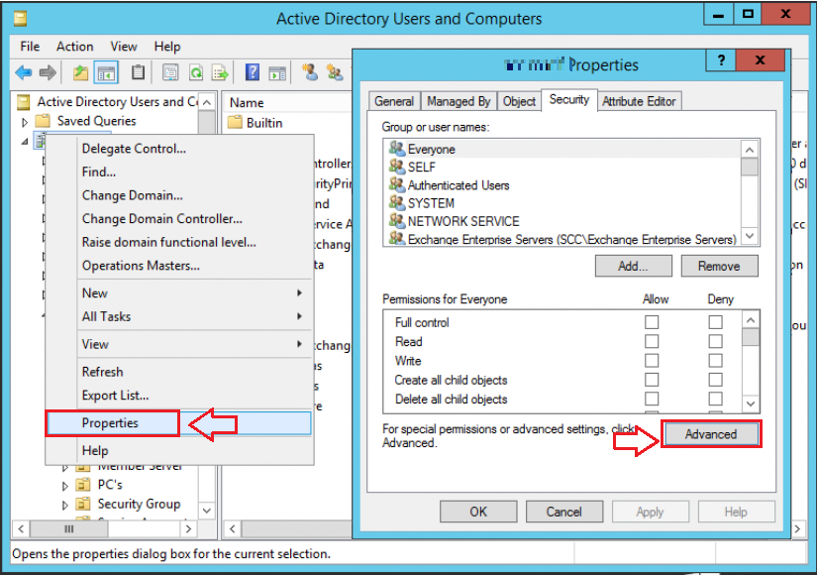
From the Permissions tab, select Add. Select the username (principal) you identified above via Azure AD Connect. In the Applies to drop-down list, select Descendant User objects. Under Permissions, select the boxes for Change password and Reset password.

Scroll down further, and under Properties, select the boxes for Write lockoutTime and Write pwdLastSet. Finally, you can Apply the changes and OK to exit.
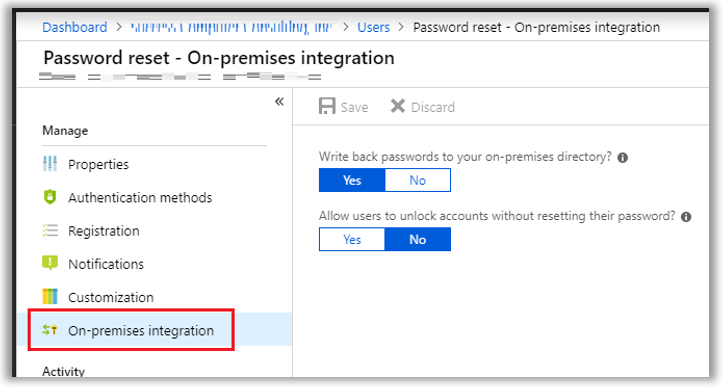
Step 4: Configure Azure AD On-premises integration
Back in the Azure AD Admin center, go to the Users blade, and find Password reset > On-premises integration. From here you can customize the settings—granting or denying the ability for users to perform self-service “unlock” in addition to self-service reset. (By default a password reset also unlocks the account).
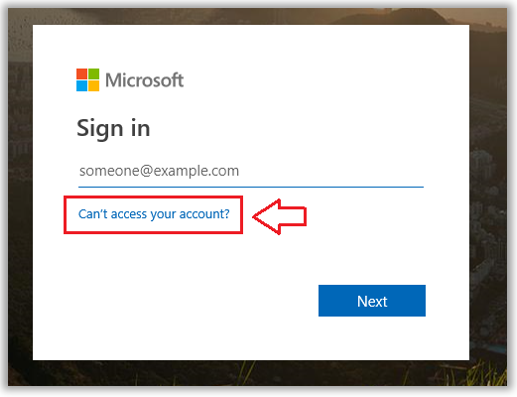
Now you should be good to go with all of those steps completed. Verify by visiting any Microsoft/Office 365 sign-in page and clicking the link: Can’t access your account?, then following the steps to perform a reset from there.
In case you have trouble along the way, check out Microsoft’s article entitled Troubleshoot password writeback.
Conclusion
So this is one step closer to basically just having Azure AD Premium P1 be included with Microsoft 365 Business (which should happen, in my opinion).
Microsoft 365 Business has always had some kind of “in-between” version of Azure AD. It is not quite the basic flavor that is included with other Office 365 bundles, but neither is it the full Azure AD Premium P1. Maybe it’s like Azure AD Plus, or something. In any event, here is where things stand:
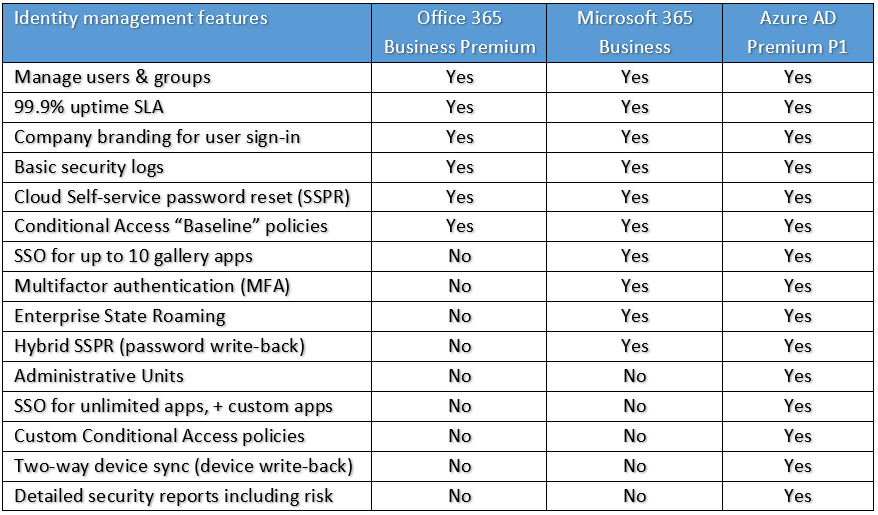
Users with cloud-based accounts have always been able to self-service reset passwords–if it had been configured. However, you could not enable this same experience in a hybrid environment, where Azure AD Connect syncs passwords from on-premises AD.
This recent announcement changes that. Now we can offer the same experience to both types of accounts.
(1) The other major request I had here was for Conditional Access, which I think is non-negotiable for pairing with device and application management. For instance, you can create policies but nobody will know about them unless they manually enroll… dumb.
NOTE: Since this article was first written, Microsoft has made many other changes to this SKU. Formerly known as Microsoft 365 Business, it is now renamed to Microsoft 365 Business Premium and contains the full Azure AD Premium P1 license (which includes Conditional Access).
Comments (8)
Great Work. Appreciate the detail.
Thank you for such a great post, Microsoft should learn from you how to explain things.
No lie, I got a job offer from their Marketing department. It’s in Redmond, though. No bueno.
HI,
Thanks for your article, i am going through many articles, and try to troubleshoot with many ways from a last week, i also set Group policy regarding to the requirements but i cannot get rid of the below error.
“Unfortunately, you cannot reset this user’s password due to a policy or error in your on-premises environment.”
Please if you have any clues or idea then help me, i will be highly thank full to you.
If you are sure that you have the right permissions delegated to your sync user and you have the feature enabled, and it is still not working, I’d say ticket w/ MS at that point.
You have to specify that you not need only M 365 Business but you must have as a minimum requirement for the M365 Business suite, the Microsoft 365 Business PREMIUM.
https://docs.microsoft.com/en-us/azure/active-directory/authentication/concept-sspr-licensing
This article is dated from when the name was still Microsoft 365 Business. They renamed all their business products and now the SKU is known as Microsoft 365 Business Premium.
thanks Alex,
it’s my fault.
M.