How to configure anti-spam with end-user digest for Office 365 Exchange Online
Office 365 Exchange Online plans all include Exchange Online Protection (EOP) by default. And by default, the spam filter settings leave something to be desired. You can modify these settings from Exchange Admin Center. Today I will share the recommended “minimum” adjustments which I typically will make to any new tenant. Estimated time to complete: 15 minutes.
From the 365 Admin portal, navigate to Admin Centers > Exchange. Choose protection from the left menu, then spam filter from the top.
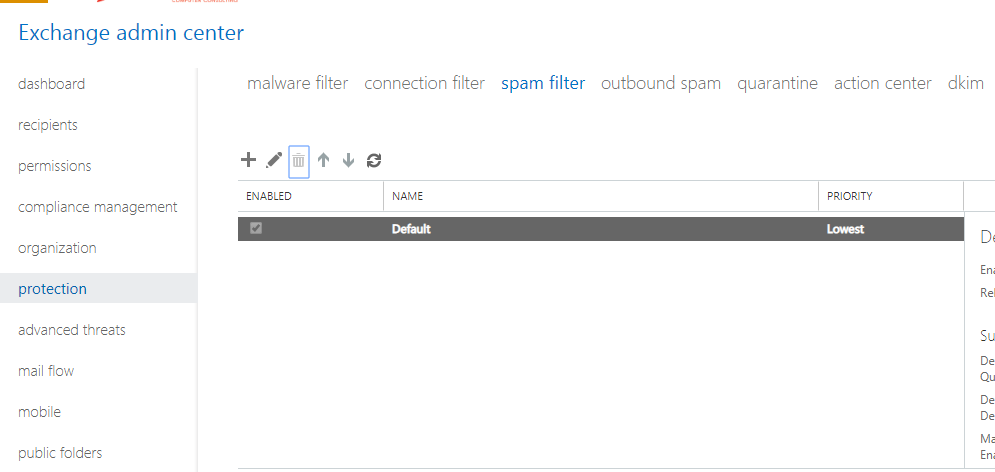
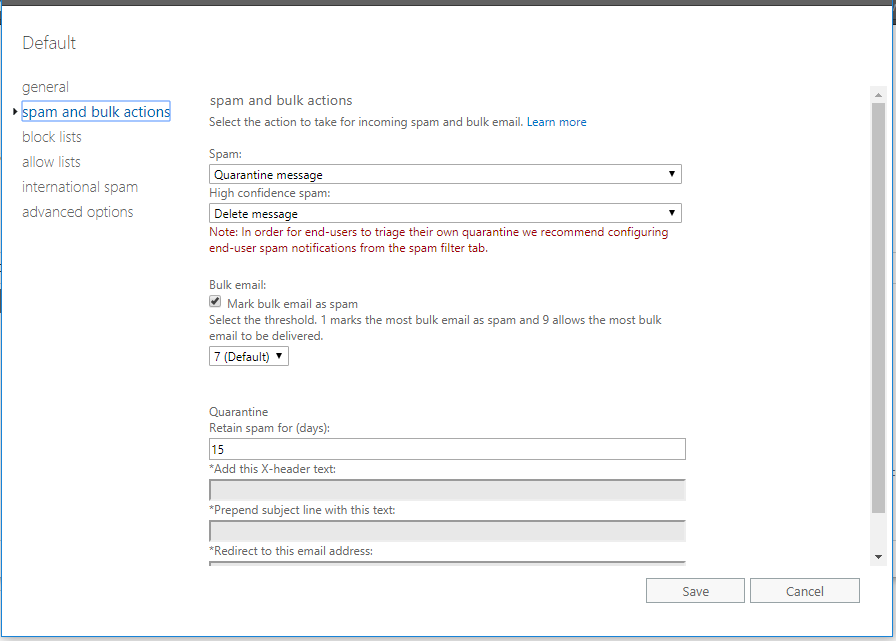
Go ahead and edit the Default policy. From here, we will start to dial in the settings. Go to spam and bulk actions. I normally make the following selections: I like to Quarantine messages rather than send them to the Junk mail folder. This is a bit more sensible, since users or admins have to manually release items from a Quarantine vs. being able to freely browse through Junk mail like any other mail items–the risk of accidentally clicking something is just too high. I will even delete high confidence spam, but that is optional–you can also send it to quarantine if you’d rather play it safer.
I am going to skip over the block, allow and international spam sections–just know that if you have specific domains or senders you want to allow or block, you can do that here. Also, you can block entire countries, like North Korea, Russia, or whatever else you like. Go right to advanced options. What I am going to recommend here is a baseline. You could dial this in even further if you want to, this is just a reasonable minimum that I’ve been using.
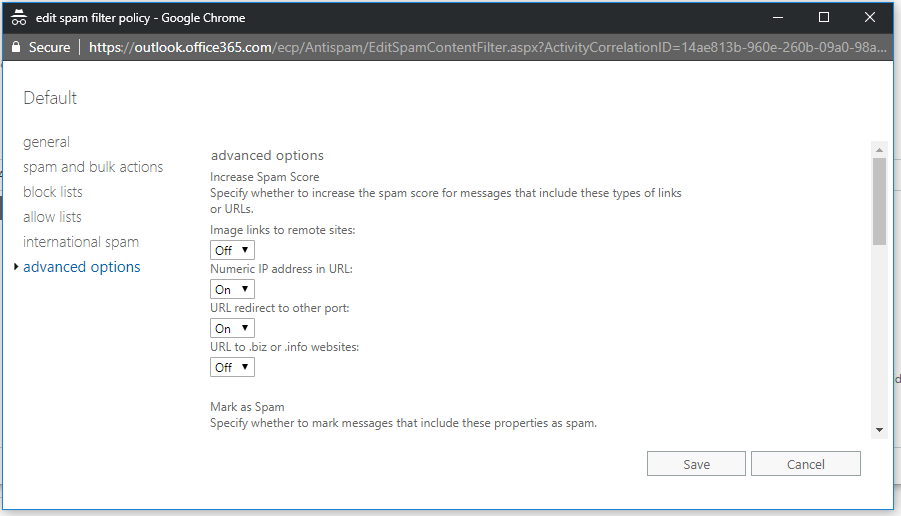
To begin, Numeric IP address in URL and URL redirect to other port–these aren’t typical for legitimate links, so I like to increase the spam score when they are present. Keep scrolling down to the next section. Here I make the following selections, always, at a minimum: Enable JavaScript or VBScript in HTML, as well as SPF record: hard fail and Conditional Sender ID filtering: hard fail. Click Save. Next, recall that we enabled the Quarantine action, so it is best if we also enable the Quarantine digest.

Select the Default policy again, and in the right hand pane, scroll all the way down to the bottom to Configure end-user spam notifications…
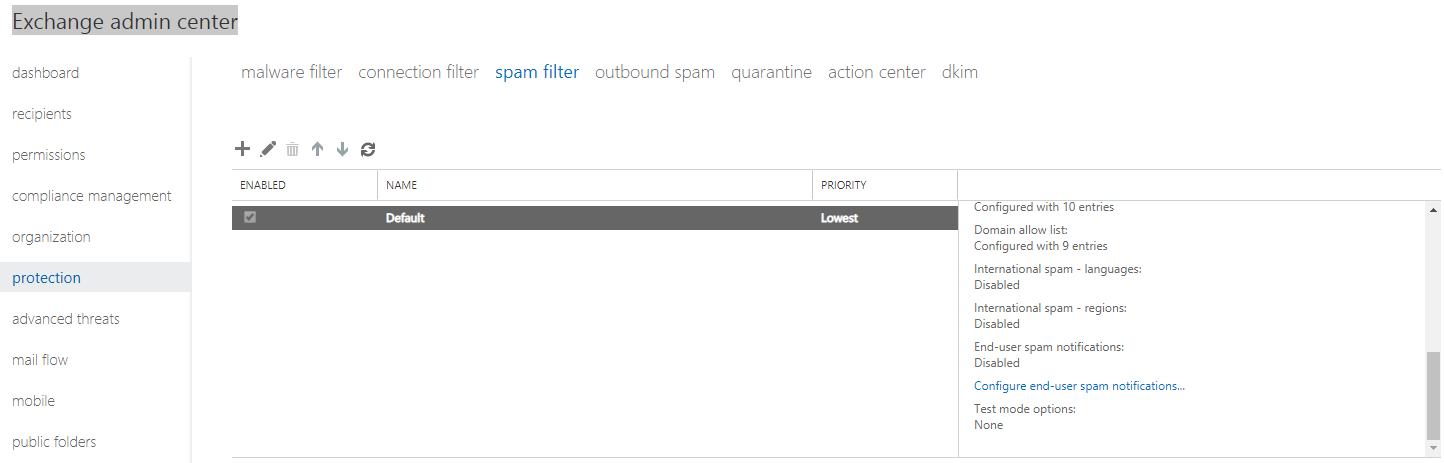
Here you can Enable the digest and the frequency with which the digest is delivered (I usually just pick 1/day). Click Save.

Now, back in the Exchange Admin Center go to outbound spam. Edit the Default policy. Spam can also originate internally, and you may want to be notified if that happens (probably indicates a compromised account).

Anti-malware settings
Now that we have dialed in the spam filter, let’s check out the anti-malware settings also. Choose malware filter, and edit the Default policy.

Here is an example of some more restrictive settings (the defaults don’t include much protection in this regard).

If a message is quarantined because of possible malware, you can also choose to notify the recipient. Note: you can also customize the text of that message if you so choose. I usually do filter the common attachment types. It is your choice again who is notified when something is caught by the anti-malware filter. You can notify the senders whether they are internal or external and you can enable notifications to be sent to administrator(s) as well.
That’s it for today. Again, these are baseline, basic settings adjustments that you can make to any Exchange Online, or Exchange Online Protection subscription. Next up, I’ll have a series of posts on configuring the advanced threats features, which are available in the Microsoft 365 Business SKU, or, as a separate add-on called Advanced Threat Protection (ATP) for $2.00/user/month to any other Exchange Online Plan/Office 365 bundle. And this is also something I recommend now to all of my clients.
Comments (6)
Nice, thanks.
The last part reminded me that in the second half of September, MS has announced that they’re enabling enhanced Anti-spoofing protection for everyone. In that case, there may be another set of best-practices that would be warranted, along the lines of this article, not the least of which is setting up DKIM and DMARC (I’m assuming everyone already has SPF, because if you don’t, the admin center pesters you about it). I don’t think you’ve gone into those before, and they’ll be more important soon. Just a thought for a possible future article.
This is indeed an article in the works.
Great article. Most of the time, O365’s default policies, along with some of your recommendations, works very well for our small domain.
Due to recent glitches with O365’s quarantining methods however, I’m having to rethink using the quarantine. While testing, I have found that I cannot enable End User Spam Notifications in policies other than the default. Is this by design?
You can but have to use PowerShell. Annoying.
But kind of amazingly, only if your policy applies to a domain. Otherwise, no soup for you.
From a Sys Admin to another, I thank you.