Protect messages and documents in Microsoft 365 Business with AIP, part 1: Email encryption
In this series, I am going to show off some of the functionality and customization that you can make in Microsoft 365 Business, which includes Azure Information Protection (AIP). There is a growing user base for this SKU, and a lot of admins out there trying to figure out how to maximize their subscription dollars (there is SO much included with the Microsoft 365 bundles–it’s hard to consume them all at once).
The answer is to follow along with my blog, of course. This has been my project for the past few months, and soon, I will have a complete guide available for the Business subscription. Stay tuned for more on that.
In the next couple of posts, I will cover two major use cases for Azure Information Protection:
- Encrypting outgoing email messages (called Office 365 Message Encryption or OME)
- Labeling or classifying documents, applying encryption, watermarks, restrictions, etc. (e.g. Personal, Public, General, Confidential, Highly Confidential)
The second of these is even more interesting right now, since recently we are able to marry our AIP labels with Office 365 “Sensitivity Labels” which are managed via the Security & Compliance center. But before we go there, let’s cover the built-in email message protection capabilities.
I have written extensively on the topic of Office 365 Message Encryption, even in the days before the Microsoft 365 Business bundle became so interesting. But it has been a while, and back then I was writing as things were changing. The new version came out, built on AIP. Then new templates. Then new options for those templates.
Let’s just lay it all out now, as it stands today.
Enabling email encryption
In the olden days, a lot of PowerShell was required to get the Email encryption features enabled within the tenant. These days, most of it is already enabled for us, right out of the box. However, there may be additional customization that you want to make before configuring your mail flow rules, and this will still require the use of PowerShell.
To begin, connect to Exchange Online using PowerShell:
$UserCredential = Get-Credential
$Session = New-PSSession -ConfigurationName Microsoft.Exchange -ConnectionUri https://outlook.office365.com/powershell-liveid/ -Credential $UserCredential -Authentication Basic -AllowRedirection
Import-PSSession $Session
The first option that you will probably want to configure, is the option to display a “Protect” button in Outlook Web Access. By default, this value is set to $false, and we just need to flip it to $true.
Set-IRMConfiguration -SimplifiedClientAccessEnabled $true
Once a user clicks on Protect, the default template that is applied is Do Not Forward. To change this to another template, such as Encrypt, click Change Permissions.
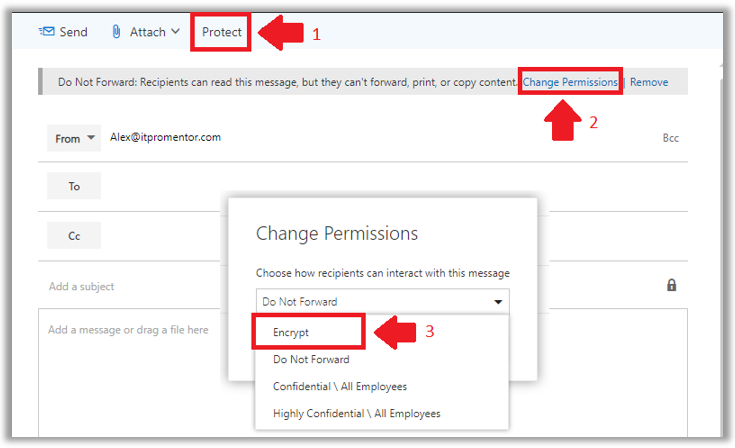
We find four default permissions templates available for sending email messages. They are:
- Encrypt – Use this template to encrypt only; no other special restrictions will be applied. This is the newest and most popular template for sending encrypted email messages. External recipients are allowed with this template.
- Do Not Forward –Recipients of a message marked with Do Not Forward permissions will not be able to share, print or copy the message or any attachments. External recipients are allowed with this template. The restrictions here are cool to see in action, and certainly have their place, but it can also be super annoying when users really just wanted Encrypt.
- Confidential \ All Employees – Recipients of a message marked with Confidential \ All Employees permissions can reply to and forward the content within the organization only. It is not possible to share with external users.
- Highly Confidential \ All Employees – Similar to the above, Highly Confidential messages can only be shared within an organization, however, the content is accessible only to the specific individuals with whom the content has been shared. Forwarding to other users either internal or external is not possible.
Configure branding for encrypted email messages
Second, you may want to customize the recipient experience by applying your logo to the default encryption messages and portal.

You will need a copy of your company’s logo in .png, .jpg, .bmp, or .tiff format. It should be less than 40 KB and the optimal size will be 170×70 pixels, but it doesn’t have to be exactly that ratio (it just should not be larger than that in either direction, certainly smaller is okay).
Still connected via PowerShell to Exchange Online? Good. Then you can customize both the logo image, as well as the background color (which is blue by default). In my example, the logo is stored as C:\Temp\logo.png and the background color is set to black (#allzeros).
Set-OMEConfiguration -Identity “OME configuration” -Image (Get-Content “C:\Temp\logo.png” –Encoding byte) -BackgroundColor “#000000”
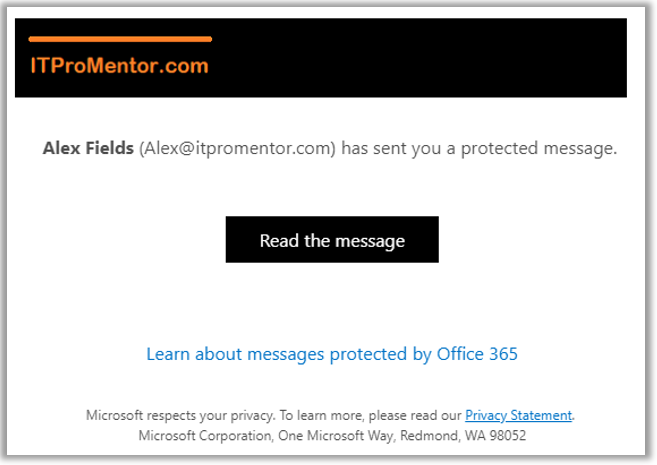
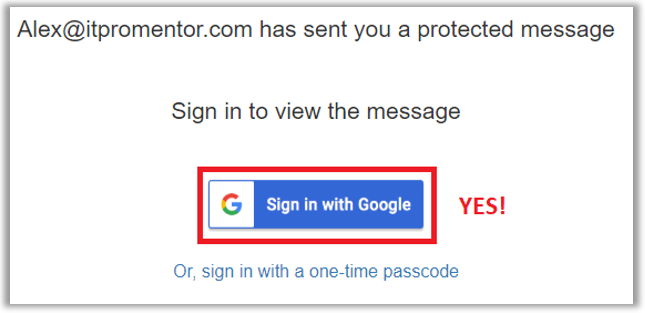
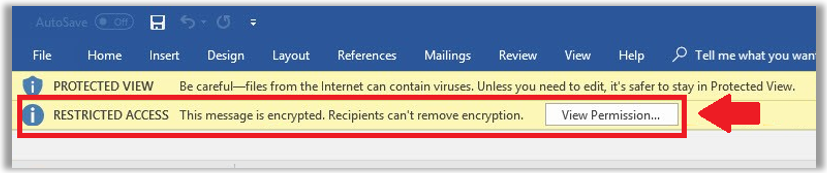
After the customization is applied, we can see the result in a test message sent to an external user (e.g. a Gmail account).
As an aside: One of the coolest updates that came out last year was the ability to sign-in to encrypted messages with an external identity, such as a Gmail account. Huge win. (OTP option also still available.)
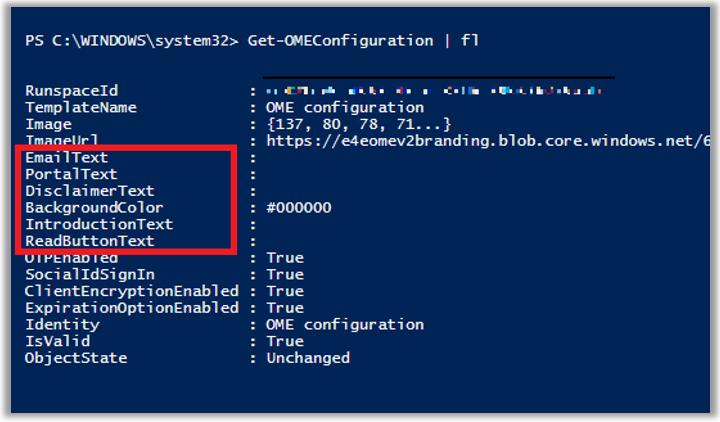
There are also other parameters you can customize, such as the default text displayed on the message, and in the online portal. To see these, simply run:
Get-OMEConfiguration | fl
Configure how downloaded attachments are treated
Next, most users who receive an encrypted email are not expecting the attachments to be “locked down” with encryption themselves. However, that is in fact the default behavior of Office Message Encryption. If that’s what you want, great—feel free to skip this section.
However, it is also possible to automatically decrypt any attached documents when they are downloaded from the portal. Many organizations opt to have this setting enabled:
Set-IRMConfiguration -DecryptAttachmentForEncryptOnly $true
Configure mail flow rules to encrypt emails
The Protect button is only available in Outlook on the Web. If you install the Azure Information Protection client, which we will talk about next, you can also get some buttons added to Outlook, but no buttons that correspond to the new Encrypt template–yet!
Therefore, users of Outlook will most likely trigger encryption using a subject line or body tag in the email message itself. Therefore, you need to setup a transport rule to allow for this. The easiest way to accomplish this is in PowerShell.
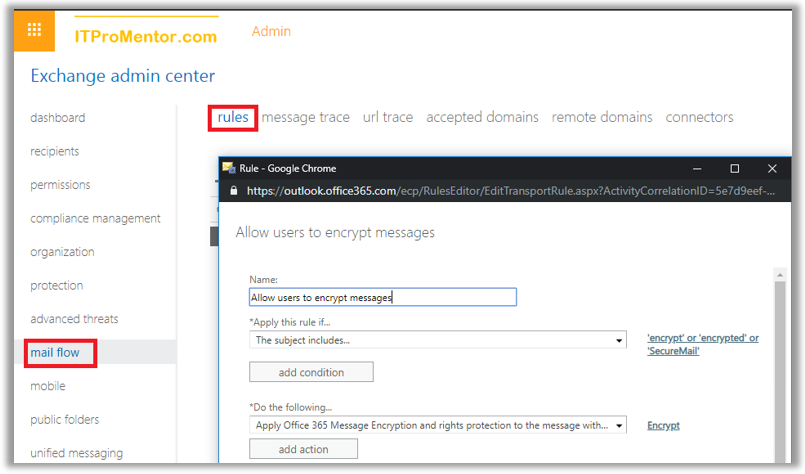
New-TransportRule -Name “Allow users to encrypt messages” -SubjectContainsWords “SecureMail” -Priority 0 -ApplyRightsProtectionTemplate Encrypt
In this example, the transport rule will apply OME encryption using the “Encrypt only” template to any message with a subject line that contains the text SecureMail. You can customize this to your own liking. The transport rule can be edited also via the Exchange Online admin center GUI, by navigating to mail flow > rules.
AIP Client
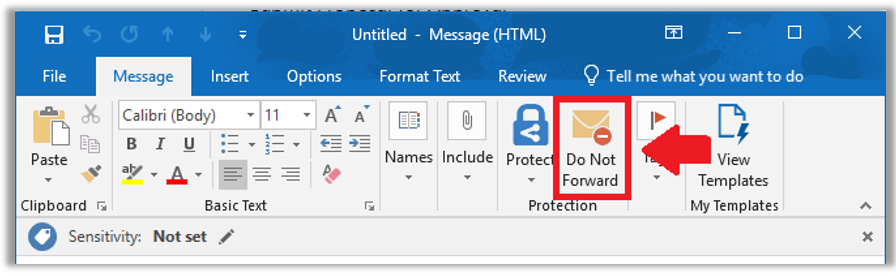
If you have the AIP client, and have enabled the corresponding setting for it in your default policy, then you can get a Do Not Forward button added to your Outlook client. As I mentioned, I really want to see an Encrypt button just like this. (I have previously shared a workaround but it’s fairly hokey.) Looking for any updates on this… Anyone at MS reading??
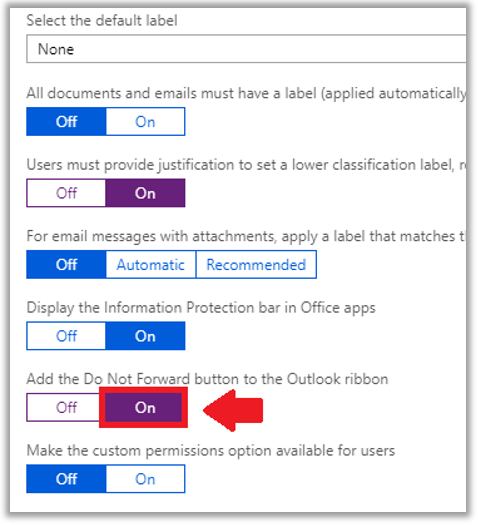
To enable this button, if you care to have it, just make your way to the Azure portal. Find the Azure Information Protection, and go to the Policies blade. Click to edit the Global policy.
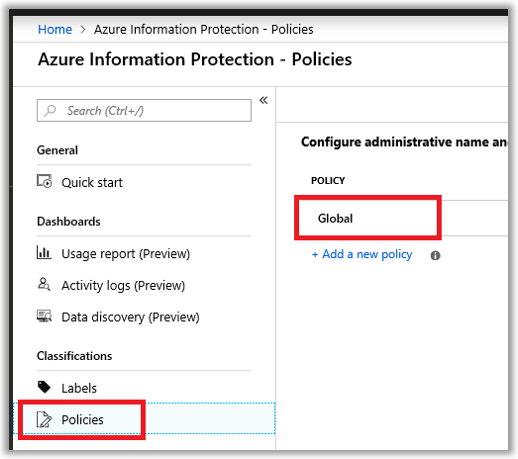
Scroll down here to find several toggles. The one we want is Add the Do Not Forward button to the Outlook ribbon.
Now there is a lot more to AIP, and specifically the AIP client. But we’ll get into that more in the next installment, when we talk about data classification and sensitivity labels (which is presently in flux, as I will explain). Until next time, keep fighting the good fight, my friends.
Comments (8)
Is there a way to automatically encrypt any emails that meet a DLP policy?
We have HIPAA, PCI and other DLP policies that currently bounce the email. I would like to have them encrypt and deliver instead
Yes, when you configure a DLP policy one of the actions is to encrypt the email (you have to target only Exchange Online when building the policy in the Security & Compliance center).
Hey, it’s August 2020. Do you know if they have added an “Encryption” button yet? I want to have one-click access to the “Encrypt-Only menu option
Yes the button exists. Be aware that when you turn on sensitivity labels, the sensitivity button will replace encrypt in OWA. It is still there, but you have to to the ellipses. In Outlook it is still on the Options tab.
Hi Alex, is it possible to use the feature to realise a userbased e-mailencryption?
We want to offer the users a feature for a confidential (internal!) conversation via e-mail. To realize that the user should be able to manually decide if an e-mail should be encrypted. The encrypted mail should only be visible by the recipients.
Use the “Do Not Forward” feature rather than “Encrypt.” The person who starts the thread owns the conversation; recipients cannot forward to other parties, but they can still reply to the conversation thread.
Is it possible for spammers to use encrypted email to send spam, viruses or other malware?
If someone has control of your email account, I suppose that is possible, yes. The key there would be to prevent them from gaining access to your mailbox with other features like MFA and the Defender policies for email.