Unboxing Microsoft Defender for Business, Part 1: Simplified configuration process

I have been playing with the new product this past month since getting access to the preview. If you have not yet had a chance to see Microsoft Defender for Business in action, then read along! To get your hands on a copy of this product yourself, the preview sign-up is here: https://aka.ms/MDB-Preview.
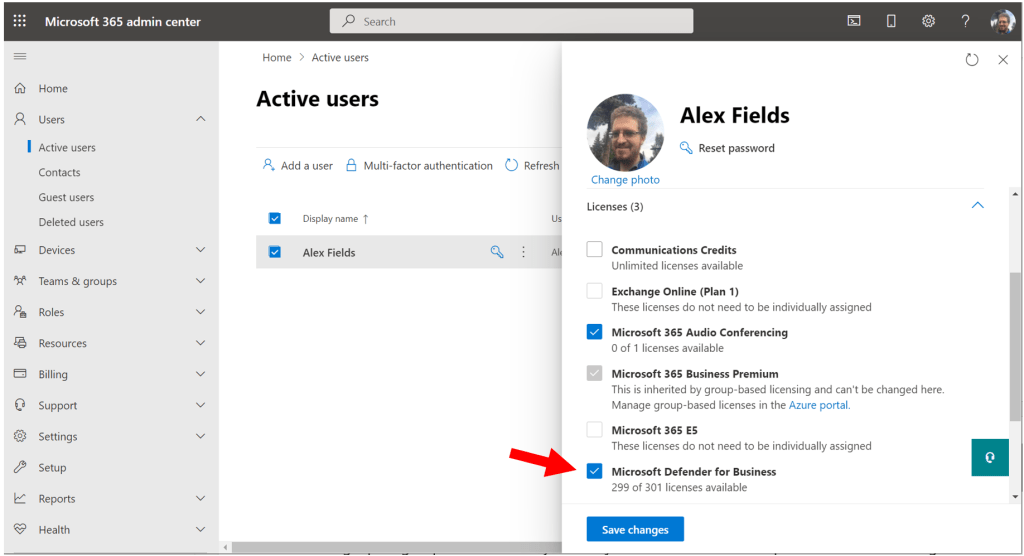
Once you have the preview activated in your tenant, you will assign the licenses, just as you would for any other product (however, note that in the future of General Availability, this product will be included in your Microsoft 365 Business Premium license, so no need to assign additional licenses in that case).
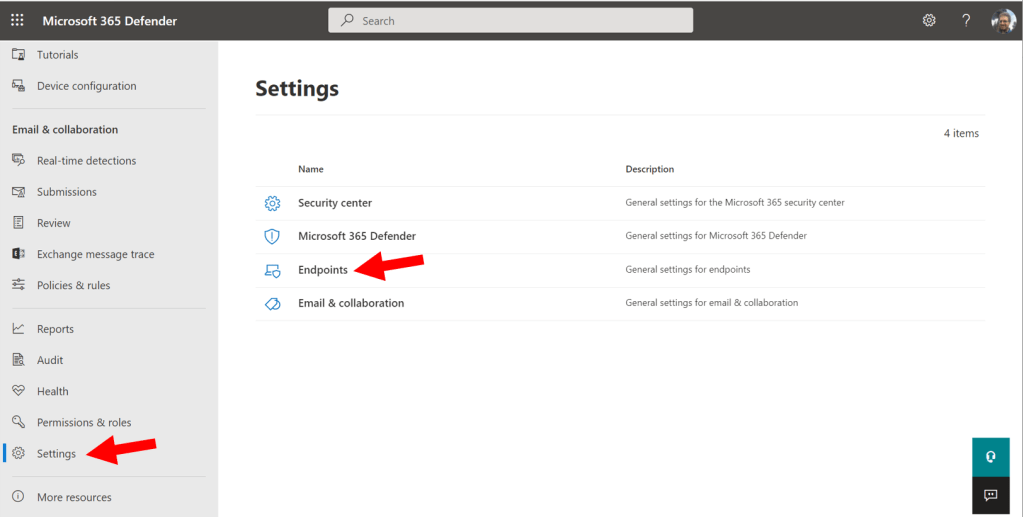
To activate the product, visit the Microsoft 365 Defender security center: https://security.microsoft.com and go to Settings > Endpoints.
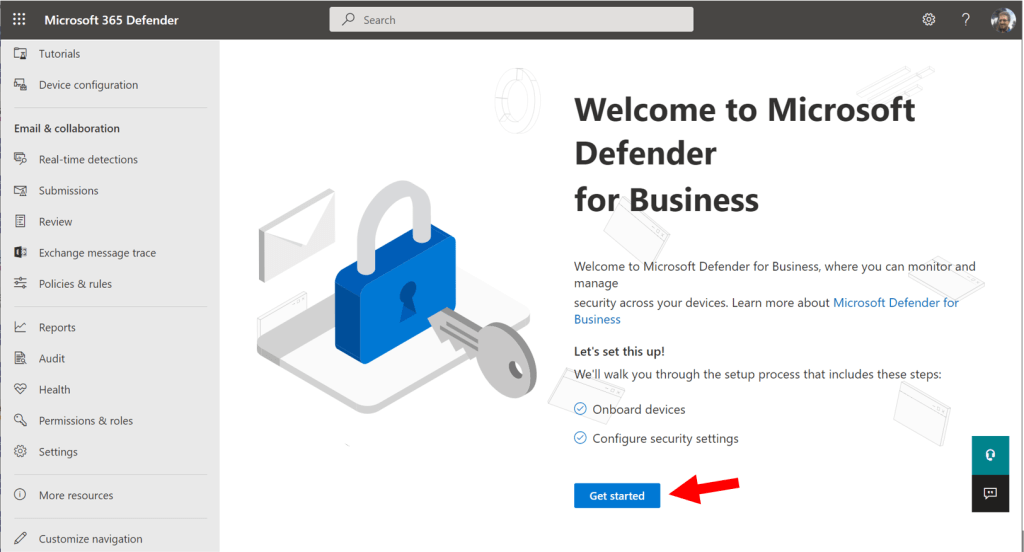
You should be greeted with the first-run wizard experience. Click Get Started.
In order to get the “Automatic onboarding” option on this next page, you must have a minimum of three devices already enrolled with Microsoft Endpoint Manager. They do not all have to be Windows devices, but only Windows devices will be automatically onboarded during this setup process. In my demo tenant, I have four devices, so I just barely clear the requirement.
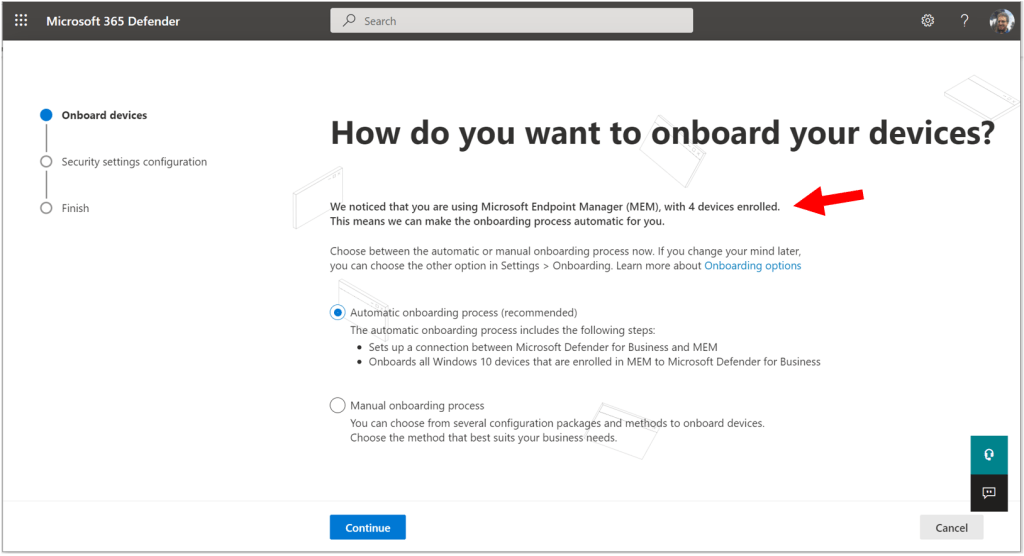
Without the minimum number of devices, you would see the manual onboarding process screen, which looks something like this:

In this case you can just expand each option for more instructions about the onboarding process, which you would need to complete yourself, later. I will proceed with the assumption that you will qualify for Automatic onboarding.
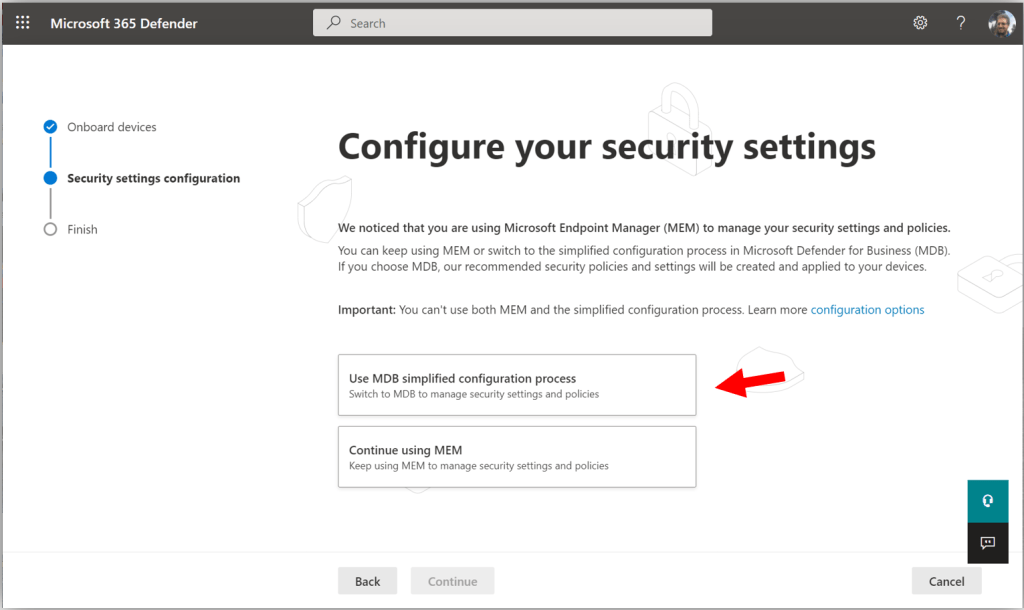
If you are like most of us, you probably already have some policies in Microsoft Endpoint Manager scoped to users and devices in your organization. You can either continue using MEM to deploy your Microsoft Defender policies, or, you can switch to using the Microsoft Defender for Business “simplified configuration process.” What is that?!
It just means the polices for Microsoft Defender will be managed right here in the Microsoft 365 Defender security center, rather than via the Endpoint Manager portal. Understand that whichever way you choose to manage your policies is up to you; in many ways this is just an aesthetic choice.
The policies in the security center will be somewhat simplified with fewer options exposed, and it is not recommended to deploy both policy types (just choose one or the other method, not both). For the purposes of this walkthrough, I will select the option to deploy my policies with the MDB simplified configuration process.
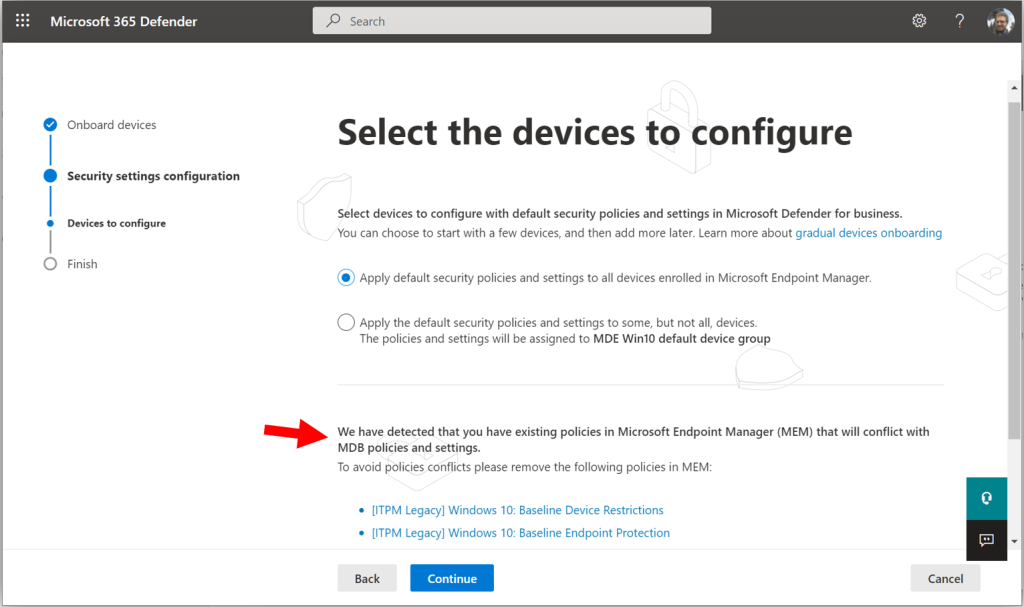
If you have pre-existing policies that are going to conflict with the settings deployed by the simplified configuration process, then you will see a message at the bottom of the next screen telling you so, and highlighting which policies need to be removed (deleted) before proceeding. When you have successfully removed the policies, you should be able to go “Back” and then return forward again to this page, and see the message at the bottom clear.
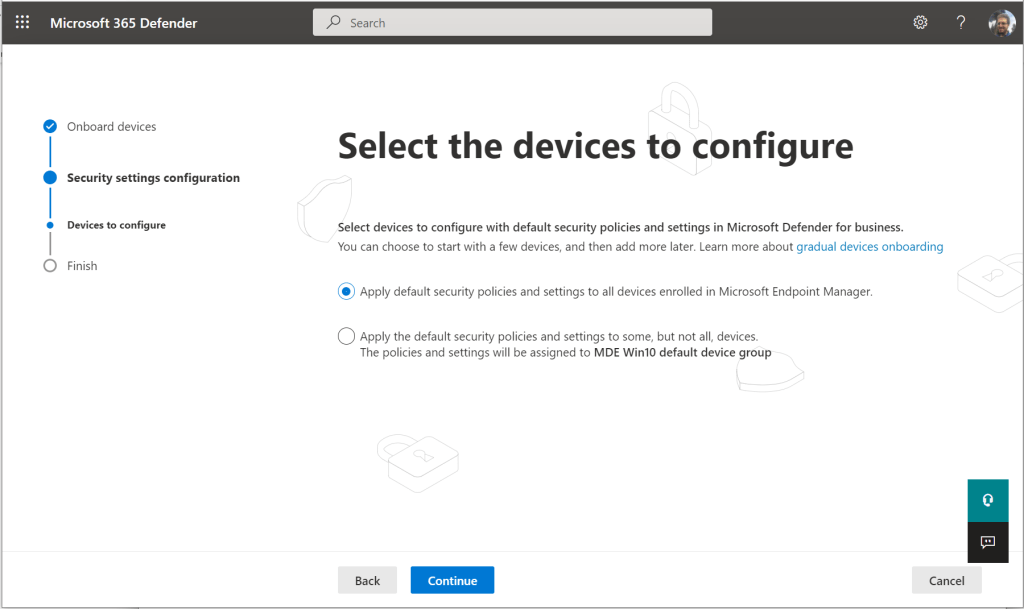
I am going to leave the selection on the first option, to apply the default security policies against all devices.
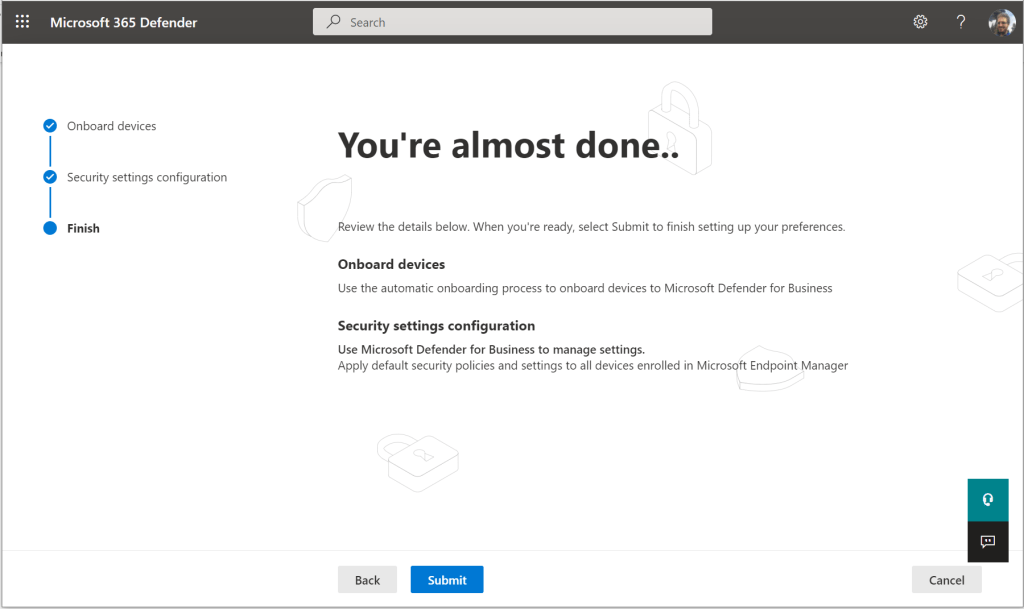
Then you can simply review the information on this last page and click Submit.
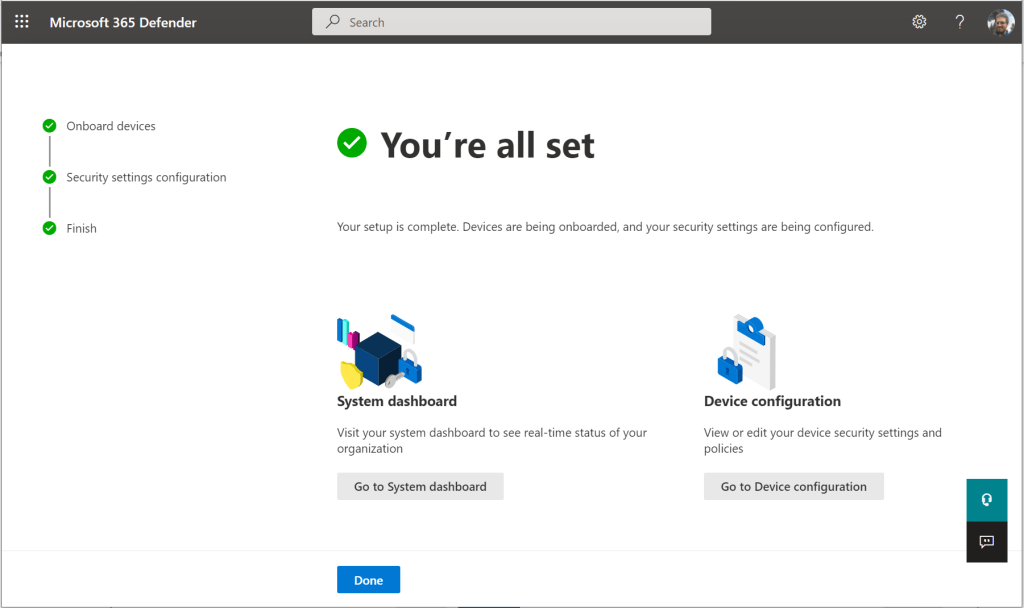
Now that we have completed the onboarding wizard, let’s review what has been done.
What happened?
The first thing that the wizard did was to automatically create the connection that is required between Intune (Endpoint manager) and Microsoft Defender for Business, and that includes the onboarding policy in the Endpoint manager portal.
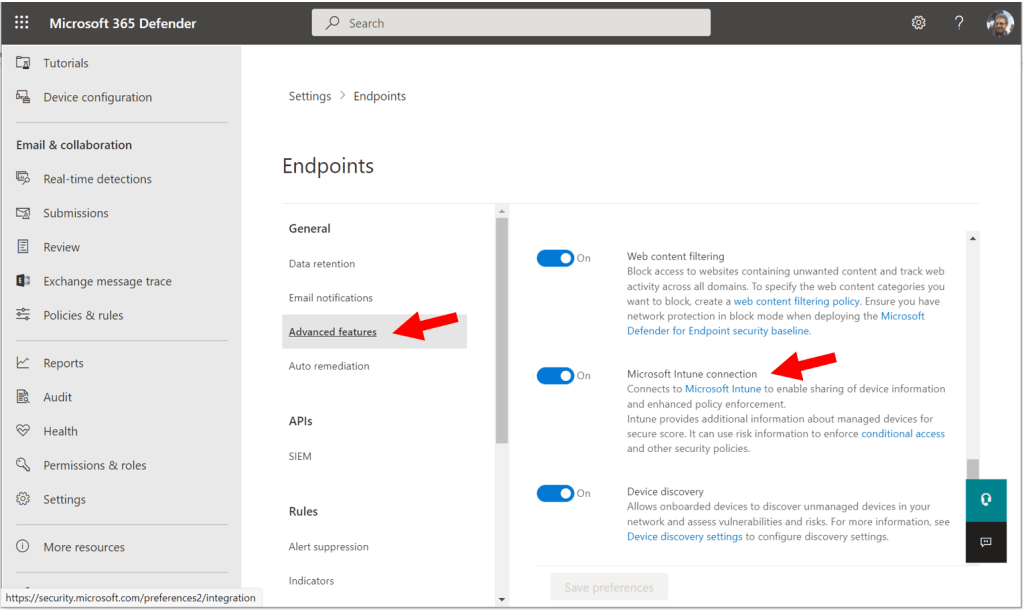
For example, if you return to Settings > Endpoints, and then find Advanced features in the Defender portal, you will find the Microsoft Intune connection has been turned On. (Some other items in here have already been enabled for you as well, such as Automated Investigation, Tamper protection, EDR in Block mode, and others).
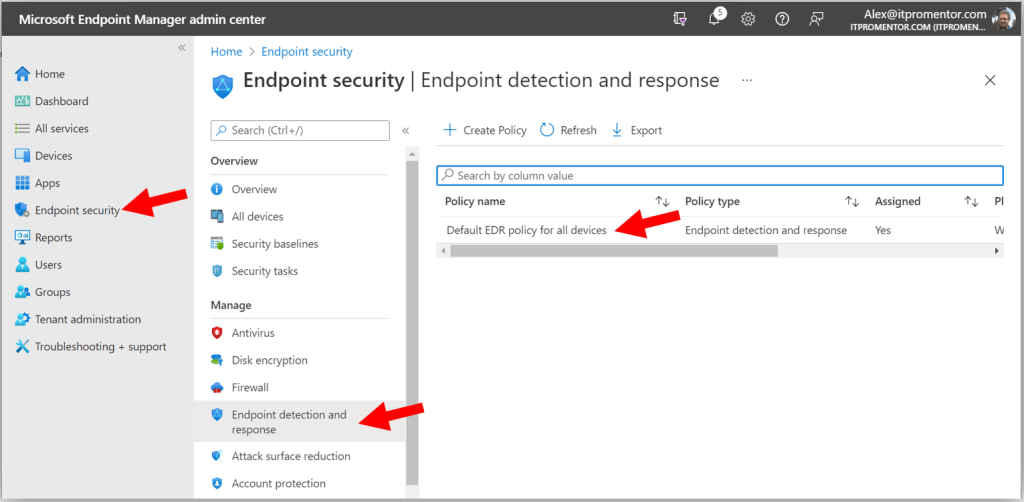
As well, in the Endpoint manager portal (https://endpoint.microsoft.com), we find under Endpoint security > Endpoint detection & response, there is the Default EDR policy for all devices. With these items in place, all of your Windows devices have been automatically onboarded.
From the Microsoft 365 Defender portal (https://security.microsoft.com) navigate to Device configuration under Endpoints.
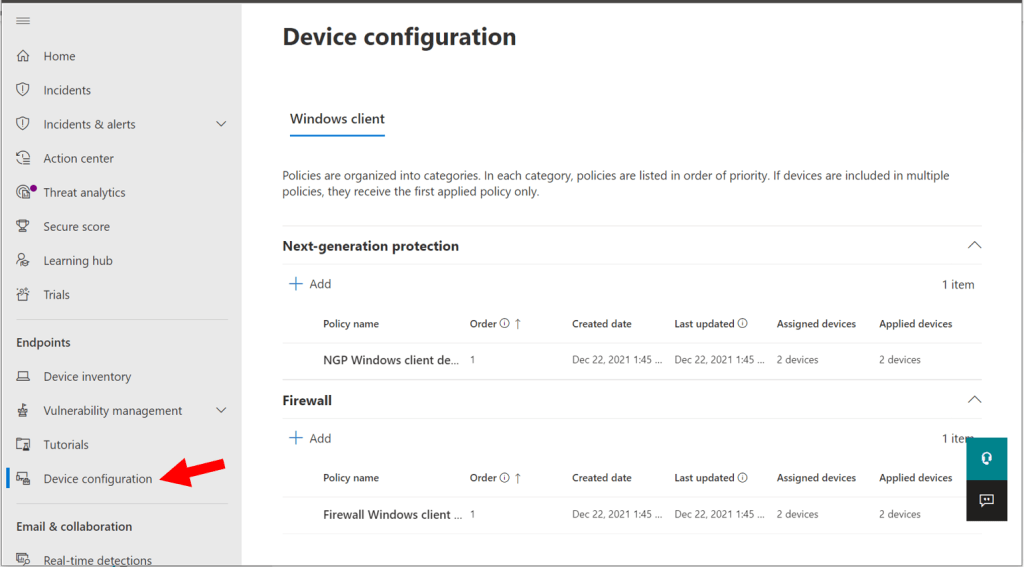
At the time of this writing, the preview only includes two Windows client policies: Next-generation protection (i.e. Antivirus) and Firewall. In the future, I hope we will have additional policies such as Attack surface reduction and others. I assume that we may also see additional tabs for other client devices, eventually. But today, the settings put in place are limited to what you see here. These would roughly correspond with the policies you find in the MEM portal under Endpoint Security > Antivirus, and Endpoint Security > Firewall, respectively.
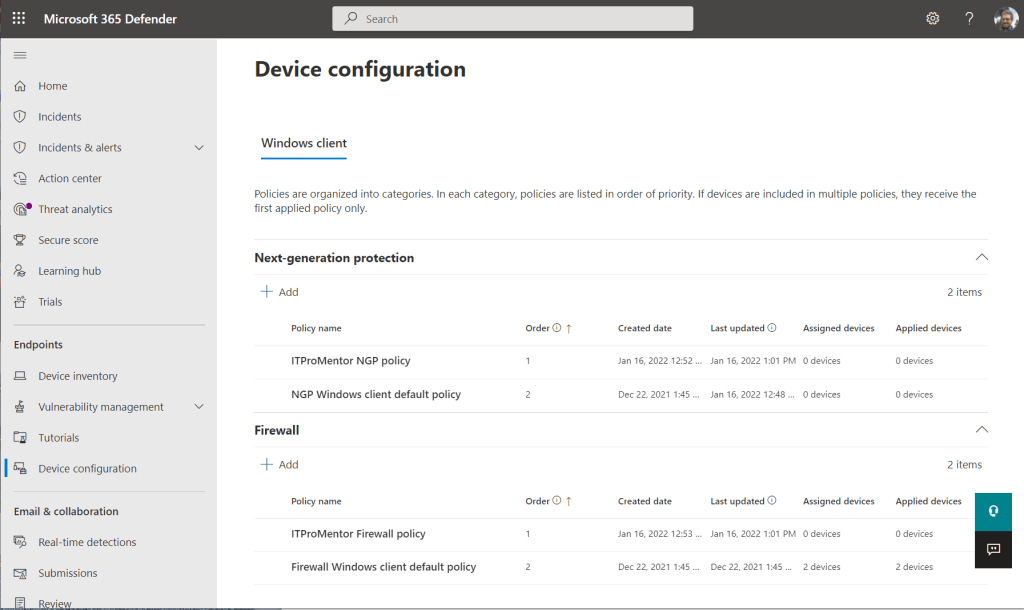
Some other notes about these default policies: you can edit these policies, or create new policies using Add, but it is not possible to delete the default policies created by the wizard. It appears that the way it works is the default policies will take the lowest order of precedence, so if another higher-ranked policy is added, then those settings would be applied. If a device does not fall in scope for a higher-ranked policy, then the settings in the default policy would still hold. Most SMB organizations will likely only need one policy, targeted against all devices.
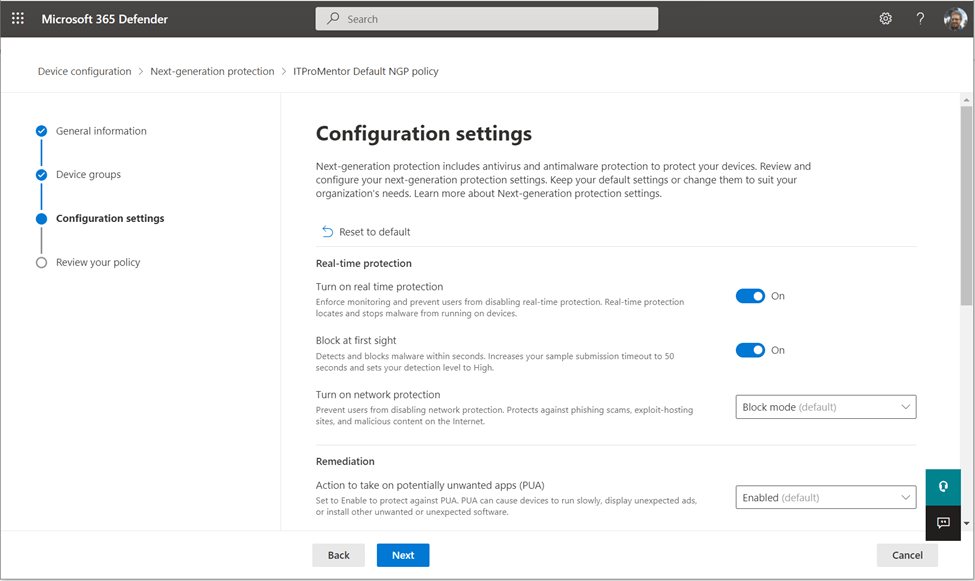
If you do choose to edit the settings, you will find common options like turning on Real-time protection, Block at first sight, network protection, and enabling protection against potentially unwanted apps. Further down you can schedule a daily scan, and at the bottom of the policy you can make Antivirus exceptions as needed by process, file extensions, or folder paths.
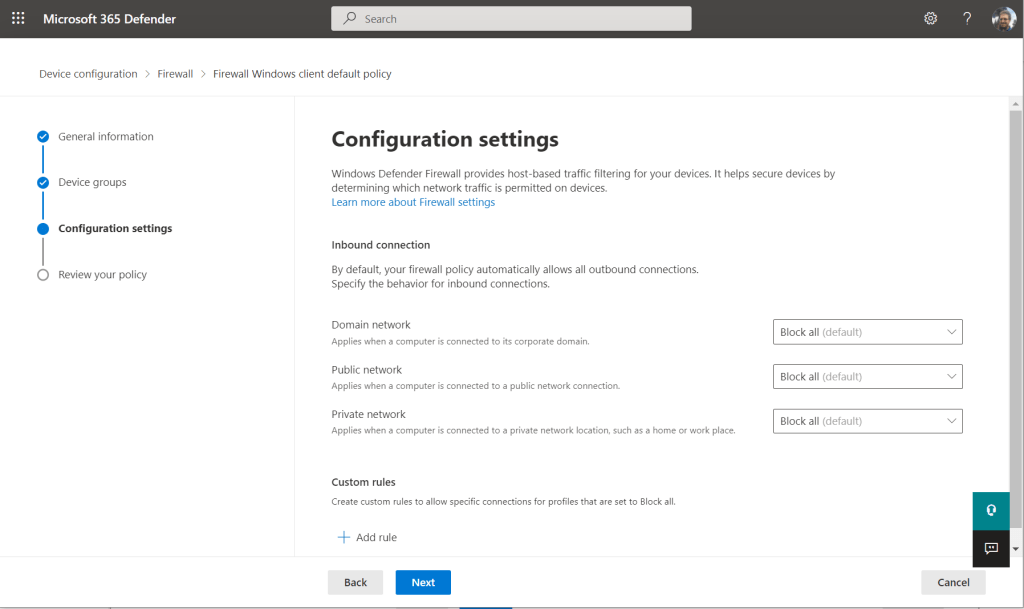
The firewall policy is even simpler: it is just set up to Block incoming connections by default for Domain, Public, and Private networks, and then it gives you a place at the bottom to add rules to allow for connections as needed.
How do I feel about it?
In general I feel extremely good about this product. It is the best thing we could have hoped for this past year, with respect to the Microsoft 365 Business Premium SKU. But I am hopeful that we see a few more improvements in this experience before it goes to General Availability:
- Additional onboarding options, especially for personal devices (macOS, iOS/iPadOS, and Android). For example, did you know that we technically have a zero-touch deployment option for iOS devices now? Would be great to include mobile device onboarding in the automated onboarding options someday.
- More policies in the Defender portal: ASR rules, Application Control, Device Control, and Application Guard come to mind right away.
- More clarity on the decision to use the MDB “simplified” policies in the Defender portal versus sticking with MEM. For example, why not just have the policies in the Defender portal automatically deploy corresponding policies in MEM, so that the same object could be viewed from both places? This would reduce confusion, I believe, and keep a more consistent experience as well, for those who have worked with the enterprise product.
These small scruples aside, I think we’re off to a fantastic start.
Additional onboarding notes
As we saw, the onboarding wizard takes care of your Windows devices for you, but if you want to get non-Windows devices into MDB, then you have to do that yourself after the fact. You can always review the manual onboarding instructions at any time from Settings > Endpoints > Onboarding.
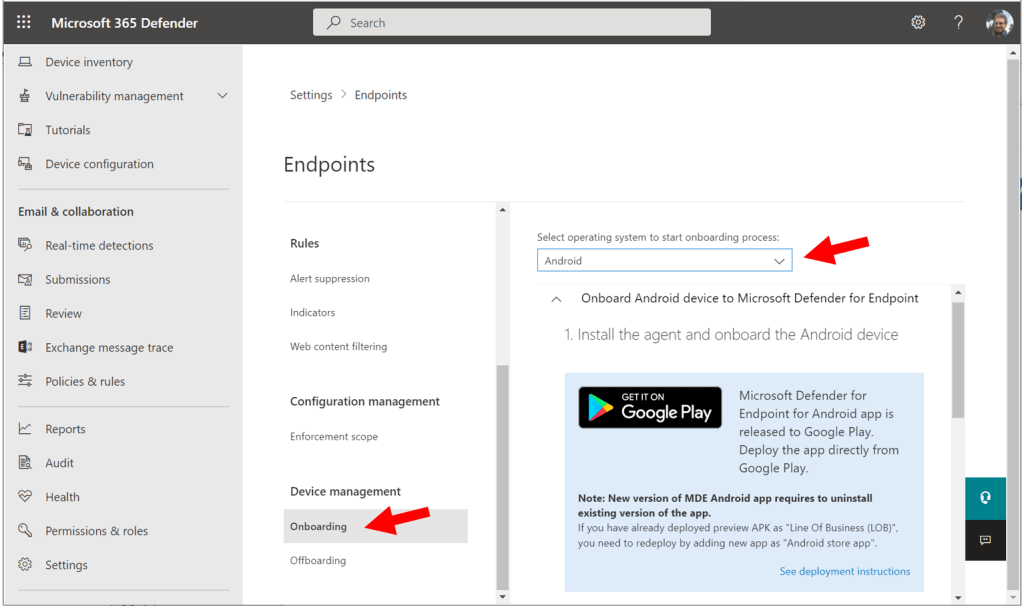
Just select your operating system at the top to learn how to deploy Defender on other device platforms. For iOS and Android, this basically means downloading the Defender Endpoint app from your app store, and signing in. As I mentioned, iOS also has a zero-touch method now. There is a different download package for macOS entirely (not in the app store unfortunately), and that can be applied either manually or via Intune.
Hopefully that gives you enough direction to get started with this product. I suspect there may be changes to the experience before it goes to GA, so we will keep an eye on that. In later articles of this series, we will explore additional features in Microsoft Defender for Business, starting with Threat and Vulnerability Management.
Comments (14)
I did the onboarding for a few test machines but even after they’re reporting in according to the console and the Windows Security settings are showing as “managed by your administrator”, the Windows Defender Advanced Threat Protection Service is still set to Manual and not running. Any ideas?
I didn’t specify that I used the Intune/MEM method. I just tried the local script option and that worked. Would definitely like to have the larger scale method working though!
[…] Endpoint detection and response (EDR) is becoming more affordable for SMBs. Microsoft 365 Business premium enabled EDR in the form of Microsoft Defender for Business. […]
[…] Endpoint detection and response (EDR) is turning into extra reasonably priced for SMBs. Microsoft 365 Enterprise premium enabled EDR within the type of Microsoft Defender for Enterprise. […]
[…] Endpoint detection and response (EDR) is turning into extra reasonably priced for SMBs. Microsoft 365 Enterprise premium enabled EDR within the type of Microsoft Defender for Enterprise. […]
[…] Endpoint detection and response (EDR) is becoming more affordable for SMBs. Microsoft 365 Business premium enabled EDR in the form of Microsoft Defender for Business. […]
[…] Endpoint detection and response (EDR) is turning into extra reasonably priced for SMBs. Microsoft 365 Enterprise premium enabled EDR within the type of Microsoft Defender for Enterprise. […]
[…] Endpoint detection and response (EDR) is becoming more affordable for SMBs. Microsoft 365 Business premium enabled EDR in the form of Microsoft Defender for Business. […]
[…] Endpoint detection and response (EDR) is becoming more affordable for SMBs. Microsoft 365 Business premium enabled EDR in the form of Microsoft Defender for Business. […]
[…] Endpoint detection and response (EDR) is becoming more affordable for SMBs. Microsoft 365 Business premium enabled EDR in the form of Microsoft Defender for Business. […]
[…] Deteksi dan respons titik akhir (EDR) menjadi lebih terjangkau untuk UKM. Microsoft 365 Enterprise premium mengaktifkan EDR dalam bentuk Microsoft Defender untuk Bisnis. […]
[…] Endpoint detection and response (EDR) is changing into extra reasonably priced for SMBs. Microsoft 365 Enterprise premium enabled EDR within the type of Microsoft Defender for Enterprise. […]
[…] Endpoint detection and response (EDR) is turning into extra reasonably priced for SMBs. Microsoft 365 Business premium enabled EDR within the type of Microsoft Defender for Business. […]
Alex,
I just noticed that this first blog in the series is missing the tags at the bottom which help it be found easily!
(I am just re-reading this series of blogs to get a handle on MDB setup. I was wanting to look at the full collection of articles, having found the 4th blog first, so I used the tags at the bottom of that 4th article to pull up the full list, but this one was missing. I found it by clicking the link at the beginning of the 2nd article). Just thought you’d want to know about the missing tags on this 1st article. Excellent content as always!