Tutorial: How to setup and configure Microsoft Azure Backup Server, part 1: installation
Microsoft Azure Backup comes in two basic flavors:
- Microsoft Azure Recovery Services Agent (MARS)
- Microsoft Azure Backup Server (MABS)
Both are free downloads from Microsoft, and both allow you to configure backup from on-premises servers to the Microsoft Azure cloud. Whereas the MARS agent is installed directly on the server you intend to protect, and it will only allow you to backup local files, folders and system state, MABS is installed on a separate server, from which you can centrally manage many backup endpoints at once.
As such, this solution is much more comprehensive, with protection for application data including Hyper-V, VMware, SQL, SharePoint, Exchange and so forth.
Did I mention: This is free software?
MABS is an Enterprise caliber product, built on System Center’s Data Protection Manager (DPM). It features a centralized on-premises console from which you can push backup agents, configure and monitor the jobs, setup alerts, etc. And it’s free.
What is not free, however, is an Azure subscription. Here is the pricing for Azure Backup. So it is not “free” once you start using it… but it is still quite affordable. Any other vendor’s solution should also have a cloud storage component to it–so that cost should be pretty easy to compare–but this solution has no other costs, except your time.
What it requires is a Windows Server 2012 or newer OS (Foundation, Storage, Standard, Datacenter). The server will also need some local storage; plan for 1.5-2x of total production data. This can be cheap storage: SATA / 7200 RPM disks, or an iSCSI NAS, for example. This does not have to be an expensive system, just a place to hold local backups. Here is a picture of how it works:

Image credit: ITProMentor.com
The local backup repository keeps a small number of retention points, with much longer retention possible in the Azure cloud (9,999 retention points at the time of this writing). Data can be restored locally from the Azure Backup Server, or downloaded and then restored locally, or restored into an Azure environment for DR (with proper DR planning of course).
Service providers: I can’t stress this enough: MABS is free Enterprise-grade backup software with zero licensing requirement. If you haven’t compared this option to your existing backup solutions yet, get on it! This could very well save you real money. Forget the cost of annual licensing, and just charge customers for your services to configure, monitor and maintain the backups.
Microsoft Azure Backup Server (MABS)
Today we will cover how to install, and in the next part of the series, we will look at configuration.
- Step 1. Pre-requisites
- Step 2. Setup vault
- Step 3. Download software and vault credentials
- Step 4. Extract software
- Step 5. Installation wizard (including MARS agent)
Step 1. Take care of the Server Pre-requisites
If you don’t do this, you’ll just get frustrated after you start the install process and have to stop, do these things, then start over again.
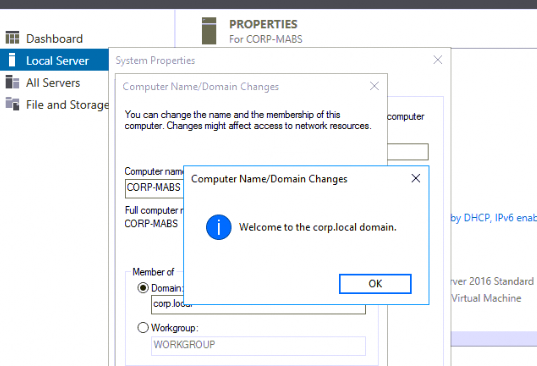
First, join the domain, this server can’t be in a workgroup.
Second, you will need to add two Windows features to this server: .NET Framework 3.5, and the Hyper-V PowerShell management tools. This can be accomplished with PowerShell:
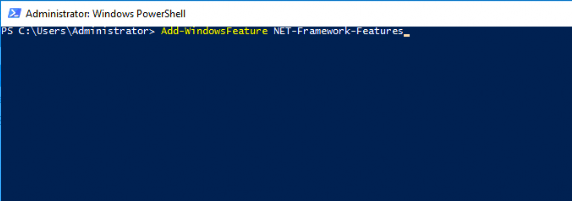
Add-WindowsFeature NET-Framework-Features
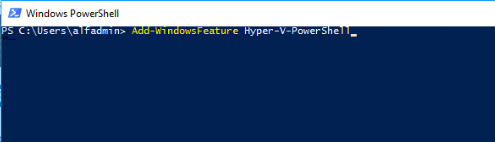
Add-WindowsFeature Hyper-V-PowerShell
Or, via Server manager > Add roles & features:
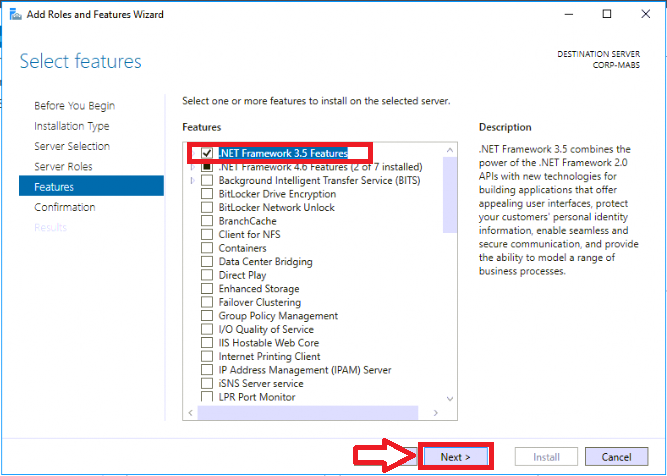
Expand RSAT tools options to find Hyper-V Module for Windows Powershell.
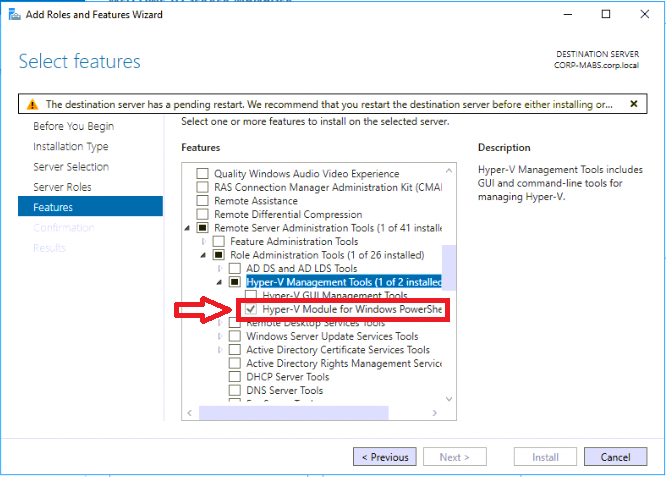
Restart is required.
Step 2. Setup the Recovery services vault
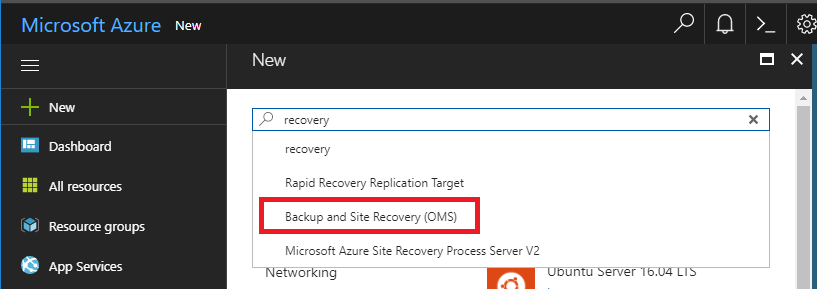
Now we are ready to install the software. All that is required is that you setup an Azure subscription. Now go sign-in to the Azure Portal. You will need to create a Recovery Services vault. Click on New and start typing backup, then click on Backup and Site Recovery.
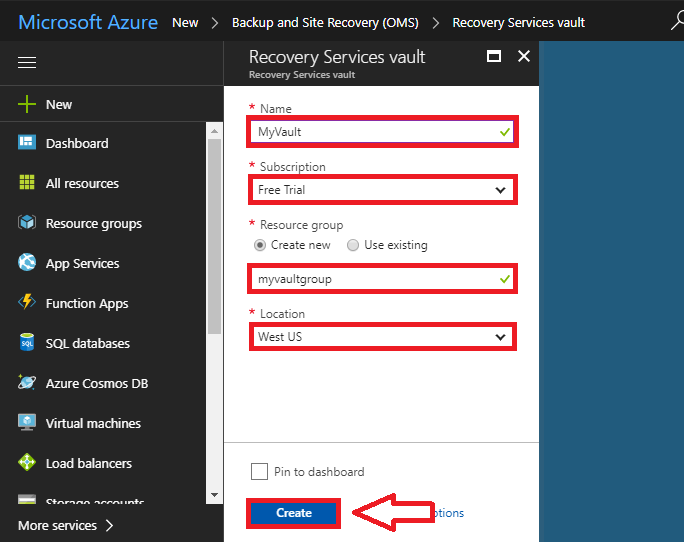
Click Create. You will need to Name your vault, choose a Subscription, configure a Resource group (just a container for grouping together objects in Azure), and select a Location.
Once you have a Recovery services vault, find Backup under Getting started.
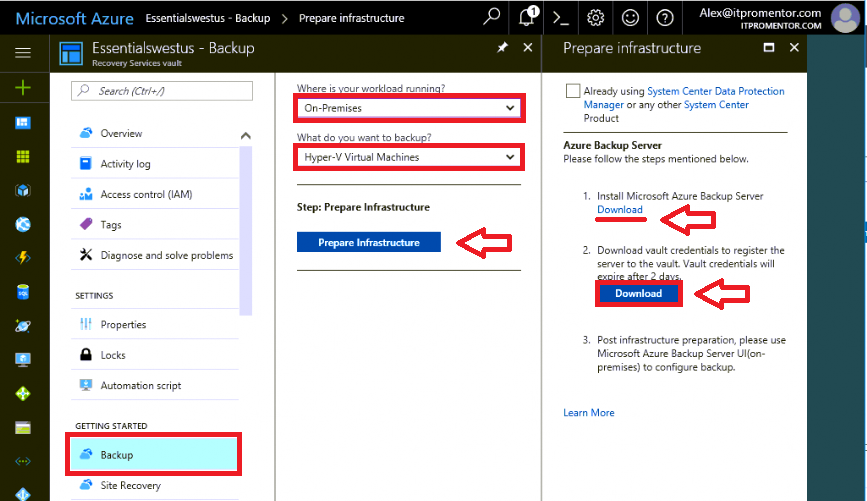
Choose On-premises and Hyper-V Virtual Machines. Click Prepare Infrastructure. The next blade will contain links to download the software, as well as your vault credentials.
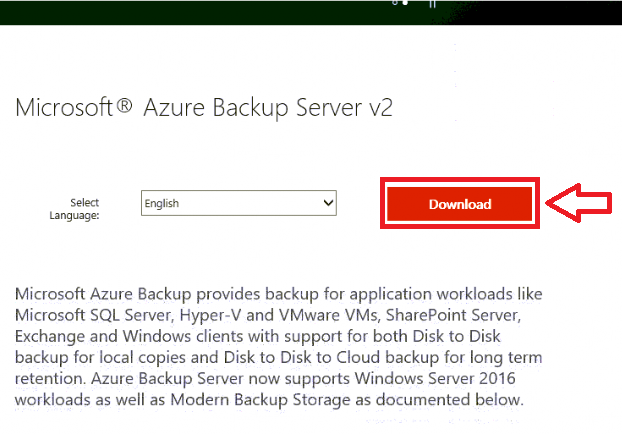
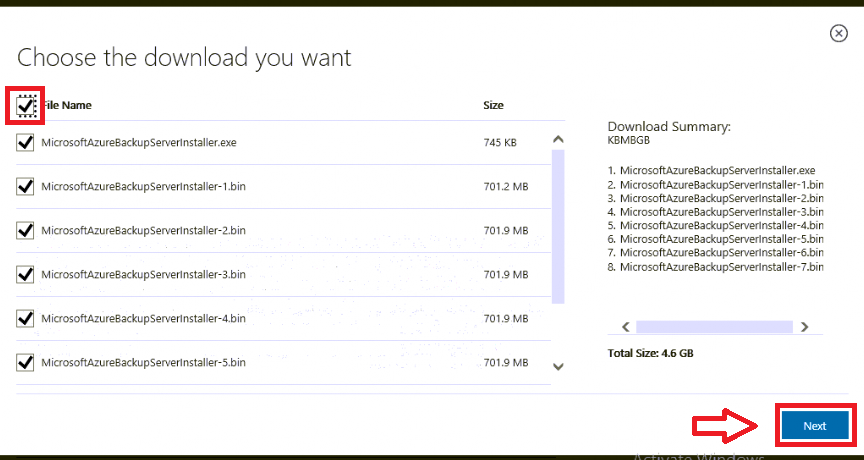
Step 3. Download the software and vault credentials
The software has several packages–be sure to download them all.
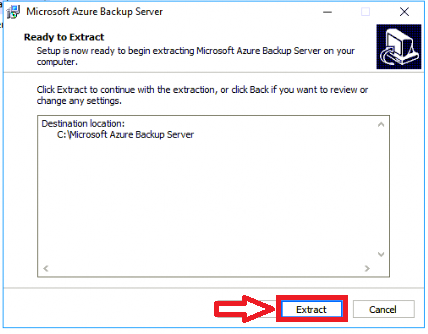
Step 4. Extract the software
The exe file is a self-extracting package, unzipping the contents of all the .bin files into an installation directory (defaul is C:\Microsoft Azure Backup Server). Open the installer and step through the Wizard: Next, Next, Extract.
At the end of the extraction you have the option to launch setup.exe. Finish.
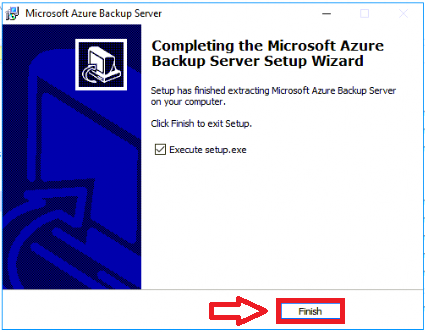
Step 5. Complete the install wizard, including MARS agent
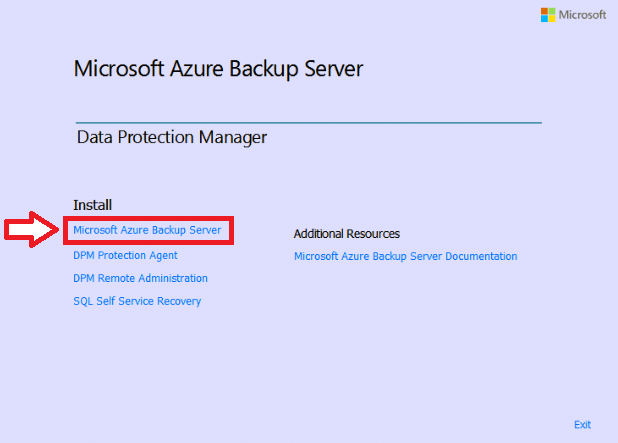
Now pick the option to Install Microsoft Azure Backup Server.
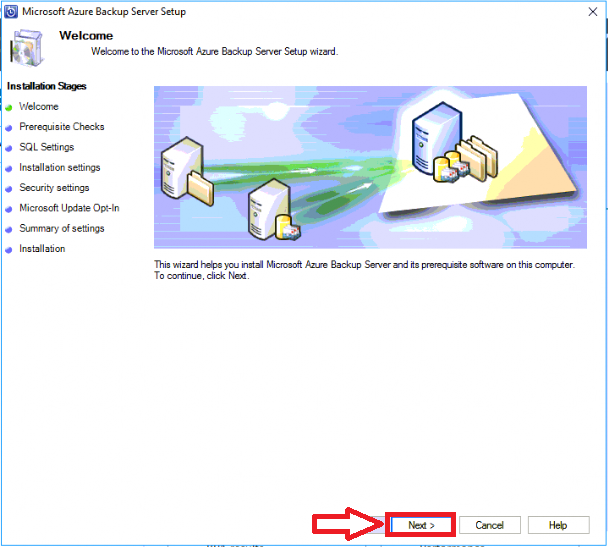
Step through the wizard. Next.
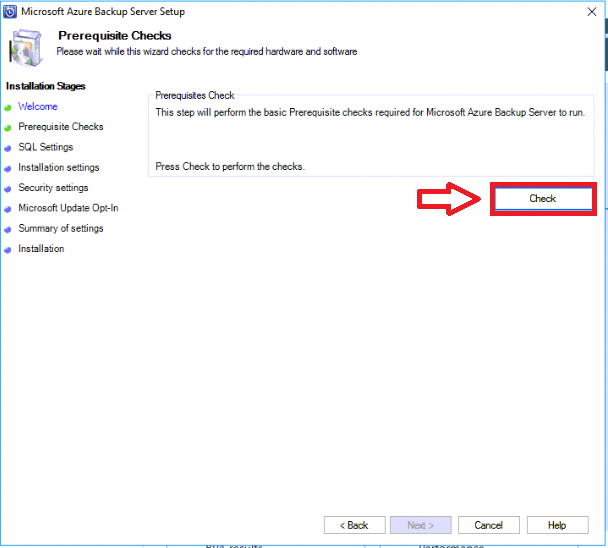
Since you have taken care of the pre-reqs, you can hit Check (it will pass), then Next.
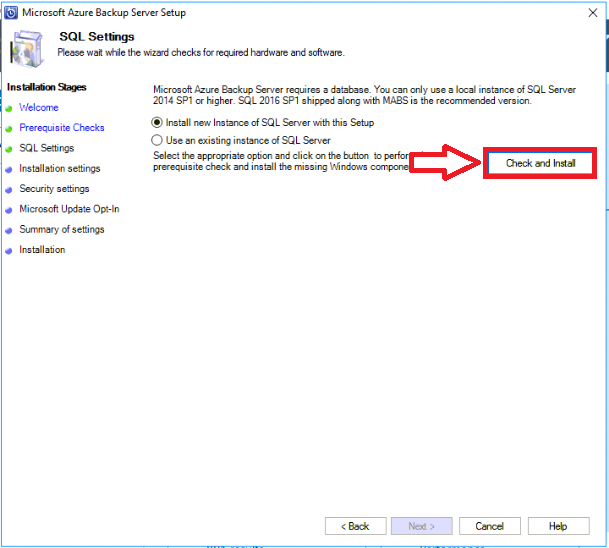
Most customers will just choose to install a new local SQL instance. Check and Install and then Next to proceed through the wizard.
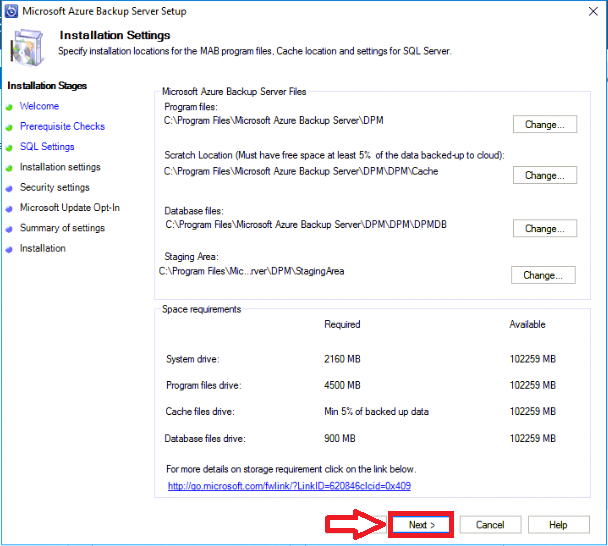
Defaults are good enough for me, if you need to change, do so now, then Next.
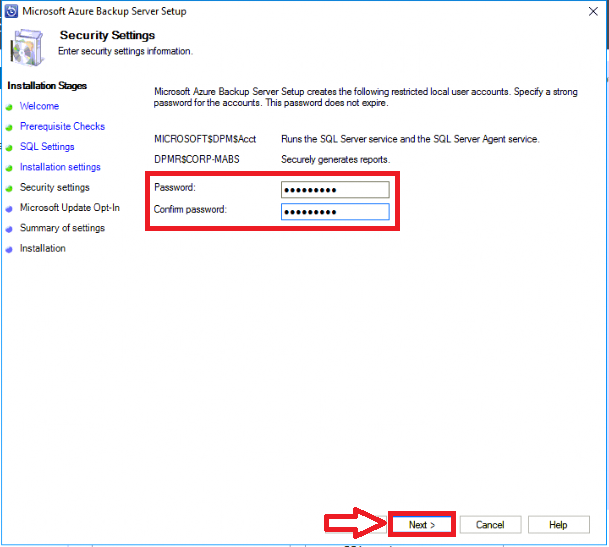
Pick a password for the local SQL service account. Be sure this is recorded somewhere safe. Next.
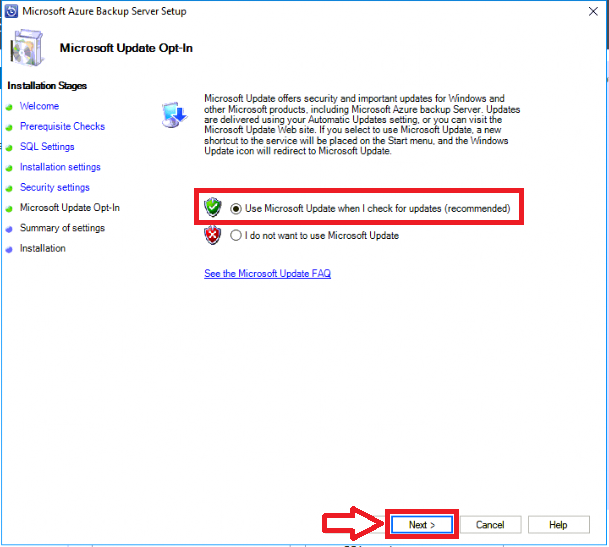
Select the Update option (recommended), and Next.
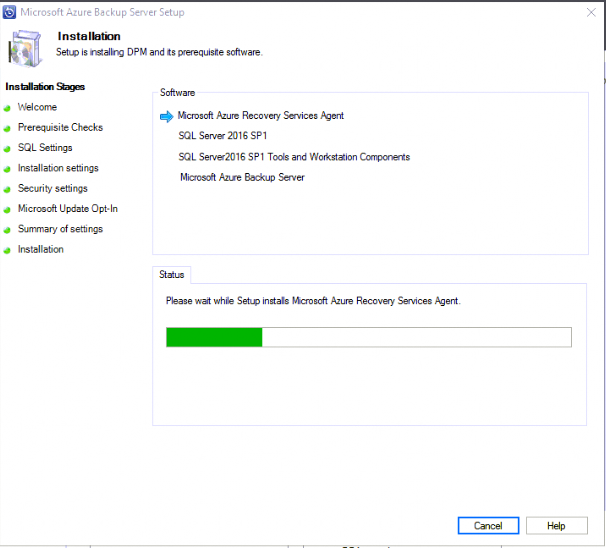
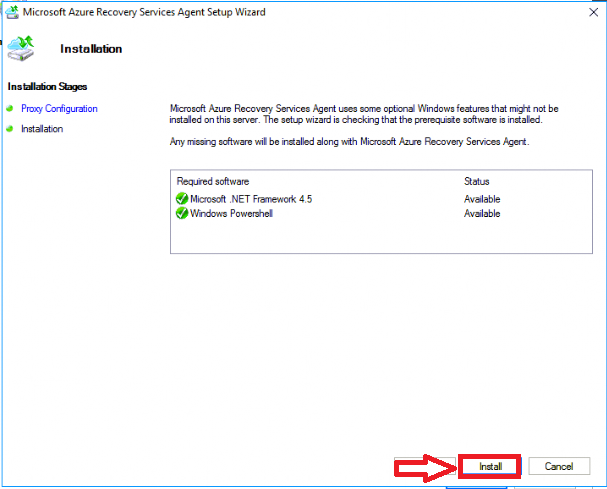
When you get to the install screen, the first thing it will do is install the MARS agent, just like you would when setting up normal Azure Backup.
It will launch the MARS agent install, so click Next and then Install.
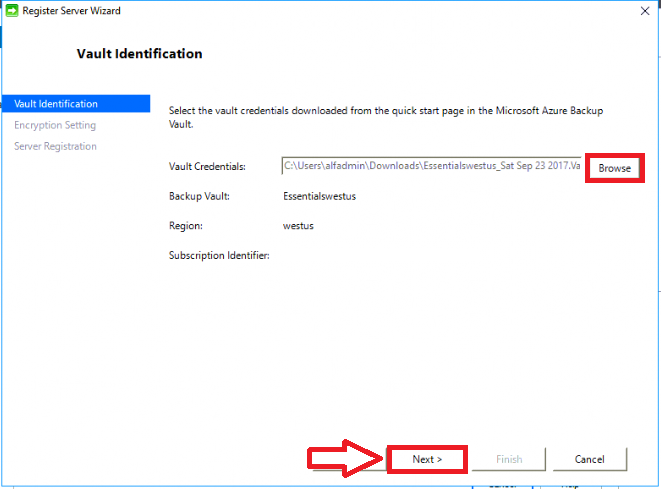
When it is finished, click Next again, and you need to provide the vault credentials, which you downloaded earlier. Browse to find it, then click Next.
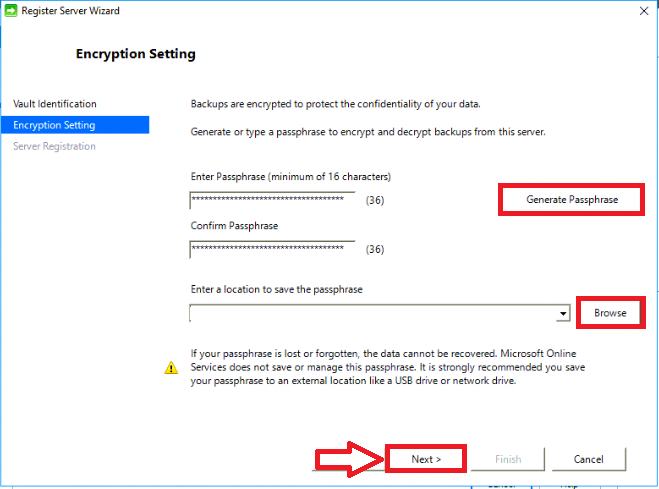
Last, you setup an encryption passphrase, if you choose to Generate Passphrase and save it to a file, then be sure it is saved somewhere safe and secure. Next.
After the MARS agent configuration, it will continue through the rest of the installation, which seems to take forever. Go get lunch.
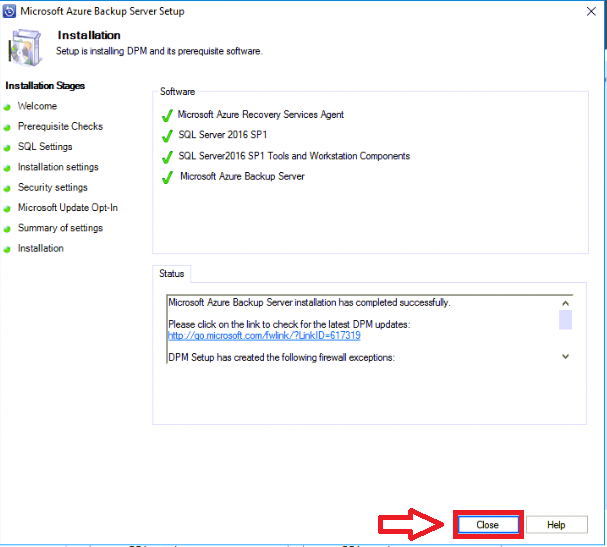
Eventually you can Close. This is the end of the installation process. We will look at configuring the Azure Backup Server in the next article.
Comments (2)
Hi Alex, I wish to setup a similar environment can you please elaborate if I need to any other configurations to be able to backup Windows 10 Clients laptops in my organisation domain.
Do I need a domain controller or just the Windows Server 2012/2016 running in the VM Azure portal and follow your guide?
Thank you
Not sure I follow the heart of the question here–typically you would use the MABS Server if you have on-premises domain-based resources to protect, and you wanted an on-premises based backup that also happens to replicate images to the cloud (for offsite DR purposes). If you have cloud-based resources such as VM’s running in Azure, then you can backup those systems directly using Azure backup to another datacenter region, for example (you would not use MABS for those systems). It almost always makes sense to have a local DC (even a very small server) if you are providing and protecting premises-based resources, even if you have a primary DC and other applications running in a cloud or datacenter elsewhere.