Hyper-V Failover Cluster: MPIO & CSV Storage
Continuing our last post on Hyper-V Failover Clustering, we turn our focus from networking to storage. To bring storage into the picture, we will have to provision some volumes from Storage Spaces, our SAN or other Shared Storage device. This varies by vendor, so see their documentation for more details.
However you do it, just be sure to provision at least one or two large volumes for holding your virtual machine files, and another (very small–1 or 2 GB) disk as your Quorum (a.k.a. Witness) Disk. You can also configure individual storage volumes for each VM, for example, if your storage vendor uses SAN-level snapshots for replication or backup.
Here is summary of the configuration steps required on the cluster servers:
- Step 1: Bring Disks Online & Enable MPIO
- Step 2: Initialize Disks & Format Partitions
- Step 3: Add Storage to the Cluster
- Step 4: Optional Tuning
Step 1: Bring Disks Online & Enable MPIO
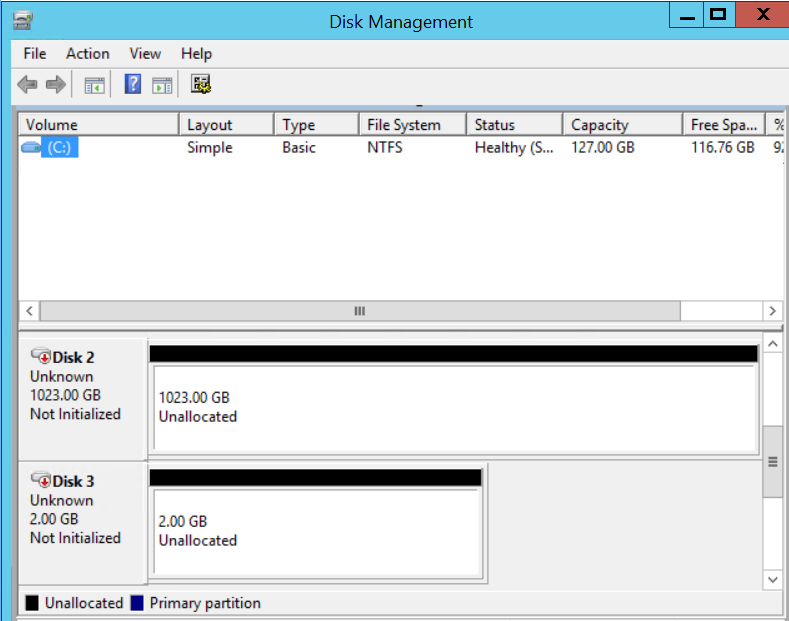
To start, you might take a peek inside Disk Management on one of the Hyper-V servers. If prompted to online/initialize disks, cancel–just look at the disks for now. There appears to be two of each one! Confused? That’s because you have two separate storage paths running into each host.

Without MPIO enabled, Windows cannot differentiate between the disks, and it does not yet understand when two paths are referring to the same logical entity. You should already have MPIO installed from earlier. That was done with this command:
Enable-WindowsOptionalFeature –Online –FeatureName MultiPathIO
Now you will need to actually turn it on. We can also bring our disks online at the same time. Run the following on both Hyper-V hosts:
#Bring Disks Online
Get-Disk | Where-Object IsOffline –Eq $True | Set-Disk –IsOffline $False
#Enable Support for MPIO
New-MSDSMSupportedHW -AllApplicable
Restart-Computer
That was easy. If completed correctly, Disk management should look a little better after that reboot.
Step 2: Initialize Disks & Format Partitions
You should only need to execute these next commands once–from just one of the two hosts.
#Initialize Disks & Format Partitions
$NewDisks=Get-Disk | Where-Object PartitionStyle -Eq RAW
Initialize-Disk -InputObject $NewDisks -Confirm:$False
Get-Partition | Where-Object NoDefaultDriveLetter -eq $True | Format-Volume -FileSystem NTFS -Confirm:$False
Step 3: Add Storage to the Cluster
Now we have to make this storage available to the cluster. Again, this should only be required to run against a single host in the cluster. It used to be that you had to manually specify a quorum disk, but since 2012R2 that now happens automatically. So you just need to find available disks and turn them into CSV’s, like this:
#Add Cluster Storage & Create CSV’s
Get-ClusterAvailableDisk | Add-ClusterDisk
Get-ClusterResource | Where-Object {$_.OwnerGroup –eq “Available Storage”} | Add-ClusterSharedVolume
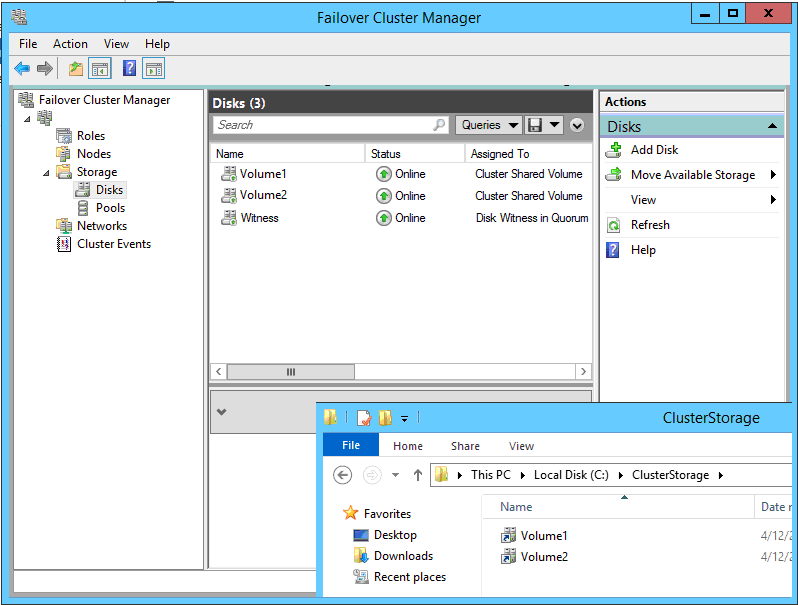
Your disks should now show up in the Failover Cluster Manager, and become visible in C:\ClusterStorage.
Step 4: Optional Tuning
Although it is optional, you can enable a CSV Block Cache, which can improve read access for your Cluster Shared Volumes. In 2012 this had to be turned on for each volume, now in 2012R2 & 2016 it is on by default, but you still need to set the size (default is 0). Microsoft recommends 512 MB for Hyper-V. To set the new size:
#Set CSV Block Cache Size
(Get–Cluster).BlockCacheSize = 512
One other thing you might want to do for your cluster is to enable the default storage locations for both Hyper-V VM files, and Virtual Hard Disk files.
#Set Default Virtual Machine Storage Locations
$Host1=”<Host1Name>” # (e.g. HVC-NODE1)
$Host2=”<Host2Name>” # (e.g. HVC-NODE2)
$VMPath=”<VMFilesPath>” # (e.g. C:\ClusterStorage\Volume1\ProductionVM)
$VHDPath=”<VHDFilesPath>” # (e.g. C:\ClusterStorage\Volume1\ProductionVHD)
set-vmhost -ComputerName $Host1 -VirtualHardDiskPath $VHDPath -VirtualMachinePath $VMPath
set-vmhost -ComputerName $Host2 -VirtualHardDiskPath $VHDPath -VirtualMachinePath $VMPath
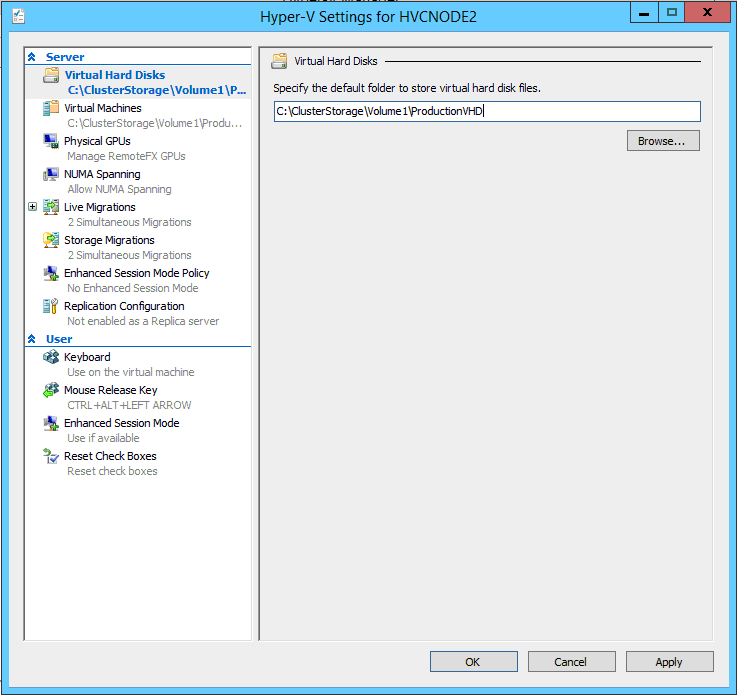
These correspond to the settings found in Hyper-V Manager > Hyper-V Settings:
Last of all, just don’t forget to run cluster validation–you would need it in order to get Microsoft support if ever that is required.
Thanks for following along, and good luck with your clustering!

Leave a Reply