2016 Essentials Integration: Azure Virtual Network, part 1
This is one of the new features I am most excited about in Windows Server 2016 Essentials Experience. Today we are going to setup a connection to an Azure Virtual Network. With this technology, we have the ability to extend our on-premises server and domain infrastructure into the Microsoft Azure cloud, and run additional virtual machines there, without buying any new hardware.
Azure Virtual Networks are perfect for running backup virtual domain controllers, replicating file shares via DFS to the cloud, hosting Line of Business applications, publishing RemoteApps, and more! It can also be your first step toward using Azure as a secondary / DR site.
We will split this topic into two separate posts: first, in part 1 we will set up the virtual network from the Essentials Dashboard, and in part 2 we will deploy a virtual machine into that network, and connect it to our on-premises domain.
Let’s get right into it.
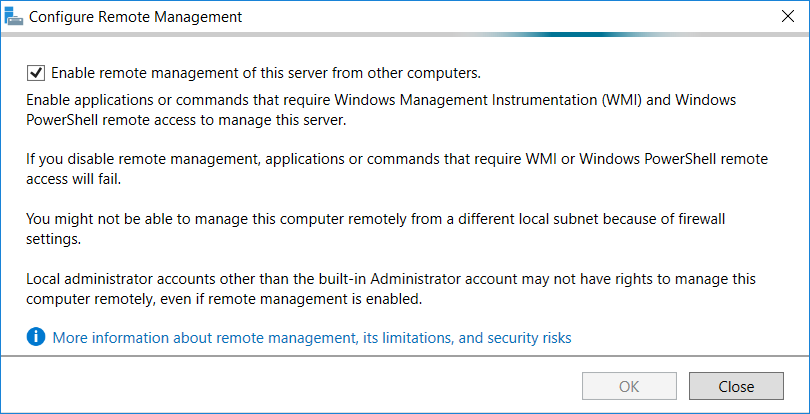
Step 1: Enable Remote Management
When you go to set up the Azure Virtual Network connection, you will need to make sure that you are allowing remote management features (or the wizard will fail). You can find this setting by opening Server Manager and navigating to Local Server from the left menu. In the right pane, find Remote management.
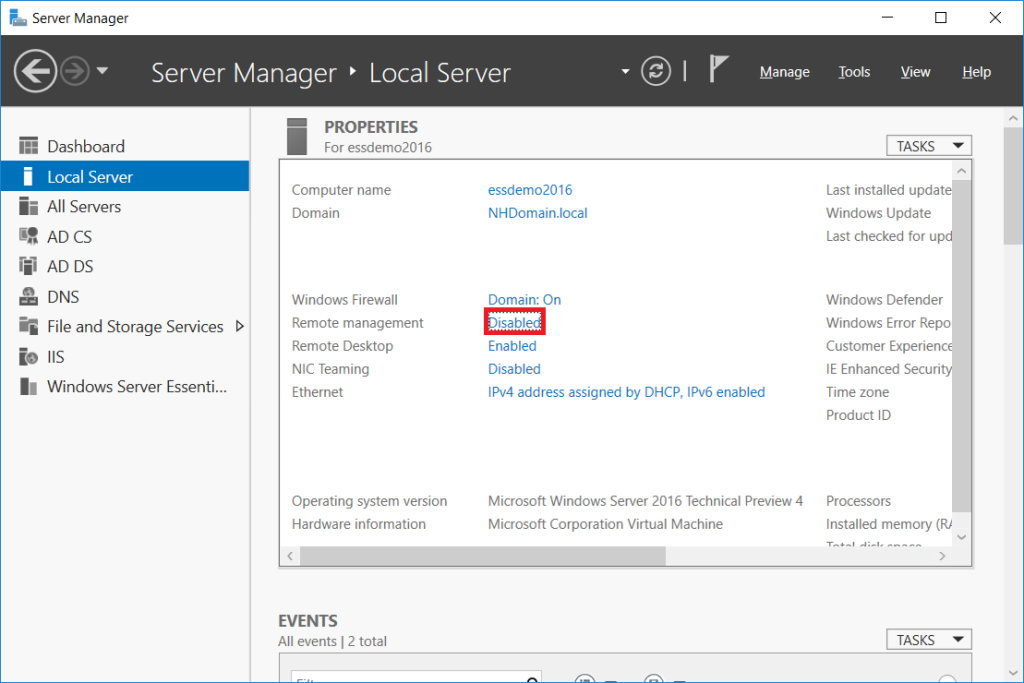
If it is set to Disabled, click on it to enable the features.
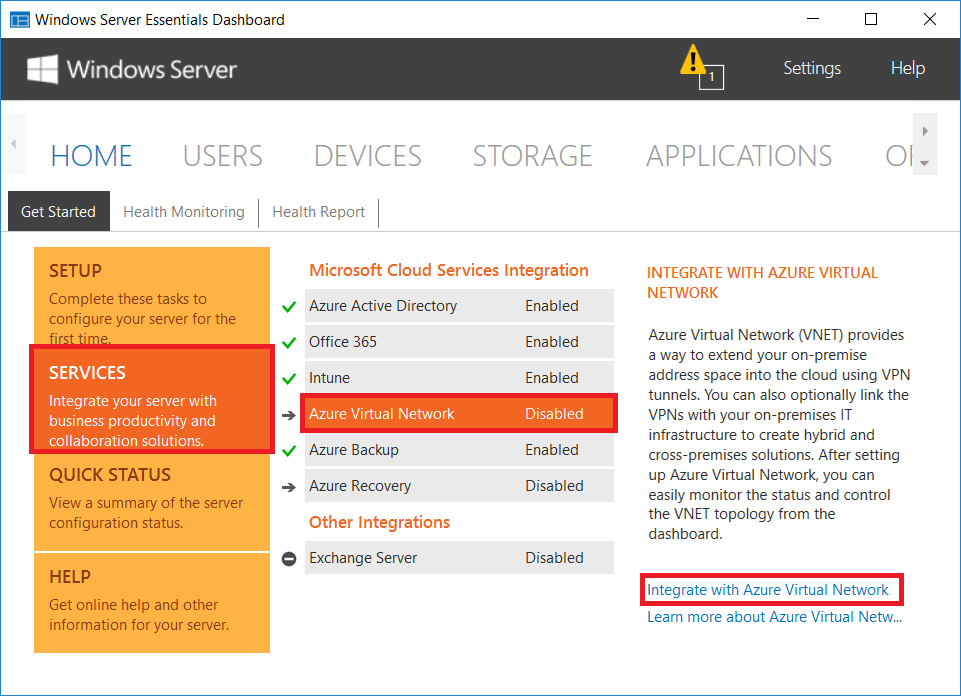
Step 2: Enable Azure Virtual Network integration
As has been the case with other Dashboard-available, wizard-driven cloud integration features, we return to the Essentials Dashboard, go to Services, find Azure Virtual Network, and click Integrate with Azure Virtual Network.
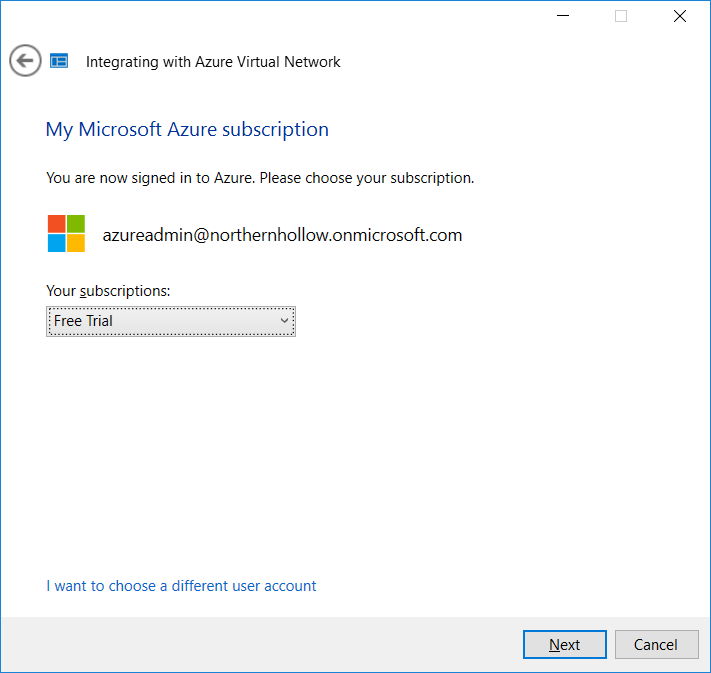
Now you will be prompted to sign into your Azure subscription. If you do not yet have one, they provide some web links to obtain a free trial (at the time of this writing it is a $200 credit to get you started). Be prepared, however–you do need to provide a credit card, even to sign up for the free trial. You can also buy your subscription / credits from an authorized Microsoft Partner.
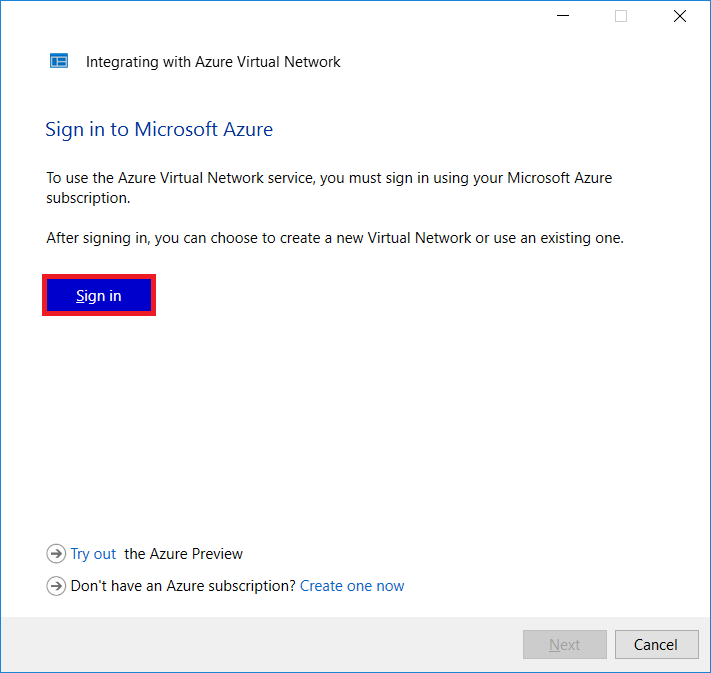
Having already set up my trial subscription prior to this, I am able to sign into my Azure account right from this wizard.
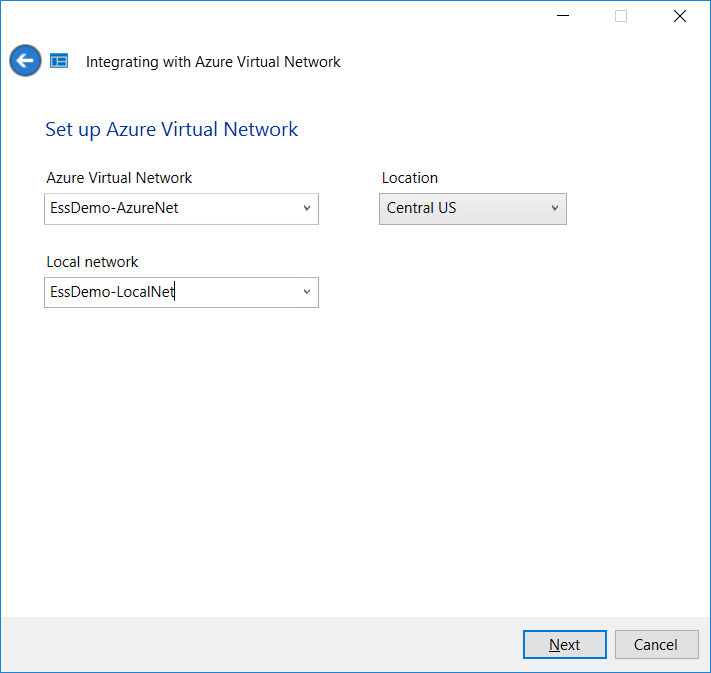
In this next step, be aware that it is only asking you to name the remote and local networks, not to provide an IP scheme (it will figure that out on its own). You can also pick a location–this will determine which datacenter / region to use for your virtual network.
Step 3: Configure your local firewall/router for the VPN
This step is where you have a choice to make–you can either let the Essentials Server handle the Site-2-Site VPN connection (it will use the Remote Access/RRAS features built-into Windows Server), or you may choose to configure the connection from your own on-premises firewall/router. For the purposes of this demo, I am just going to let the Windows Server be our connection endpoint.
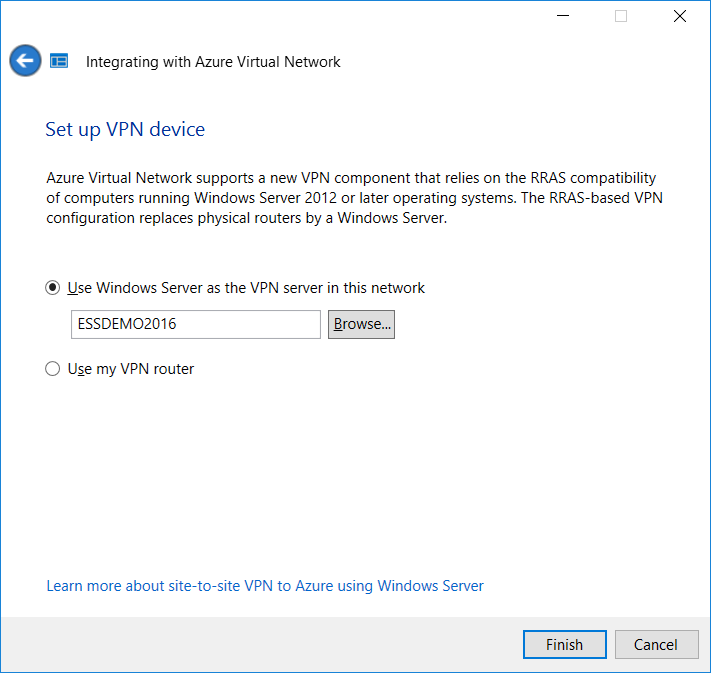
However, I do not actually recommend using the Windows Server / RRAS method (where the local server acts as the VPN device). Other devices on your network will not, by default, have the routing required to contact the remote network unless you initiate it from your default gateway device (usually your firewall). Azure provides some scripts to make the process easier for configuring certain makes & models, but you can also find step-by-step instructions online–just search for your firewall’s make/model number with the keywords “Azure VPN.” Make your selection–Use my VPN router–and click Finish.
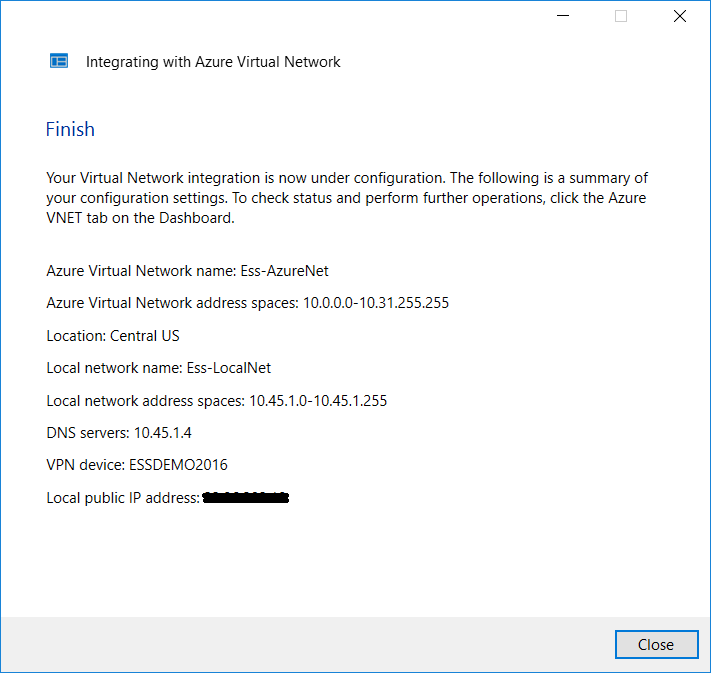
Review the configuration and click close. Notice that it automatically configured an Azure Virtual Network address space outside of the detected on-premises address space.
Step 4: Monitor the progress on-premises & online
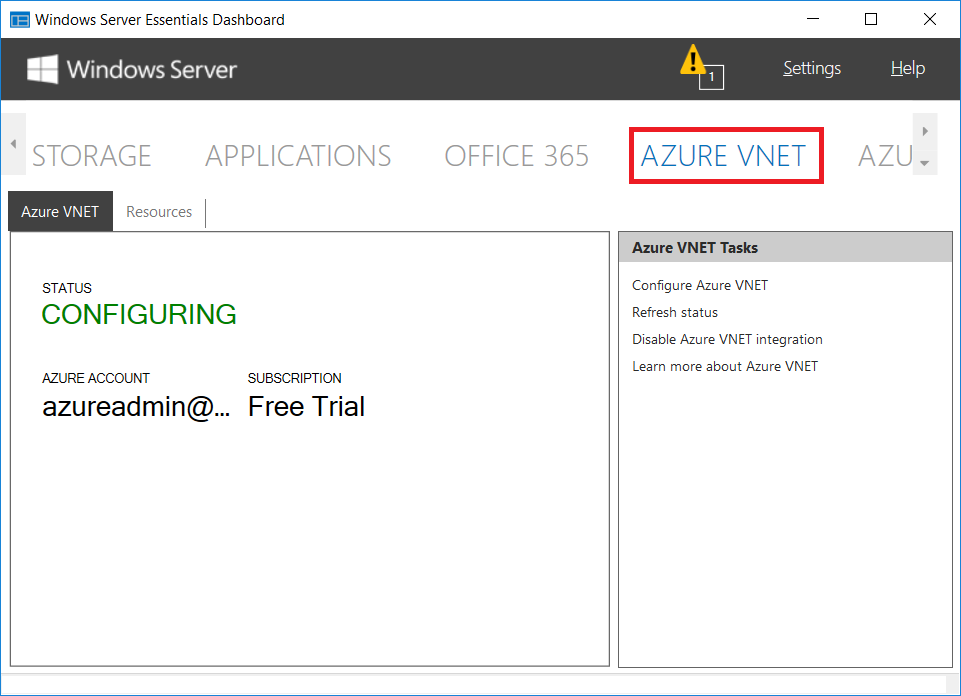
Now let’s see what we’ve got in the Essentials Dashboard… look at that! A new plugin has been activated for AZURE VNET. As you can see, the virtual network still has a status of CONFIGURING.
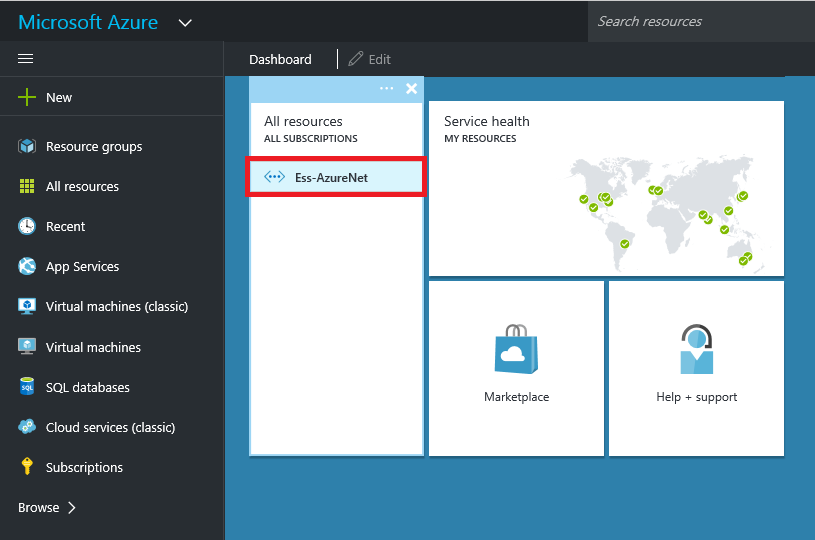
If we login to the Azure portal, we will see that our virtual network has been added. You can click on it to expand some additional details.
Very cool! With the networking details up top, the VPN topology is shown in the lower pane, and if we click on the symbol between our gateway and the local network on the Site-to-site connection, we can see in the right-most pane that the virtual network is still Not Connected.
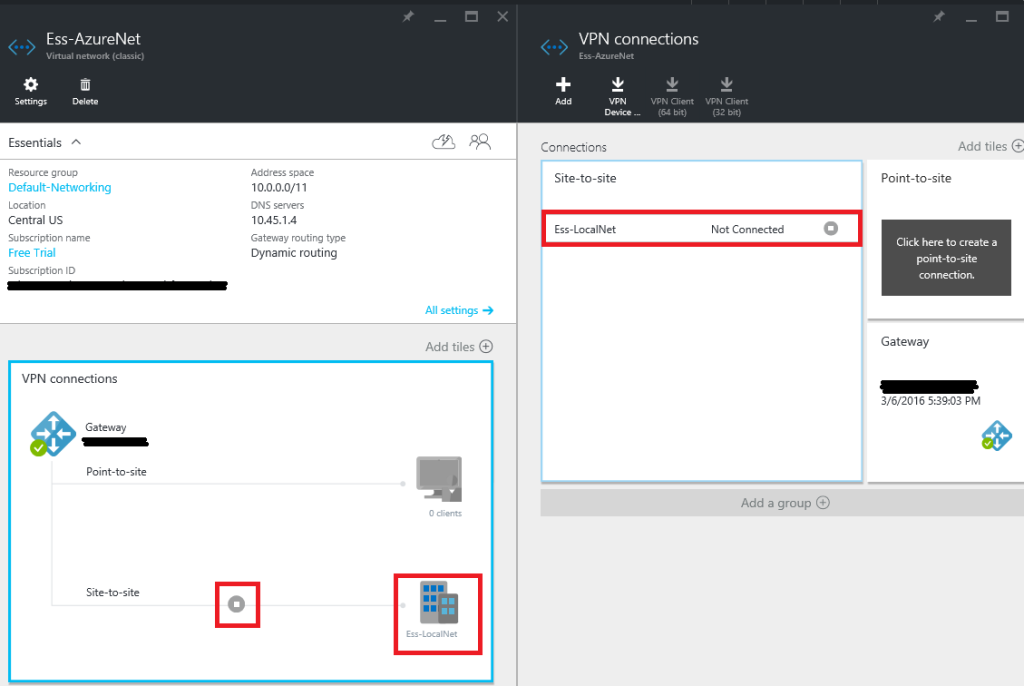
For now, that status is completely fine with us–it can take some time to provision the network and create a gateway connection with a static IP address. We can proceed to the next article and deploy a virtual machine while we wait for this process to finish up.
Leave a Reply