Migrating File Shares from SBS to Windows Server 2016 Essentials Experience
To copy files from a legacy file server to a new file server, whether 2012 R2 or 2016, the process would be the same.
Note: Some files shares might be better off in SharePoint, and users’ personal Documents Libraries can probably go to OneDrive. This could greatly reduce the amount of data you need to bring over to your new Windows Server. Here is the procedure I recommend:
- Review source server
- Prepare destination server
- Prepare & run the migration scripts
- Enable backup on the destination server
- Cut-over procedures
- Disable write access on source shares & re-run migration scripts
- Remove and/or update legacy group policies & logon scripts
- Disable source server file shares
- Implement BranchCache (optional)
An alternative to this procedure is to use DFS to add a replication group with a new target (the destination server), then eventually remove the source server from the replication group, when you go to retire it. If you choose to go that route, just be aware that DFS does introduce a layer of management complexity to a small business network that is largely optional. Furthermore, not all applications that store data on file shares will support DFS. For these reasons, I usually just go old-school and kick it with robocopy, which is the method described here.
Step 1. Review Source Server
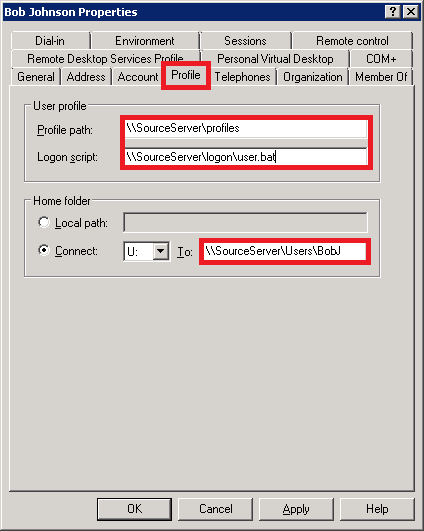
Review the source environment, and note down file share paths that are referenced in group policy & line of business apps/devices into a checklist–you will need to verify these at the time of cut-over.
- Group policy: login scripts, drive maps, redirected folders?
- User account properties / profile tab?
- Scan-to-folder functions on MFP copier/scanner/printers?
- Line of Business apps that refer to a file path?
Step 2. Prepare destination server
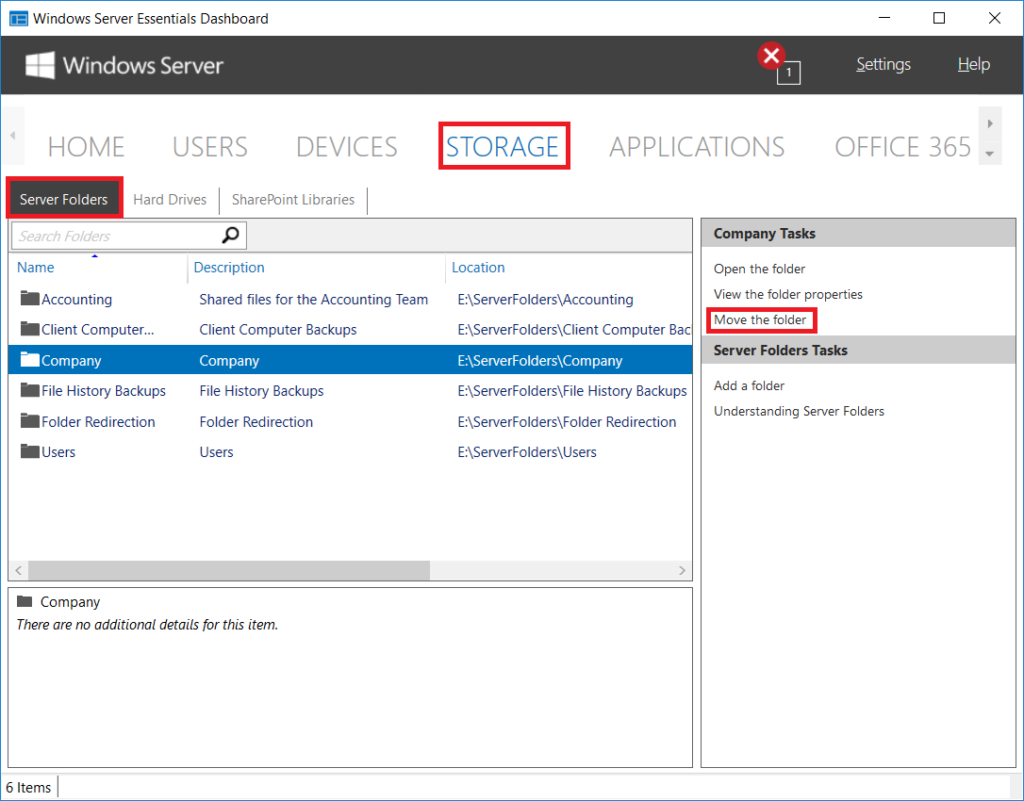
You should create folders, and enable them for sharing. For best practices, store the file shares on a volume separate from the OS partition (e.g. something like E:\ instead of C:\). In Essentials, these folders might be on C:\ by default, so you might have to open the Essentials Dashboard, go to STORAGE > Server Folders > Move the folder.
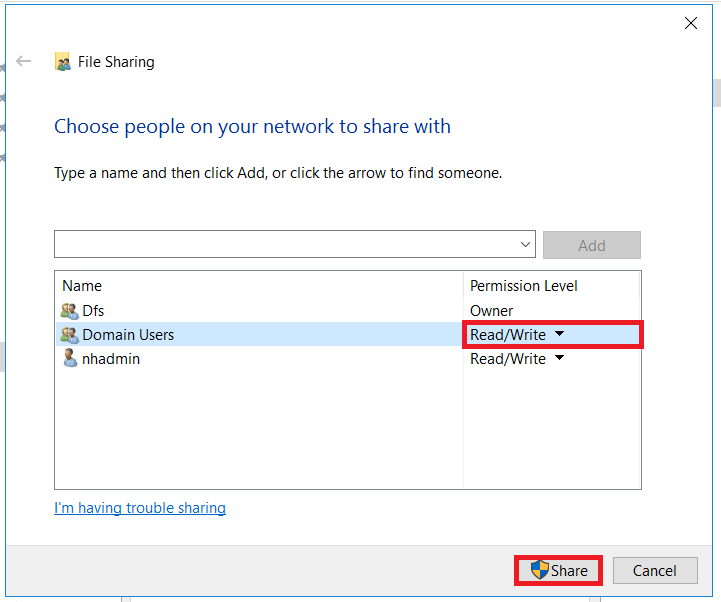
Otherwise, for Standard & Datacenter versions of Windows Server, you can just set them up manually in Windows Explorer. Right click the folder, Properties > Sharing > Share… and choose your permissions.
Step 3. Prepare & run the migration scripts
From the destination server, open Notepad and add a robocopy line for each top-level file share that you will be migrating. Save it to the desktop with a .bat or .cmd extension. Here is an example of the robocopy syntax that you can lift:
robocopy \\SourceServer\ShareName \\DesinationServer\ShareName /E /ZB /R:3 /W:3 /COPY:DATSOU /MIR /LOG:C:\Logs\Results-ShareName.txt /V /NP
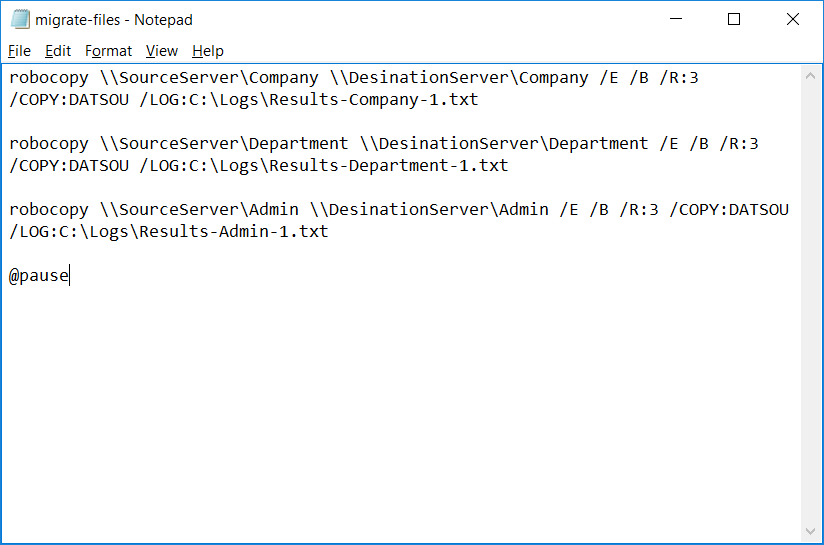
Your script will copy all files & folders from this list (including file attributes/security) from the source to the destination server, and log results in a plain text file at C:\Logs\. Personally, I like to add @pause to the end of the script so that the command prompt window remains open at the end of the operations.
To run the script, simply right-click from the desktop, and choose Run as Administrator. You can run this same script again later, and it will update the deltas (data that has changed since the initial sync).

Step 4. Enable backup on the destination server
Once the initial sync is complete, you will have most of the data that will from here on forward be present on the destination server. You can enable your own third-party backup solution to capture this data, or you can enable Windows Server Backup and even Azure Backup.
A. Windows Backup using the Essentials Dashboard
From the Essentials Dashboard, go to Home > Get Started > Setup > Set up Server Backup. Complete the wizard to protect your server data, including the system state.
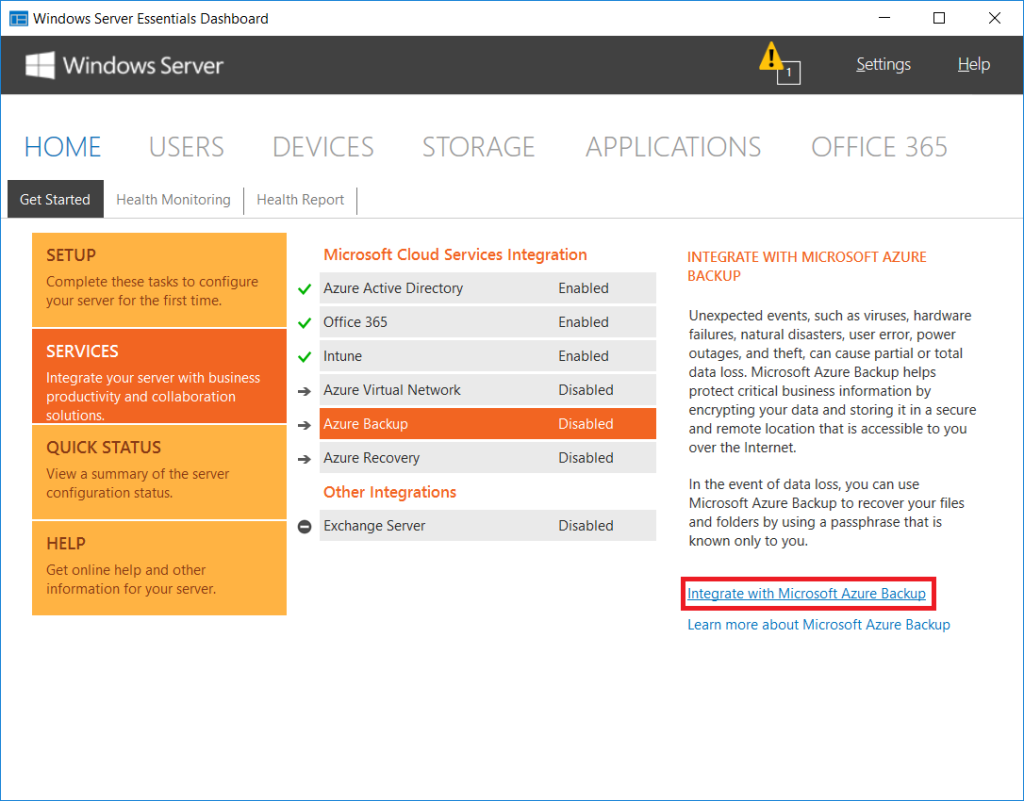
B. Azure Backup for offsite protection of data
Windows Essentials Dashboard also offers an integration for Azure Backup, so you can have offsite protection of your server data (file & folder backup only–not including the system state). Azure Backup does require an Azure subscription, but the storage is very affordable. See Azure pricing page for more details.
To enable, go to Dashboard > Home > Get Started > Services > Azure Backup.
Step 5. Cut-over procedures
Just before the cut-over, let users know what to expect: file shares will be unavailable for write access while you are finalizing the migration. Then the file shares on the old server will become permanently unavailable once the new server is made accessible.
A. Disable write access on source server & re-run migration scripts
Once you are ready to initiate cut-over procedures, you can disable write access on the source file shares. Right click each shared folder on the source server, go to Properties > Sharing > Share… and change Permission Levels to Read.
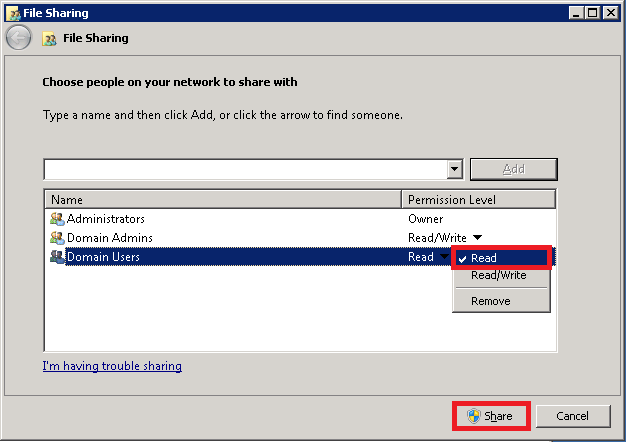
This ensures files on the source server cannot be changed during the final sync. Next, re-run the migration scripts one more time to capture changes since the initial sync.
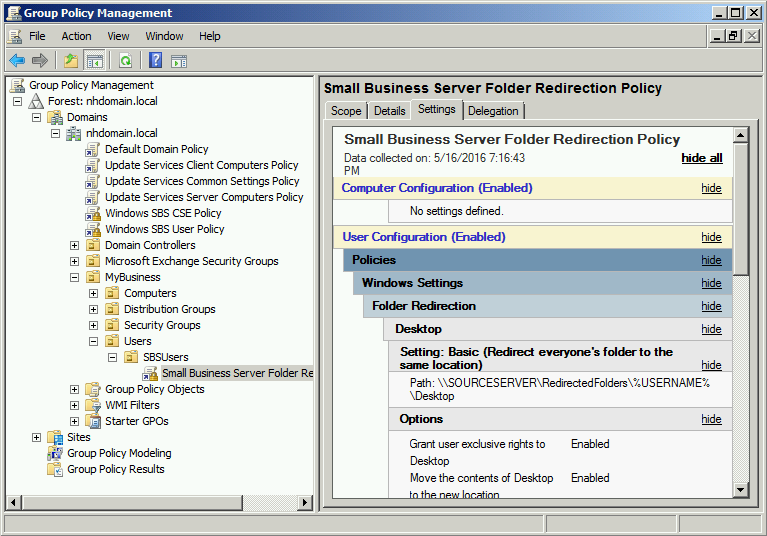
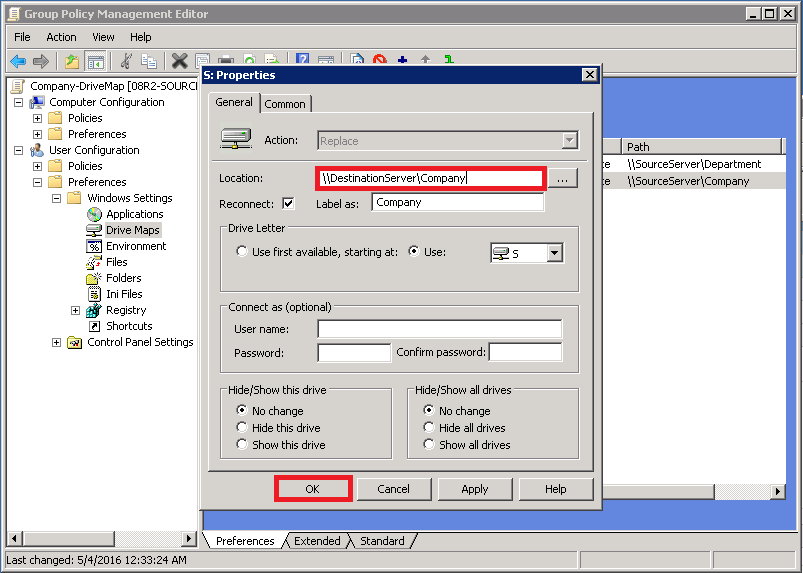
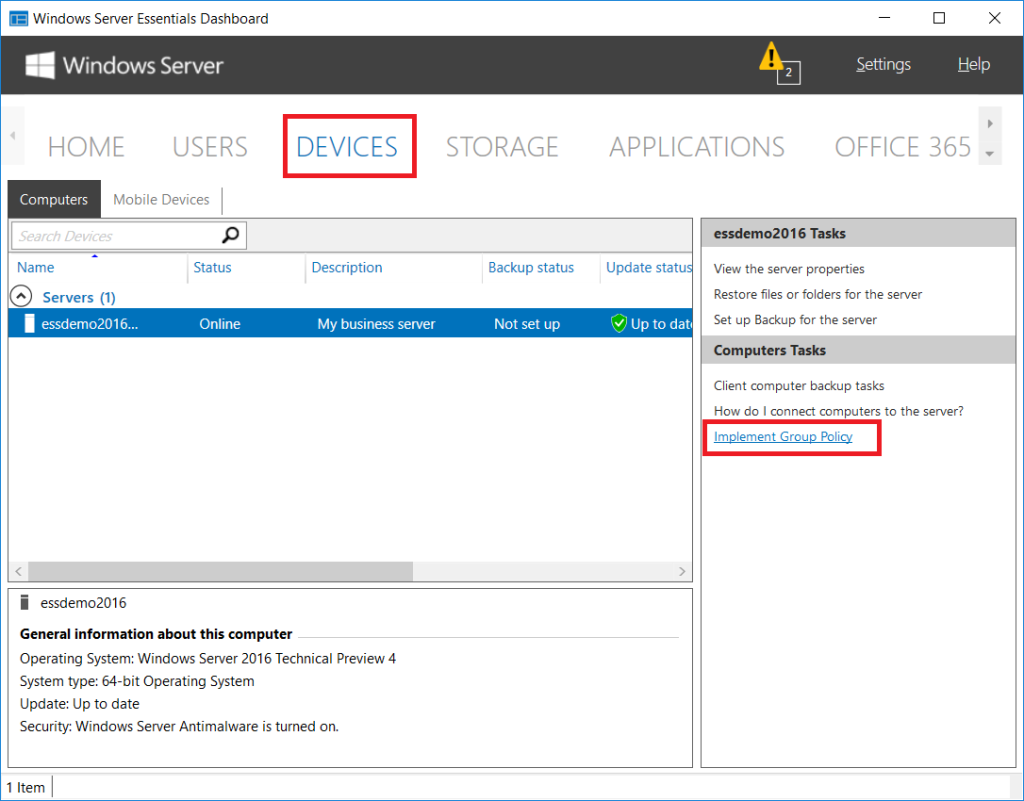
B. Remove and/or update legacy group policies & logon scripts
Now you are ready to go back through your dependencies checklist, and update the file path for anything that referred to the <SourceServer>, and set every instance to your <DestinationServer> instead.
For Small Business Server, you can remove all the SBS-specific policies, as shown below.
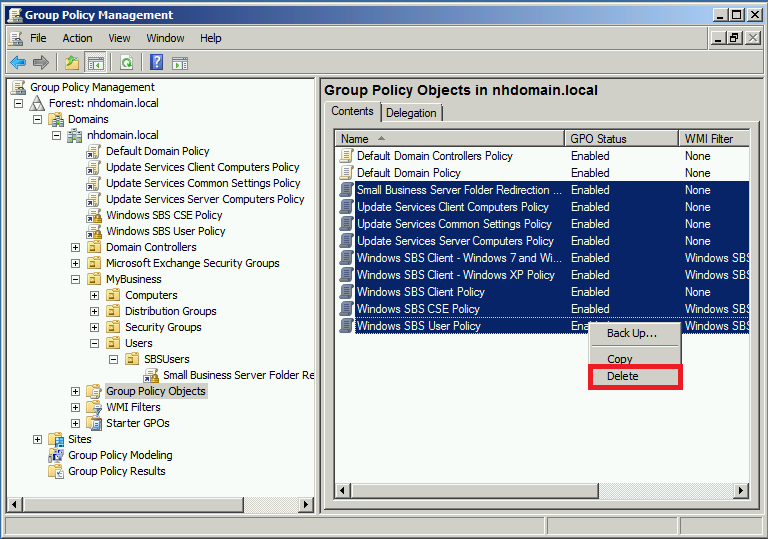
From the Windows Server Essentials Dashboard, you can navigate to DEVICES > Implement Group Policy.
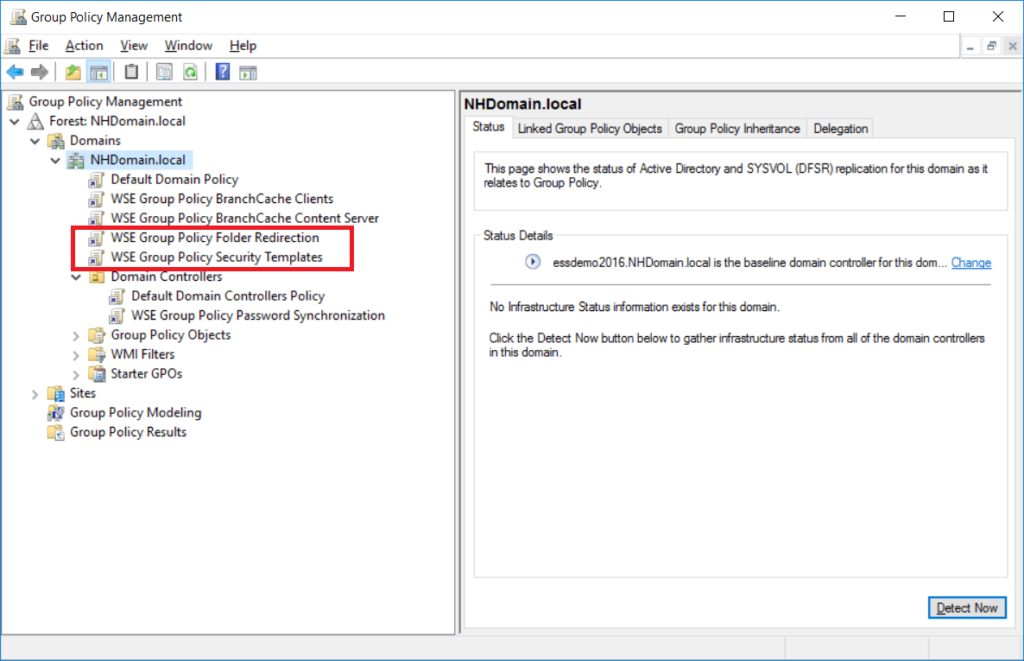
In Group Policy Management, you can confirm that the new WSE policies have been applied.
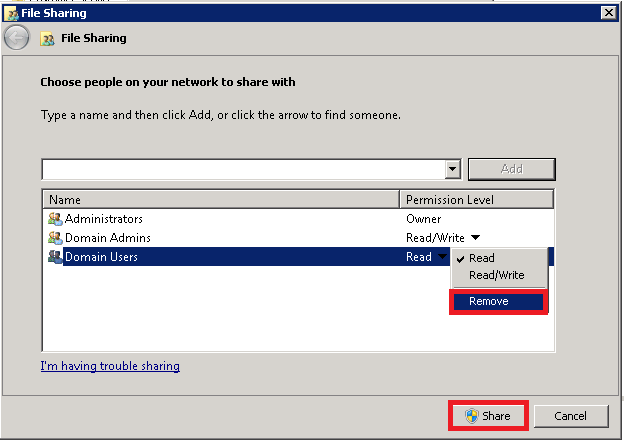
C. Disable source server shares
Finally, to disable the source file shares entirely, follow the same process as before when disabling write access, but choose Remove rather than Read or Read/Write.
At this point, the source server’s file shares are no longer available, and you should be able to access all file shares on the new server successfully. Client computers may need to reboot to get the updated login scripts, group policies and so forth. In some cases, shortcuts or manually mapped drives might also need to be updated (if you find any instances of this, remove them and set programmatically from Group Policy, instead).
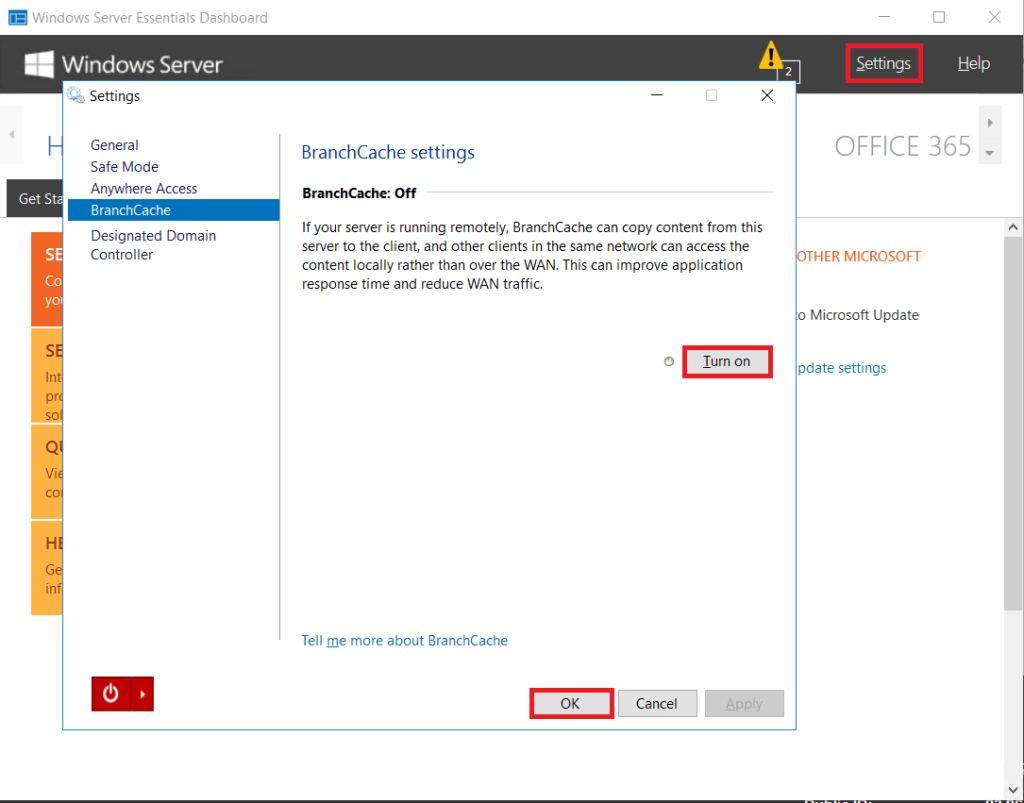
Step 6. Implement BranchCache (optional)
If your Windows Server Essentials instance is hosted in Microsoft Azure or at another service provider’s remote datacenter, you can optionally enable BranchCache, which will allow you to cache server content locally. This requires Windows Enterprise licensing for the client machines. From the Dashboard, go to Settings > BranchCache.
This concludes the file share migration process.

Comments (7)
NICE ARTICLE
use robocopy
As always, excellent article Alex!! thanks much for making our life easier.
hmm, I used DFS to replicate files from SBS 2008 to Windows Server 2019.
It seems to have worked, I just needed to recreate the shares on Server 2019.
really ? why don’t you just use cut and paste
lol, you make me laugh.
One added point. Robocopy should be run multiple times with the subsequent times using /xo as an option to replace any files that were incomplete or corrupted the first time. Corrupted files are dated 1980 so they will be replaced automatically with a good file that has a newer date.