Migrating DHCP from SBS to Windows Server 2016
If you have a small network without much complexity (e.g. single subnet, a firewall, a few devices), you might consider having DHCP handled by the firewall rather than your new Windows Server–in that case, see Option 1 below. Otherwise, if would rather continue managing DHCP from Windows Server, then you can just follow the steps for Option 2.
Microsoft is starting to recommend Option 1 for most small business networks. The goal, I believe, is to further de-emphasize the role of Windows Server in the small to midsize business, as more services move to the cloud. For very small networks, I agree with this approach. However, I typically use Option 2 in practice. This is because I tend to work with larger or “mid-size” networks, where Windows Server has a stronger presence and we may be dealing with multiple subnets and routers.
Option 1: Move DHCP Services to your Firewall/Router
This option assumes you have little or no special DHCP settings or server/scope options to bring over. If you do, you might want to consider using Option 2, instead. Otherwise, begin by deactivating the DHCP scope on the source server.
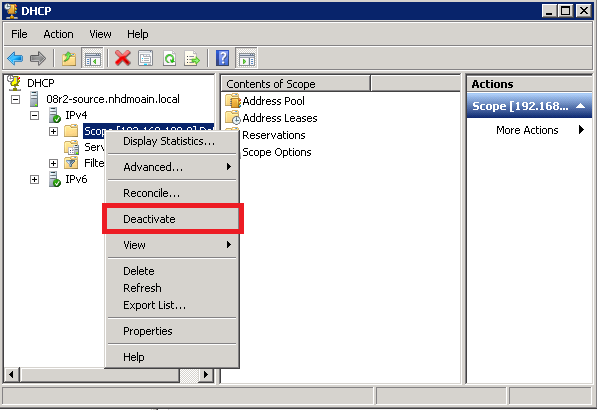
Step 1. Deactivate the scope
Open the DHCP console on the source server, right-click on the scope and choose Deactivate. Note: new IP addresses will not be handed out until you activate the service on your firewall.
Step 2. Activate DHCP on your router/firewall
Every vendor is a little bit different. I recommend WatchGuard firewalls to all my clients, so that is what I am going to show here, but you can also just refer to the support / documentation for your own vendor–Cisco, Sonicwall or whomever.
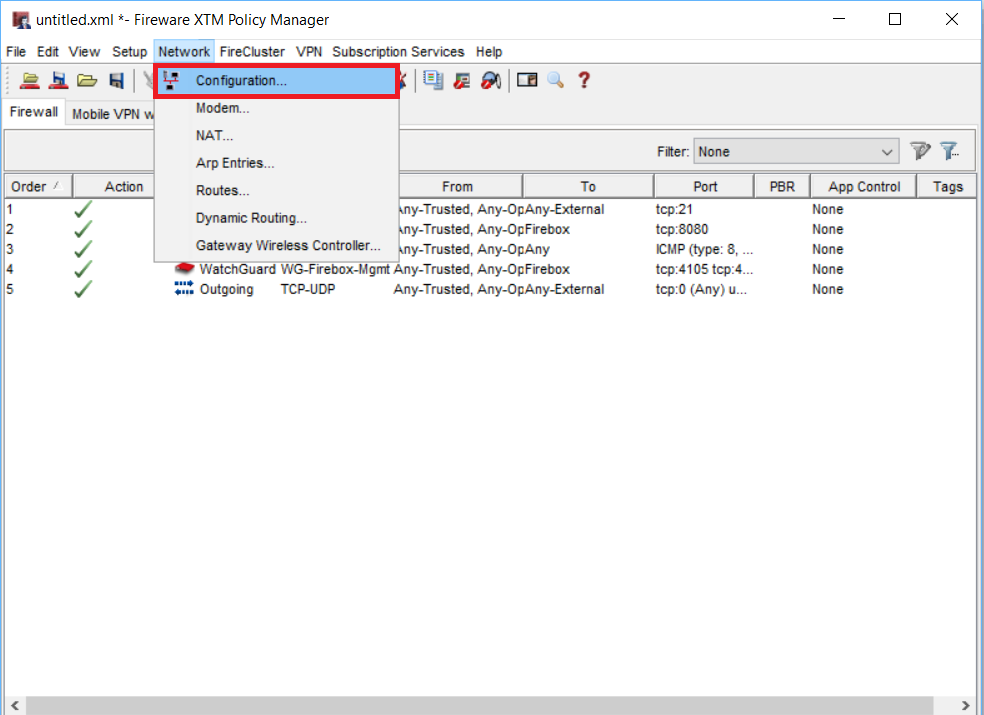
Typically, you will find DHCP somewhere under the “Network” area in your firewall’s settings.
You may also have to configure the actual Ethernet interface that connects to your LAN (referred to as the “Trusted” interface in WatchGuard).
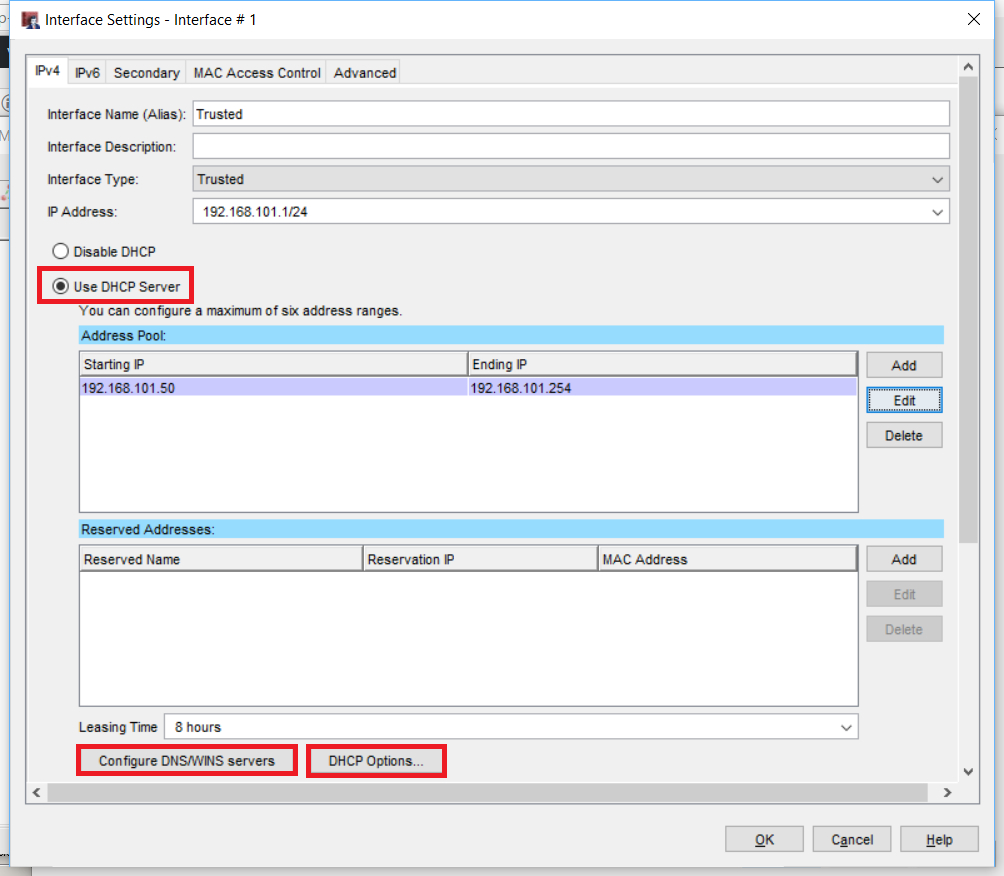
In this case, we would just select Use DHCP Server to enable the services. Make sure to exclude any statically set IP addresses from this range, such as your server, printers, or anything else that might be set with a static address (my range starts at .50 in this example, to leave room for statically configured devices).
We need to specify the DNS servers for this network–so do not skip that setting! Note: we also have a place to add Reservations (if applicable) and DHCP Options, as well–in case you have a phone system that requires them, for example. Refer to your source server’s configuration and try to get all these settings to match.
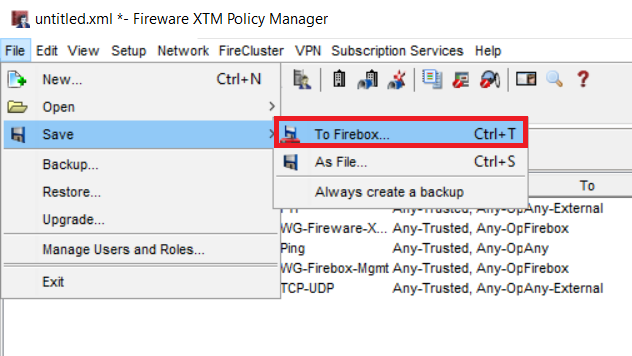
Finally, do not forget to save your configuration. Many vendors allow you to manipulate settings in memory, but they won’t actually go live, or be made permanent, until you save the changes.
Step 3. Unauthorize the server
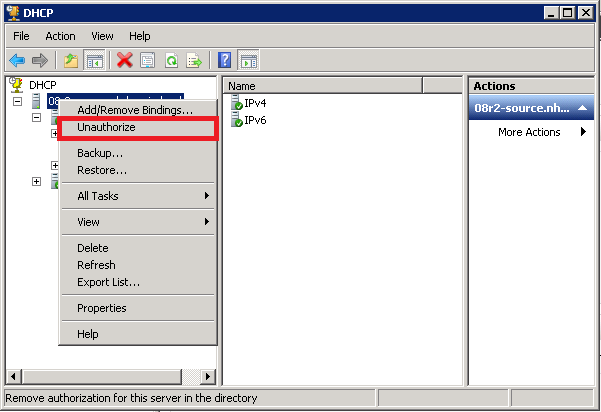
Once you are successful with the above steps, you can permanently disable the legacy DHCP service by right-clicking on the server in the DHCP console and choosing Unauthorize.
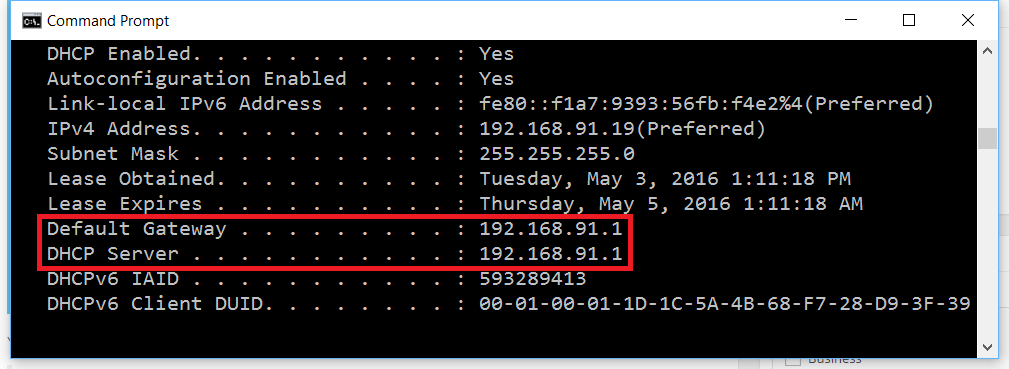
Last, you should verify things are working by having client computers & devices reboot to obtain a new IP address lease from the firewall. In this example, we can see from running ipconfig /all that the default gateway (the firewall) and the DHCP server are the same.
Option 2: Move DHCP Services to your new Windows Server
This can be accomplished in the GUI or in PowerShell. I will share both methods here.
Step 1. Prepare the destination server
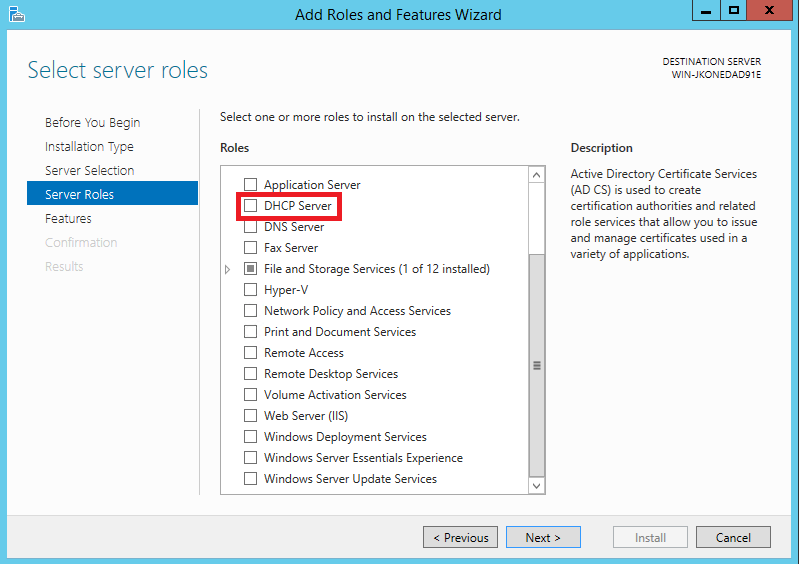
You will want to add the DHCP role to your destination server. From PowerShell (as Administrator):
Install-WindowsFeature DHCP -IncludeManagementTools

You can do this from Server Manager also: Dashboard > Add roles and features.
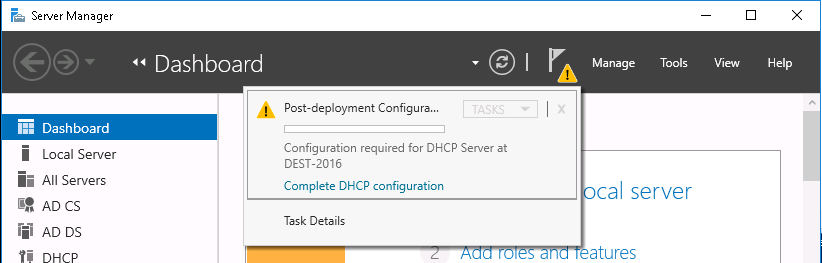
Check tasks in Server Manager, as you will need to click Complete DHCP configuration. Just step through the wizard and click Commit.
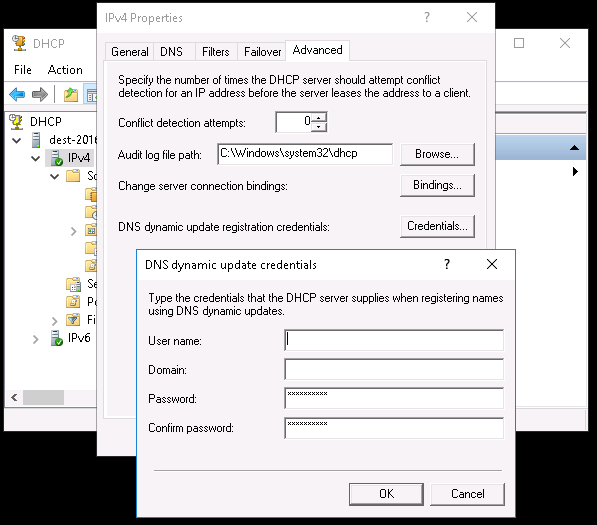
Set the credentials for DNS dynamic updates from the DHCP console, right-click IPv4 > Properties > Advanced tab > Credentials…
Step 2. Backup settings from the source server
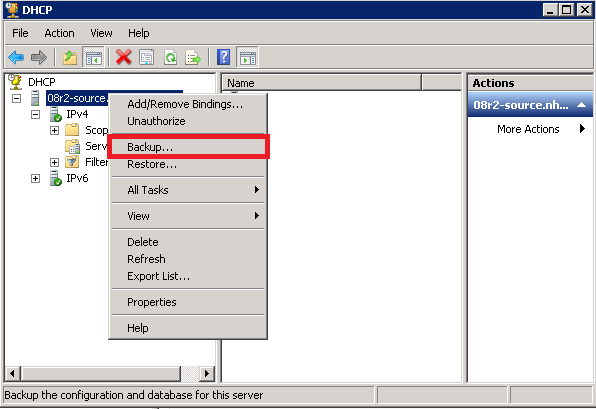
This is a classic export/import scenario. To back up the DHCP settings on the source server, open the DHCP console, right click on the server and choose Backup…, and select a location to save the file.
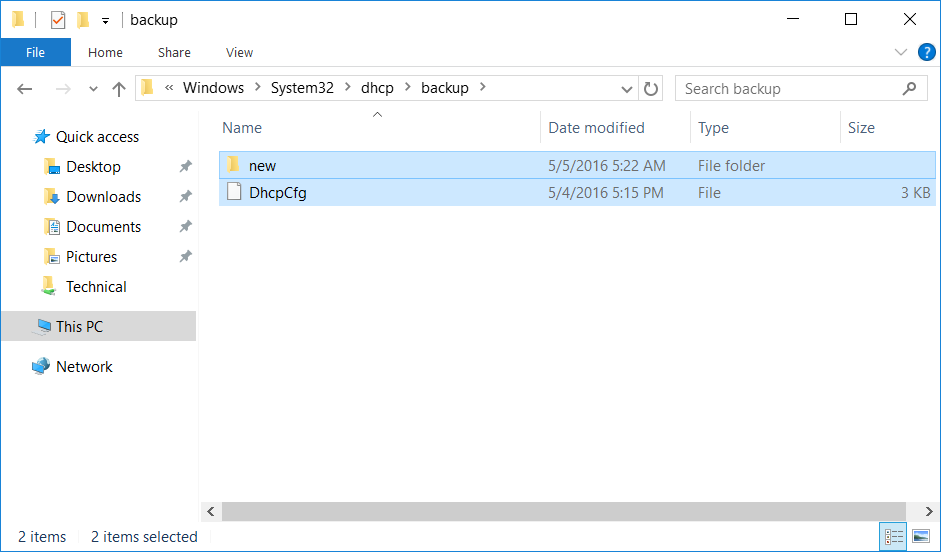
Copy the contents of the backup folder to the local path on the destination server: \\DestinationServer\C$\Windows\System32\dhcp\backup
Step 3. Disable the DHCP scope on the source server
Now right-click on the scope and choose Deactivate. If you have more than one scope, do it for each scope on the server. During this time, new IP addresses will not be distributed, until you complete the import procedure on the destination server in the next step.
Step 4. Restore settings on the destination server
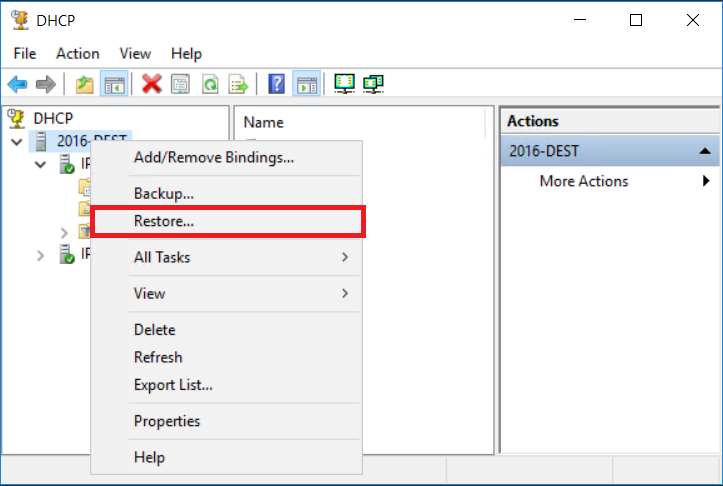
Now, from the DHCP console, you can right-click the server, choose Restore…, and select the backup folder to import the settings.
Your DHCP service will stop and restart, and that should complete the migration–new IP addresses will be handed out by the destination server from here forward. You can verify this from any client computer with a reboot and checking ipconfig /all to see if the DHCP Server lists the new server’s IP address.
Step 5. Unauthorize the source server
Finally, you can unauthorize the source server, which will permanently disable it from being an active DHCP server on the domain. From the DHCP console, right-click on the source server, select Unauthorize.
Option 2 (b): Move DHCP Services… with PowerShell!
Probably even easier, if the source environment is at least Windows Server 2008. Assuming you already prepared the role as per step 1 above, you can simply export and import DHCP settings right from PowerShell on the destination server. Edit the variables at the beginning of this script to suit your environment:
$SourceServer= “SourceName.domain.local”
$SourceIP= “192.168.0.4”
$DestinationServer= “DestinationName.domain.local”
$DestinationIP= “192.168.0.5”
New-Item -ItemType Directory -Path C:\DhcpBackup
Get-DhcpServerv4Scope -ComputerName $SourceServer | Set-DhcpServerv4Scope -ComputerName $SourceServer -State InActive
Export-DhcpServer -File C:\DhcpBackup\dhcp.xml -ComputerName $SourceServer -Force -Leases
Import-DhcpServer -File C:\DhcpBackup\dhcp.xml -ComputerName $DestinationServer -BackupPath C:\DhcpBackup -Force -Leases
Set-DhcpServerv4OptionValue -OptionId 6 -Value $DestinationIP -ComputerName $DestinationServer
Get-DhcpServerv4Scope -ComputerName $DestinationServer | Set-DhcpServerv4Scope -ComputerName $DestinationServer -State Active
Add-DhcpServerInDC -DnsName $DestinationServer -IPAddress $DestinationIP
Remove-DhcpServerInDC -DnsName $SourceServer -IPAddress $SourceIP
I bet you can guess which method I prefer.


Leave a Reply