How to migrate company file shares and mapped drives to Office 365 using the SharePoint Migration Tool
I debated on writing about this tool for a long time. Because here’s the thing: most file servers in production today are just huge garbage piles, built out of years of half-completed thoughts and haphazard document collaboration. Therefore, before we get into it, I first want to cover off on why you don’t really want to do this.
The case against formal migration of legacy file shares
Any file share generically named “Company” or “Shared” you know right away is just going to be littered with debris that hardly anyone at the organization can account for today. And the situation is rarely better even in smaller departments of people with share names like “Sales” or “Accounting.”
Therefore, I generally say to my customers: Do not bother moving dead data! Cloud storage costs real money. Imagine all the effort being spent by employees weeding through an ancient hierarchical folder structure that is 80-90% trash–uggh–who needs that drain on productivity?! Just stop carrying the burden!
You can simply tell your users to move their current working docs (e.g. what are you doing for the next two weeks?) up to locations that make sense, and then leave the rest behind in read-only mode on the server. Good riddance.
Are your users really going to miss the random collection of junk that they have thoughtlessly accumulated over the past decade as you migrated mapped drives from one version of Windows Server to the next? NO!
Embrace the modern!
Besides, some of the magic of modern apps like Teams gets lost when you have a gnarly legacy file structure behind your files & document libraries. It is much more elegant, intuitive and modern to arrange documents behind the channels and conversations within the Team. We recall what was written about, what was talked about, and whom we were working with at the time of the conversation. This leads us to the right channel quickly, and the necessary doc is usually easy to find from there.
We say “flat and wide” now, not “narrow and buried deep.” The new arrangement actually makes it easier to find data, surprisingly. Also, in case you get lost, or it turns into a rat’s nest, we do still have the Microsoft search function in Teams and elsewhere, and that is another key feature of working in a more modern environment. Again–searching is easier than mentally tracking structured hierarchies.
The real reason people insist on migrating dead data, and resist making a substantial shift in how they work, is not because it is difficult to do (it’s way easier in fact), it’s just because they are afraid to change their behaviors and they are holding onto the past, unwilling to make the switch.
Okay, I understand I’m being a stubborn caveman/ cavelady… so how do I move forward?
Nevertheless, I get this question all the time: How do I migrate my file server to Office 365 OneDrive, Teams, or SharePoint Online?
The answer is: if you insist on doing it, then you would just use the SharePoint Migration Tool (SPMT). This tool is currently on version 3.0, and I even piloted the latest preview version for this demo. I have to say, the tool has improved quite a bit since I last played with it.
Let’s step through a basic migration.
First, download and install the tool from Microsoft.

Once it is done installing, you will need to sign in to your Microsoft 365 admin account.

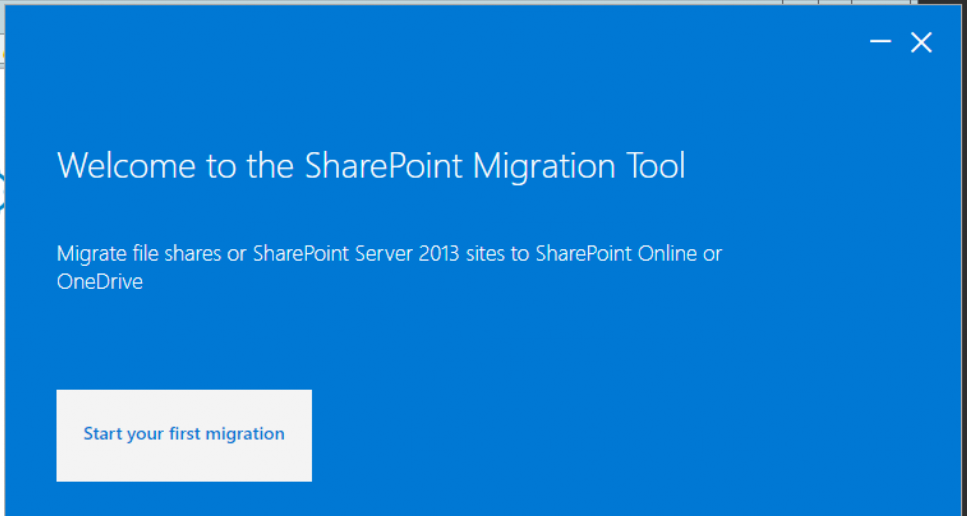
Click the big button to Start your first migration (they make this so easy, seriously).
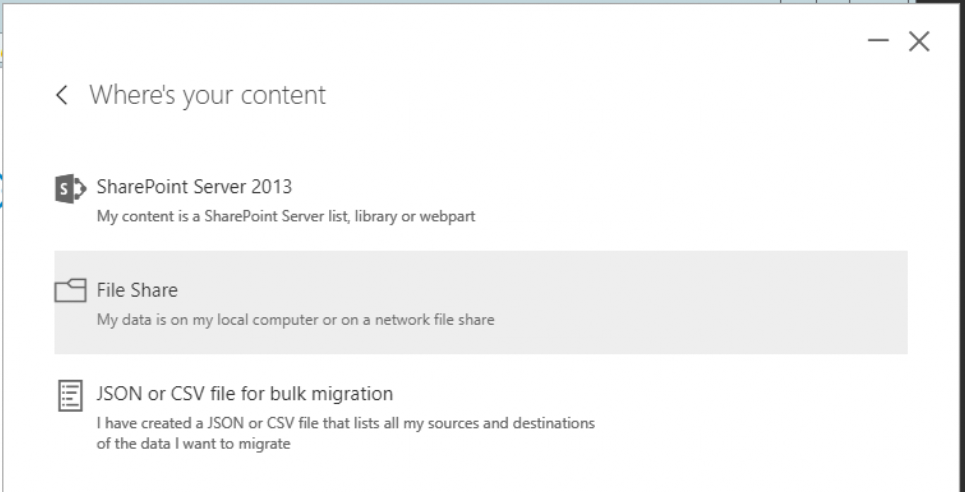
You have several options here, but we will just demonstrate the option to move File Shares. Note that it is also possible to use a CSV file–for more information on that, you can check out this article at Microsoft. In many SMB environments there aren’t that many shared folders to grab, but the CSV may save you time in larger environments.
For the purposes of this demonstration, I will choose my source and destination using the GUI, so click File Share.
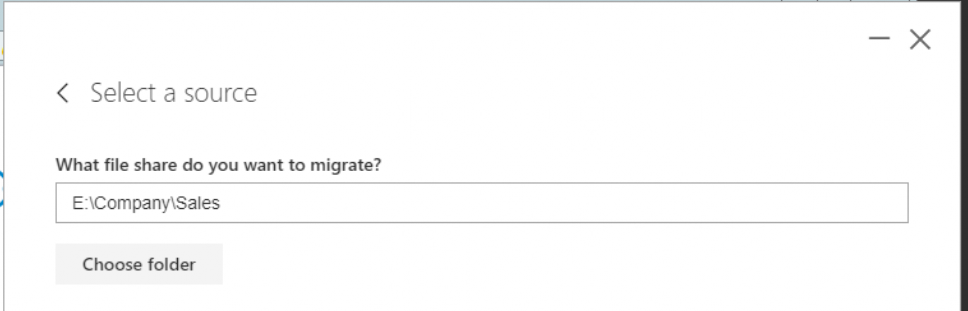
I will start by selecting my first source folder, corresponding to a mapped drive that the Sales department uses.
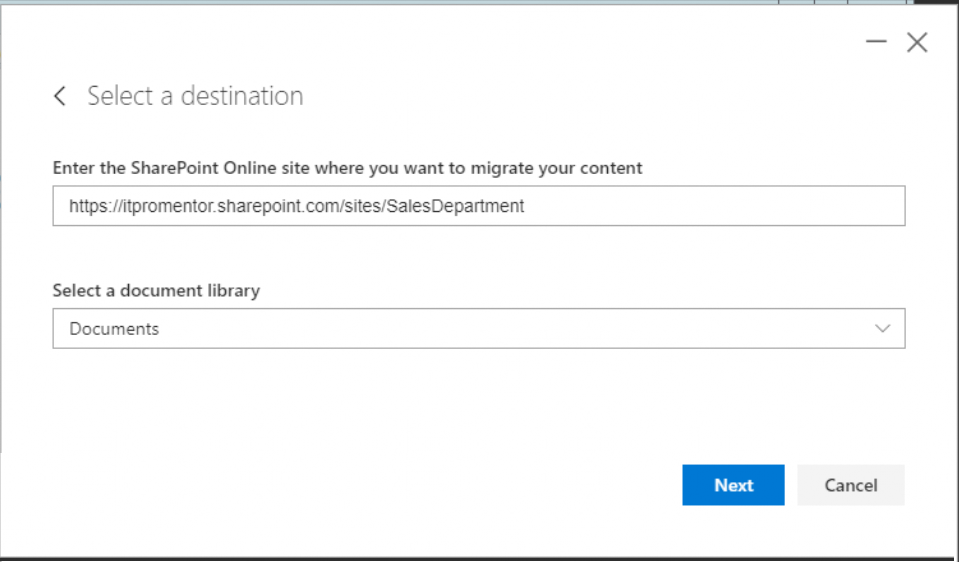
The next screen in the wizard, as you can probably guess, is going to ask for the destination. Now to find out the destination URL path, you will want to locate the SharePoint URL for the Sales department’s Team site. If it doesn’t exist yet, then you can create it from Teams, or from the “new” SharePoint admin center. Go to Active sites.
In my case, the site already exists in here, because I enabled it earlier via the creation of a Team using Microsoft Teams. Under the site’s Properties, I can see the Domain and URL sub-path.

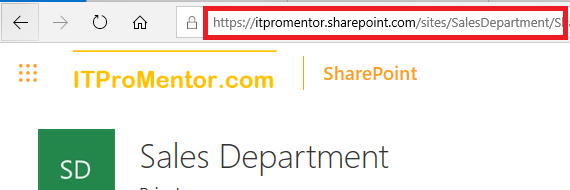
By the way, since this site was created using the Teams application, another place I can go get this URL is in Teams itself! Go to the General channel, click the ellipses and find “Open in SharePoint.”

The same URL is at the top of the address bar now.
However you retrieve the URL, just paste it into the empty field on the destination screen in the wizard. Once you do that, you will be able to select a document library below (there could be more than one Document library per site, but probably you will just use the default Documents for most department-share-to-department-site migrations).
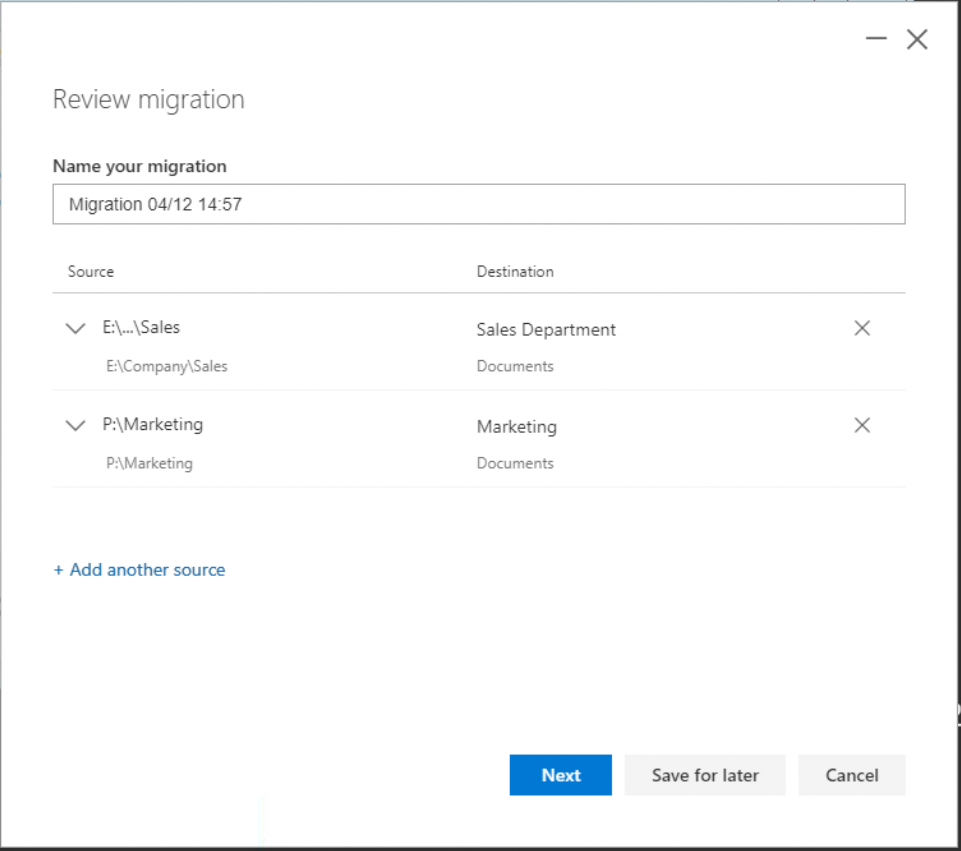
On the next screen you will see that it is possible to Add another source (you basically just repeat the same steps we went through for other sources & destinations). I went ahead and added one more source for the demo, called Marketing.
Again, with the CSV method you would basically be skipping to this part with all of the various sources and destinations having been built out of the entries within the CSV file.
On this next screen we have some options to discuss. In most situations, I start by choosing to Only perform scanning. This means that instead of actually migrating data, the tool would just look for potential issues on its first pass.
Examples of issues would be file types that are not supported, or invalid characters or file name length (remember that every document becomes a URL path online–so the name must be URL-able).
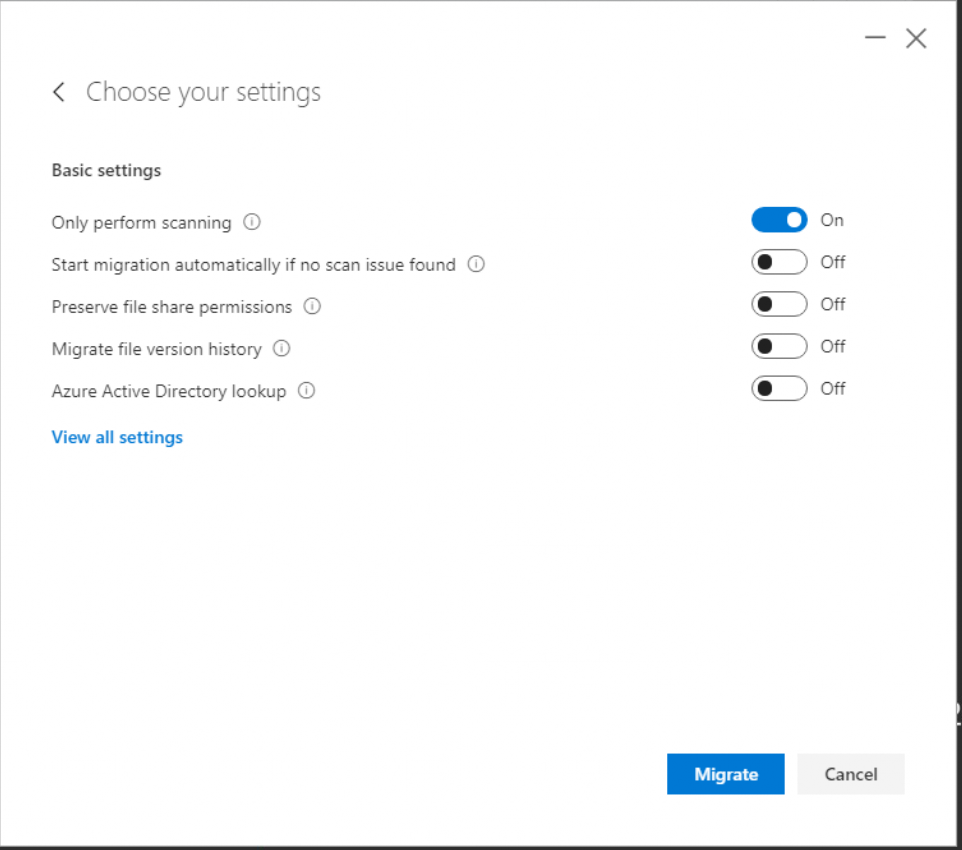
However, you can also select any other options here that are important to you. For instance, you can just have it start the migration automatically if no issues are found, copy existing local AD permissions (rather than just depositing copies of the files into SharePoint and having the permissions follow whatever you have set in the cloud), and so on.
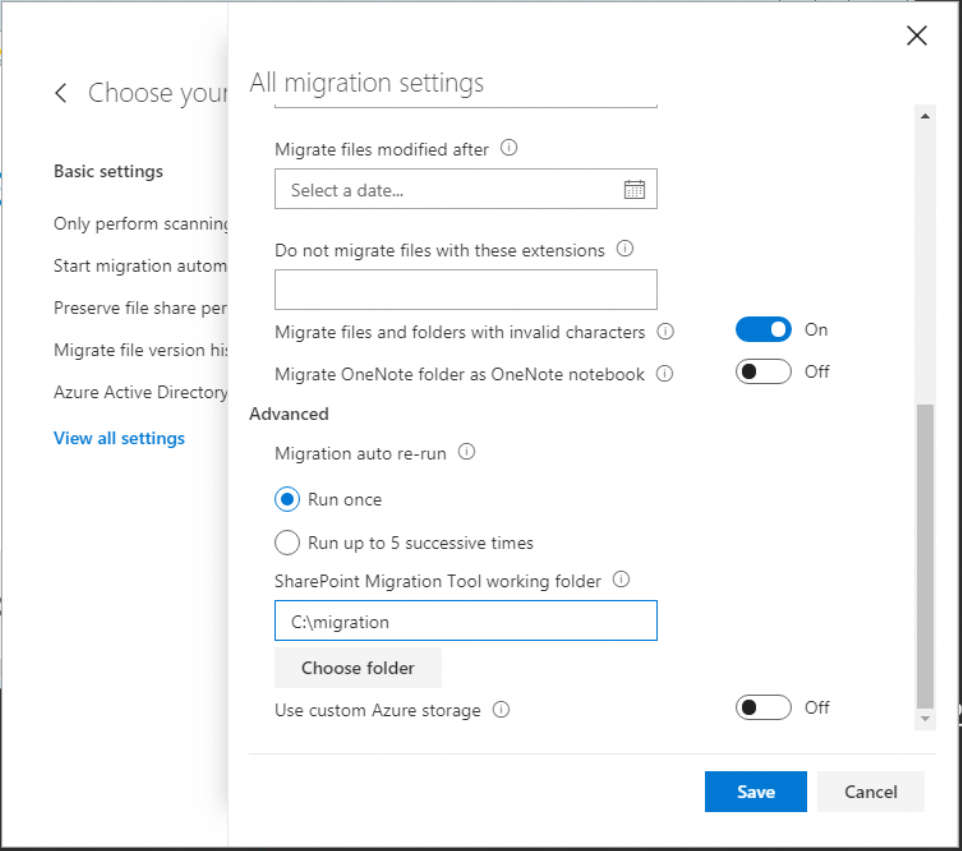
If you click View all settings, you will see these same options, and several others, scrolling down. One of the best features, I think, is the option to “leave behind” really old data. For example, if it hasn’t been modified in a couple of years, do you really need to bring it with for the ride?
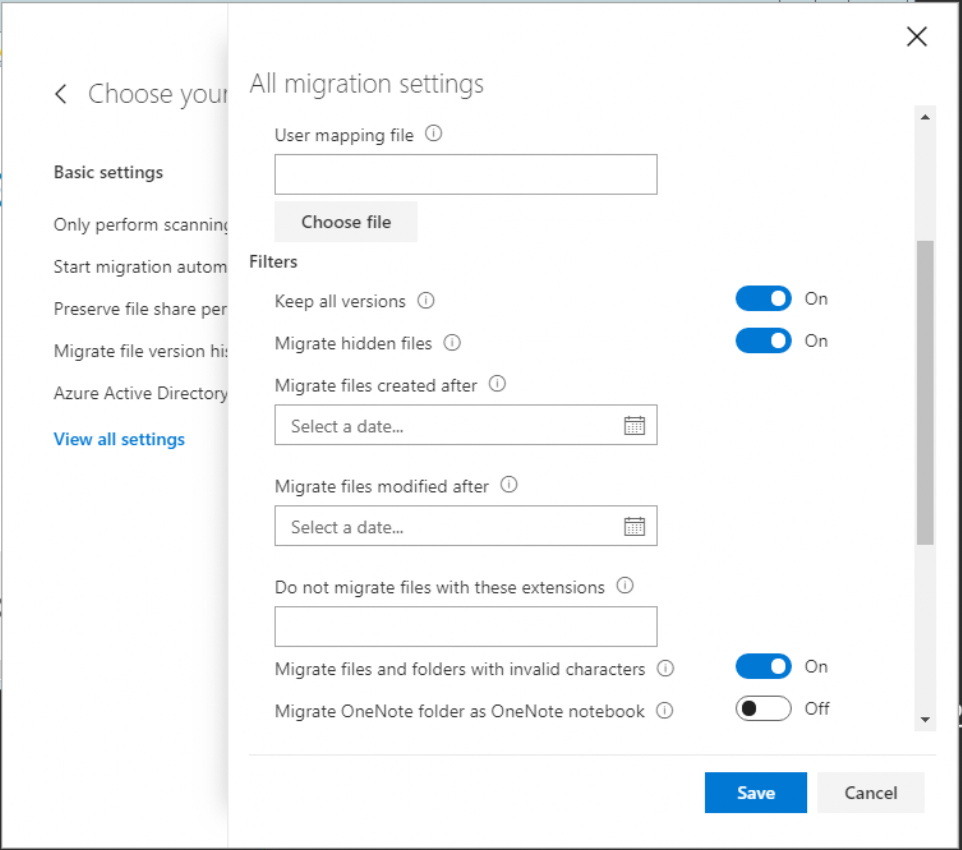
I notice an option here to bring files and folders with invalid characters–so the characters could be auto-substituted to make them compatible with SharePoint Online.
Further down, we see that it is possible to have the migration just Run once, or Run up to 5 successive times (to catch any lingering data that changed since the initial sync). Note that you can also save your migration job and come back into the tool later, and run a manual sync also (which will have the same effect of catching up incremental changes except that you are controlling this manually rather than automatically).
So go ahead and make all of your favorite settings selections, then click Migrate (In this example I selected the option to Only perform scanning).
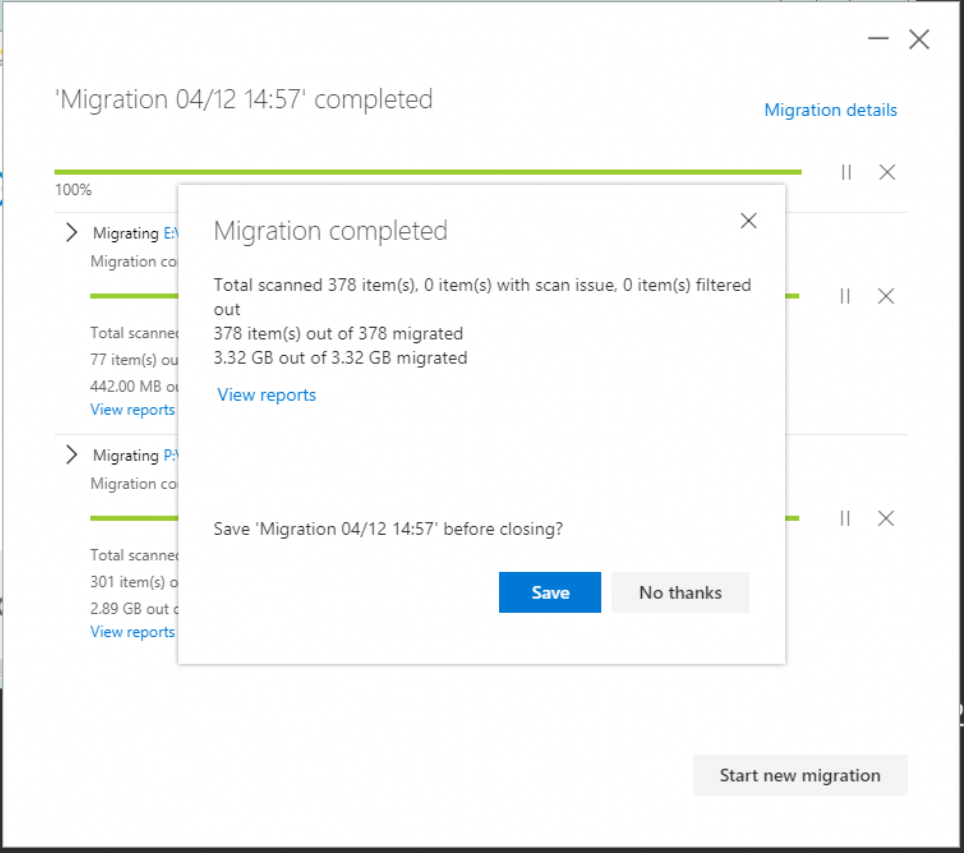
The migration scan only will complete. Look, no issues found with my files, hooray! That means I can proceed with the migration simply by clicking the play button next to each line item. Even if you selected Only perform scanning, the play buttons here will actual migrate–for real. So be aware of that.

Eventually we will see these migration jobs complete. You can Save your migration, which gives you the chance to come back in later to run new incremental syncs, if you so choose.
I will just browse out to that Marketing directory. As you can see below, it migrated all the content, as promised. The Modified date has even been preserved in this case, and, the Modified By field has the correct names associated to each item. Like magic!

And that is really the end of the demonstration. You would basically turn all of your source directories to Read Only, so that new content could not be written or saved. That would minimize the number of incremental syncs you would need to perform after the initial migration. Users would be directed to begin collaborating and transacting with their shared data using SharePoint Online, Teams, OneDrive, or however they interface with it–as quickly as possible.
Again: not recommended
So there you have it–this does not have to be a scary undertaking by any means. But just remember what I warned you about–most orgs think they need to bring everything to the cloud. Until you start talking with them about it–then they usually realize it is a silly exercise to attempt doing so. (Although the new options to bring only content in front of a certain date modified is certainly more attractive).
Just pause one more time here and think about it: do you really want to lift and shift this disaster of an old file server? Or would you rather start fresh with clean working directories in new sites and libraries? And might users not even enjoy interacting with those clean directories via modern apps and experiences such as Teams?
Make the stakeholders take the time to move the important stuff up (like just pose the question to them: “What are you guys/gals working on for the next couple of weeks or the next month?”). You’d be surprised how little actually needs to be moved into the new working directories.
You can come up with other means of disposing or archiving all that dead data, I am sure. Some cloud backup tool maybe, or even a NAS or some offline storage. Something read-only and out of sight, so users don’t start falling back to old mapped drive habits again. But still accessible, in the event someone “forgot” to move something they needed.
At some point I’ll do a post about Azure File Sync too. Might be of interest to some.
Other Footnotes
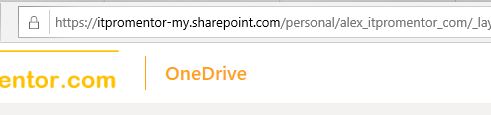
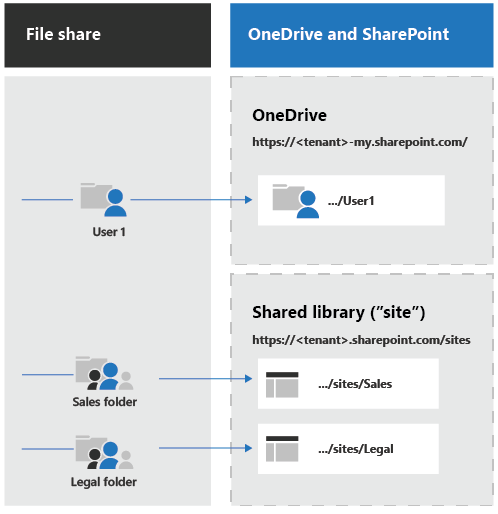
OneDrive has a different URL path than SharePoint. Instead of:
- <tenant>.sharepoint.com/sites/DepartmentName
It may look more like this:
- <tenant>-my.sharepoint.com/personal/<user>_<domain>_com
It is worth reviewing this resource if you plan to migrate a lot of file shares and user folders into SharePoint and OneDrive. You may find additional, and more helpful information there.
Comments (11)
Alex,
When running the SharePoint Migration tool I run in to an issue when scanning the files, some of files get flagged with; Scan File Failure: Unauthorized access to source file. The strange part is I have full control over those files and im part of the backup operators.
Have you run in to this issue in the past? If so how did you correct it.
You always put out great content. Keep up the great work.
Oren
Sometimes there are strange inheritance things going on. Sometimes I have to take ownership of a directory and then push the propagation down forcefully to all child items, etc., and then start again.
Can this tool be used to migrate from a server to a new server and not online ?
Thanks.
No. Just use robocopy if moving to new server.
Very interesting, thank you. If I now want to migrate only the most important documents, as recommended, should this be done manually or should a specific tool be used?
Up to you, e.g. if there are many such documents and you want to move them to roughly corresponding locations (1-1) in the cloud, then I might use a tool. If it will be easier to sort through manually, and especially if your collaboration structure will look different in the cloud with more varied locations/groups, then manual may be more efficient.
Great read! While I get it’s not recommended, if you have a culture of users who wouldn’t adjust well, this is a perfect alternative.
If you wanted to, I assume you would install Onedrive on a shared server which users are accessing, have them sign in and once it syncs, all of these files/folders will show in File Explorer for users to have the “mapped drive” feeling?
Not exactly… I would hold a training to teach them about the “spheres of collaboration” and then with the stakeholders, plan and deploy Teams and Sites that are “anchor points” for the org which may or may not reflect the current mapped drive structure (sometimes they want to re-org their files anyway), and finally launch, while turning the original mapped drives to read-only. Then they are free to start moving the content they want into the new locations.
Depending on your specific needs and requirements. Here are a few possible options:
– OneDrive sync client: If you have a small amount of data to migrate and are primarily using mapped drives, you can use the OneDrive sync client to migrate your files to OneDrive in Office 365. Simply install the OneDrive sync client on your users’ computers, configure it to sync the appropriate folders, and wait for the files to sync to OneDrive. Note that this method is not recommended for large-scale migrations or migrations that require complex metadata or permission mappings.
– Third-party migration tools: There are several third-party migration tools available that can help you migrate file shares and mapped drives to Office 365. These tools often provide additional features and functionality beyond what is available in the SMT or OneDrive sync client, such as support for custom metadata, incremental migrations, and pre-migration assessments. Some popular third-party migration tools include Gs Richcopy 360 ,ShareGate, Metalogix, and AvePoint.
Overall, the method you choose to migrate your company file shares and mapped drives to Office 365 will depend on factors such as the amount of data you need to migrate, the complexity of your metadata and permission mappings, and your technical expertise. It’s important to thoroughly plan and test your migration before starting, and to communicate any changes or updates to your users.
I use Gs Richcopy 360 for cloud migrations , it is straightforward ,quick and easy than SMT
This is my best list tools for cloud migrations:
– Cloudfuze
– AvePoint
– Gs Richcopy 360
– Multi-Cloud