How to configure journaling, and the undeliverable reports mailbox, in Exchange Online
In Office 365 Exchange Online, it is possible to setup journal rules. When you turn on journaling, a copy of email messages that you specify will be written to another (third-party) location. It is not supported to write the journal into another mailbox hosted at Office 365, however, there are many third-party providers out there which provide this service (sometimes referred to as an “Email Archive” instead of an “Email Journal”–which confuses some people).
Journals are useful in certain compliance or litigation situations where organizations may need to refer back to historical communications and be sure they are seeing “the whole truth.” I hear from people on this question a lot: “But what about Litigation hold instead?” With Litigation hold in place, nothing is ever really deleted, and the content remains searchable by eDiscovery admins. Litigation hold is most useful in temporary situations, in my opinion. I still prefer journals, personally–more on that later.
Before we create any journal rules, we will need to have a dedicated mailbox for any NDR’s, in case there are issues with the journal. Go to recipients > shared and click + to create a new shared mailbox. I usually name it something like [email protected], and be sure to assign at least one person permissions so they can monitor the inbox.
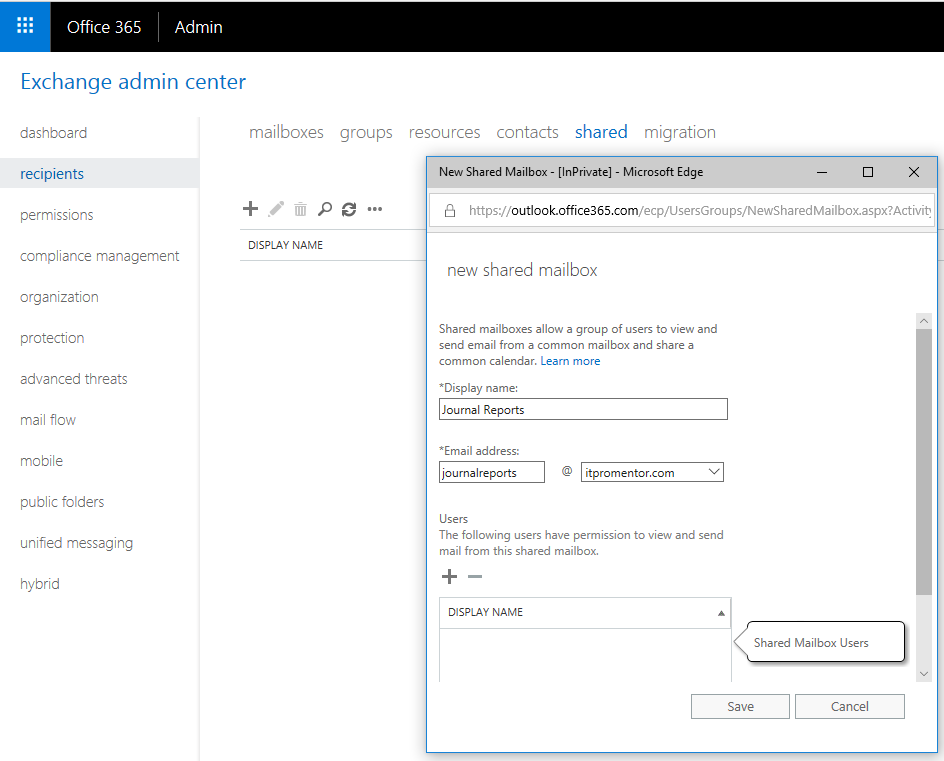
Aside: If you happen to see a warning about failed replication of the mailbox–just ignore it. I’ve been seeing that lately throughout Exchange Online–there must be some kind of delay in replicating these mailboxes quickly enough throughout the 365 universe.
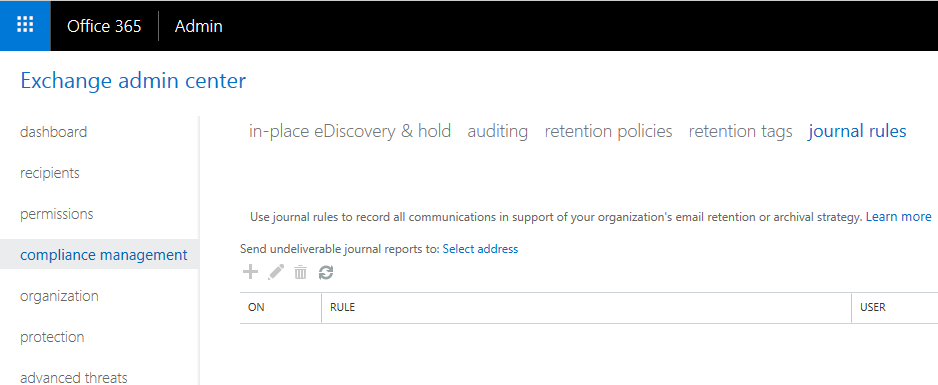
Next navigate to compliance management > journal rules. Notice that the + button to create a new rule is greyed out. This is because you must first select an address which can receive undeliverable journal reports. Click the link called Select address.
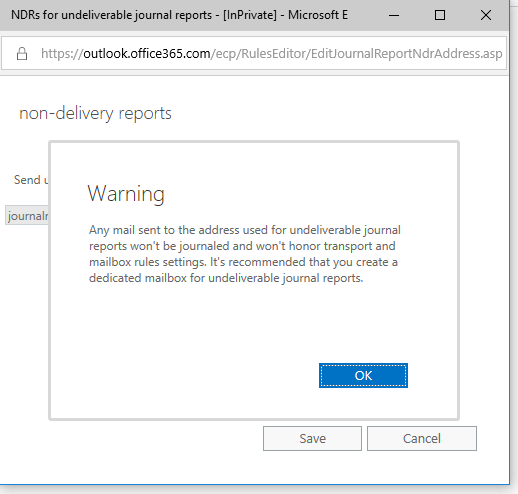
Select the shared mailbox that you created. When you go to Save your setting, you will notice the following warning, which is just recommending the use of a dedicated address for this purpose (you can ignore it since that is exactly what we have done–Click OK).
Now that you’ve seen how to do it the long way around, know that you can also accomplish this setup very quickly using PowerShell. First, connect to Exchange Online using PowerShell:
#Connect to Exchange Online:
$cred = Get-Credential
$session = New-PSSession -ConfigurationName Microsoft.Exchange -ConnectionUri https://outlook.office365.com/powershell-liveid/ -Credential $cred -Authentication Basic -AllowRedirection
Import-PSSession $session
Then, define your domain name and the email user who will monitor the shared mailbox, then run these cmdlets:
#Specify the primary smtp domain name of the organization
$DomainName = "companydomainname.com"

#Specify a mailbox user for monitoring alerts
$MonitorUsers= "[email protected]"

#Create the JournalMonitor security group
New-DistributionGroup -Type Security -Name "JournalMonitor" -DisplayName "JournalMonitor" -Alias journalmonitor -Members $MonitorUsers -PrimarySmtpAddress JournalMonitor@$DomainName

#Create the Journal NDR mailbox and add the security permission
New-Mailbox -Shared -Name "JournalNDR" -DisplayName "Journal NDR" -Alias journalndr | Add-MailboxPermission -User JournalMonitor -AccessRights FullAccess –InheritanceType All

#Set the default Journal NDR report mailbox
Set-TransportConfig -JournalingReportNdrTo journalndr@$DomainName
Notice that we are also setting up some permissions (using a security group, instead of a user directly–that way if the person changes over time their replacement just gets added to this group).
Also, you can (optionally) have the journal report mailbox forward copies of the NDR messages to another monitored inbox, such as your IT Support inbox.
$ITSupportEmail= "[email protected]"
Set-Mailbox -Identity JournalNDR -DeliverToMailboxAndForward $true -ForwardingSMTPAddress $ITSupportEmail
When you are all done, disconnect from Exchange Online:
Remove-PSSession $session
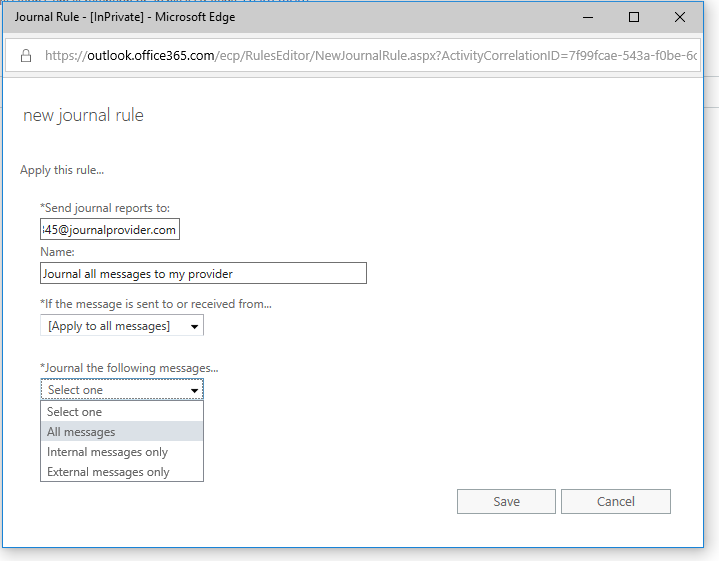
Create a journal rule
Now you will be able to click the + button to add a new rule.

The structure of these rules is very simple:
- Send journal reports to: You will have received your unique journal address from your third-party journal/archive provider–input the value here.
- Name the rule as appropriate to your situation–in this example I will be sending all messages to my journal provider, so I have named it to reflect that setup.
- If the message is sent to or received from… Here it is possible to choose individual mailboxes, a distribution group containing many recipients, or just [Apply to all messages], as I have done in this example.
- Journal the following messages… Last you can choose Internal, External or All messages.
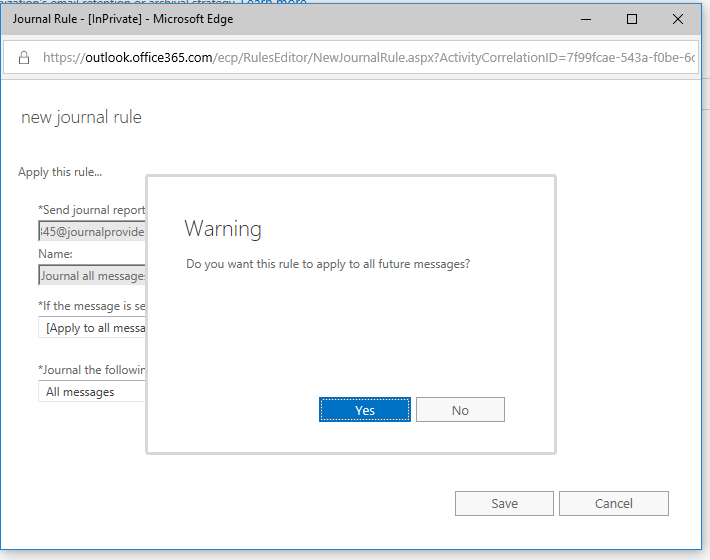
You may receive another warning, which is fine–just be sure you made the selection you intended and click Yes.
Now your rule is visible in the rules list. Note: your own compliance requirements may vary, and this guide is only providing an example. Be sure you understand your own requirements for journaling before implementing.

With journals you can capture any message sent to/from anyone (or everyone) in the organization, and have it written somewhere else as a secondary source of “the truth.” If you are weighing the pros and cons of turning on journaling versus something like Litigation hold, for what it is worth, I prefer the journal. Here is why: when a user account in Office 365 is deleted, the mailbox is also deleted, and the fact that it had a litigation hold applied will make no difference–the data is just not kept once past the retention periods. Last, understand that when litigation hold is removed, any items deleted during the hold period will indeed disappear also, and really be deleted. So, for some organizations a combination of holds and retention policies may be the preferred approach. But for other organizations, they would rather have “the whole truth” and for that, the journal is a great tool.
Leave a Reply