How to Activate Azure Information Protection for Office 365
This is a four-part post on Azure Information Protection (formerly Rights Management) for Office 365. This service is a powerful tool that we can use to prevent data leakage and share information securely with users inside & outside of the organization.
Follow along as we explore how to:
- Activate Azure Information Protection for Office 365 (this post)
- Configure Email encryption for Office 365
- Compare Email encryption & Rights Management templates
- Enable Rights Management for SharePoint Online & OneDrive for Business
How-to Activate Azure Rights Management for Office 365
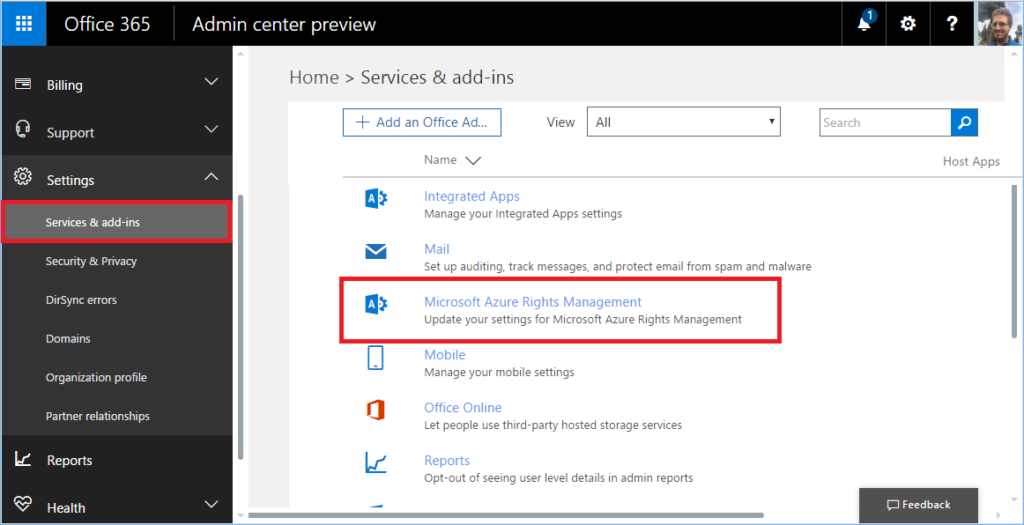
Navigate to the Office 365 Admin Center. From the left menu, choose Settings > Services & add-ins. In the list of apps on the right, choose Microsoft Azure Information Protection. (Formerly it was Microsoft Azure Rights Management).
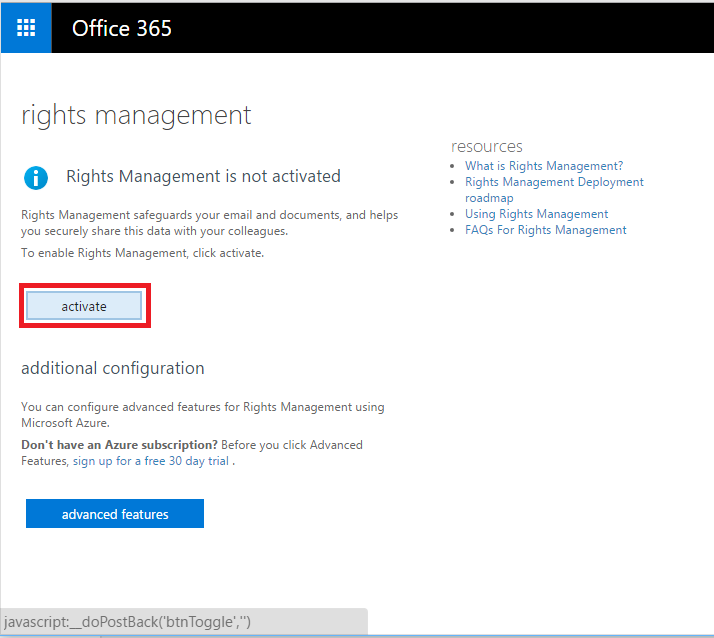
This will bring up a blade containing a link to Manage Microsoft Azure Rights Management settings, follow it.

On the next page, click Activate.
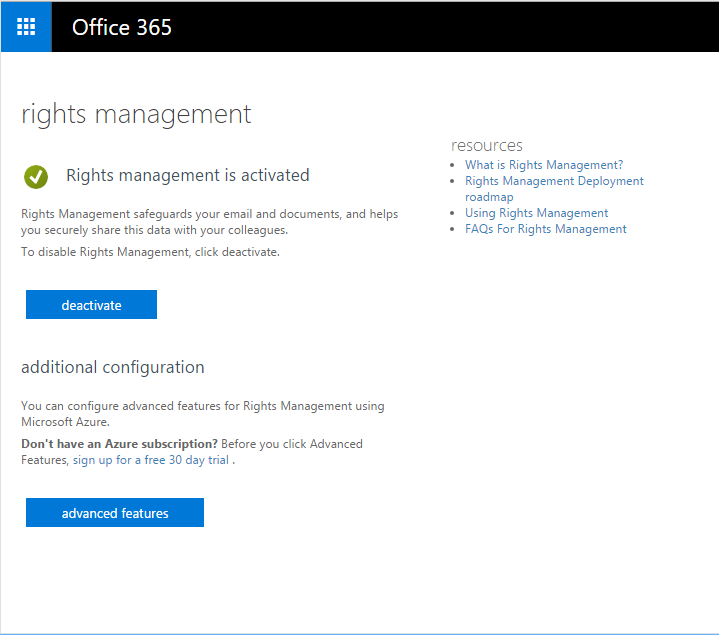
Confirm in the dialogue by clicking Activate.

Incredibly easy, right? Well, not really; you can’t actually do anything with it yet–at this point, it is just enabled for your tenant.
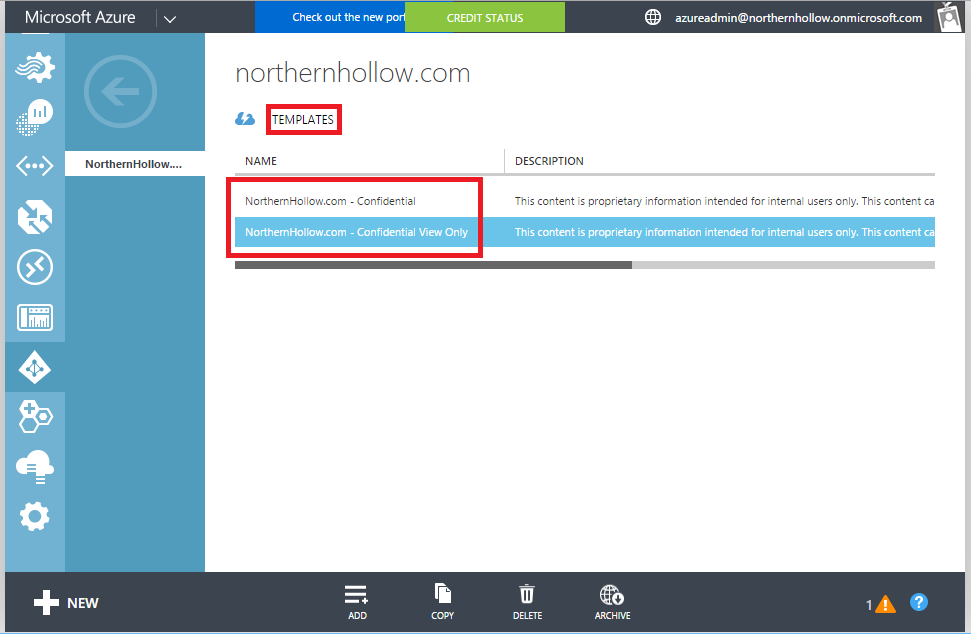
BONUS: if you want to see what has been accomplished so far, visit Azure Rights Management in the (classic) Azure management portal. Navigate to Active Directory from the left menu, then Rights Management along the top. Click on your domain name for more details.
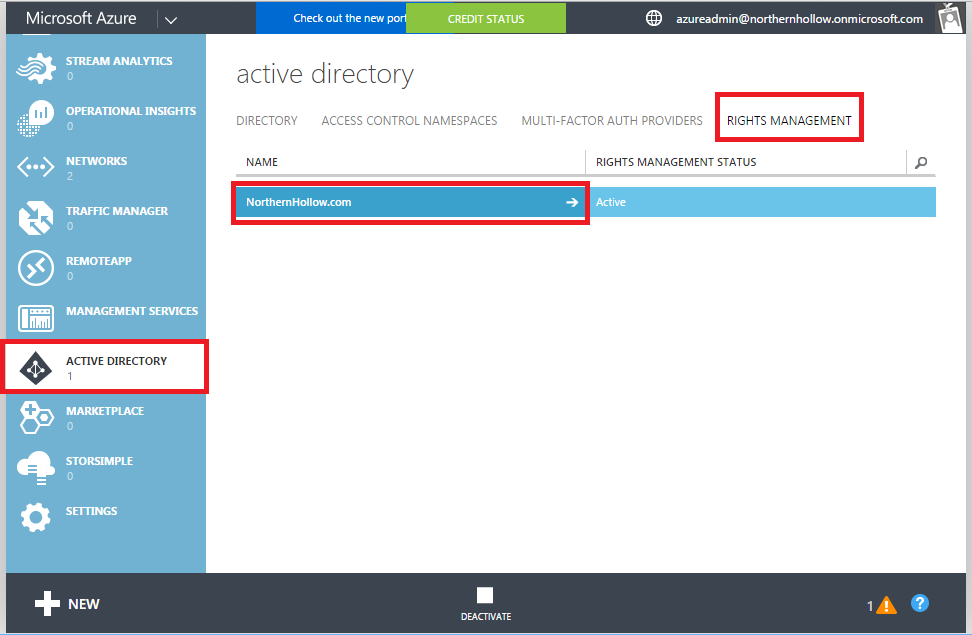
Clicking on TEMPLATES at the top, we can see just two default templates are present: Confidential and Confidential – View only.
Remember this as we move into the next step so you can follow along with what is happening.

Leave a Reply