Extend Your On-premises Network with Azure Virtual Network
One of my favorite use cases for Azure Virtual Networks and Azure Virtual Machines is to create a secondary (DR) site for a fraction of what it would cost to build your own co-location. With one of the smaller-sized basic or even standard tier VM’s to act as a backup Domain Controller, the basic components of this solution can be had for less than the cost of your home satellite TV subscription.
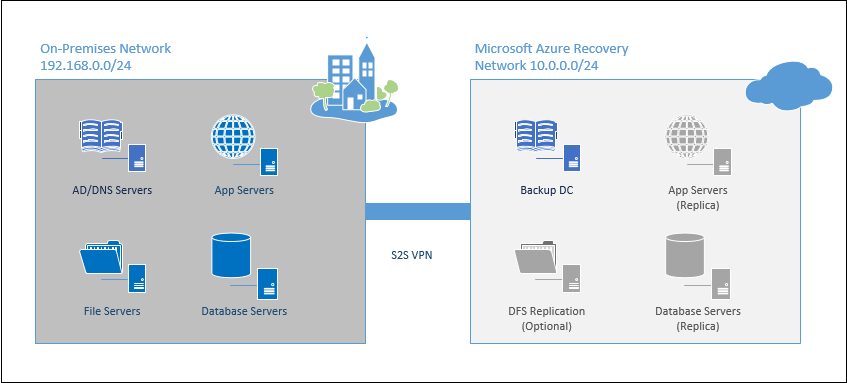
Whether you want to pair this solution with Azure Site Recovery to host a DR site, or just extend your on-premises network for hosting LOB apps in the cloud, this solution is exactly where you need to start.
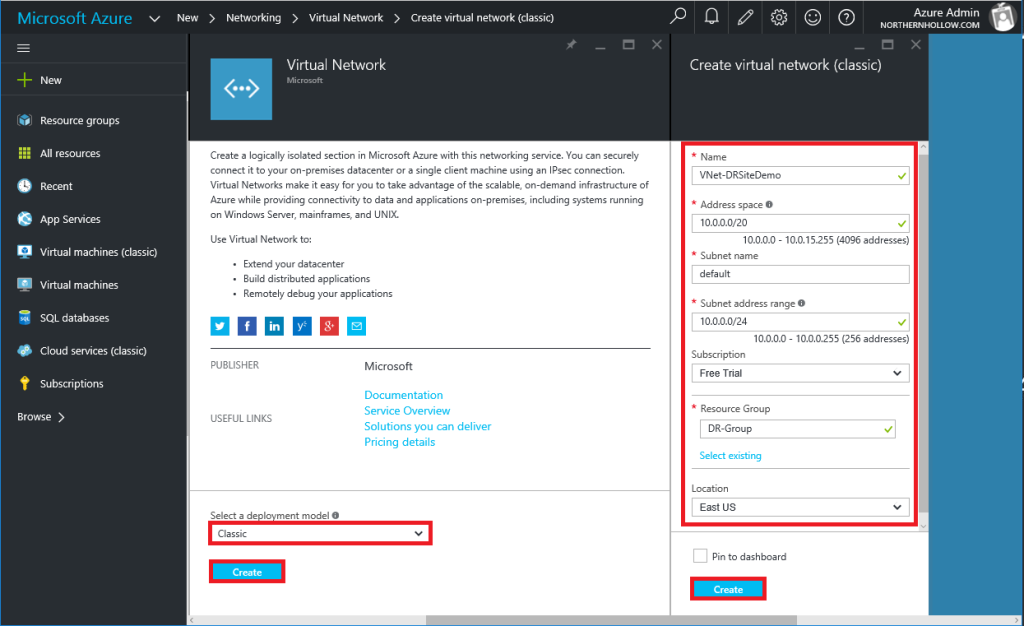
Step 1: Create a Virtual Network
If you haven’t already built one as part of setting up an Azure Site Recovery workflow, then begin by navigating to the portal and clicking on New > Networking > Virtual Network. Three items to double-check as you build.
- Be sure to select Classic deployment model, if you plan to use this with Azure Site Recovery (update: you can deploy this ARM now also).
- The IP Address Space cannot overlap with your on-premises IP scheme.
- Ensure that your location choice is consistent with the recovery vault, storage accounts, and other resources you plan to use with this network.
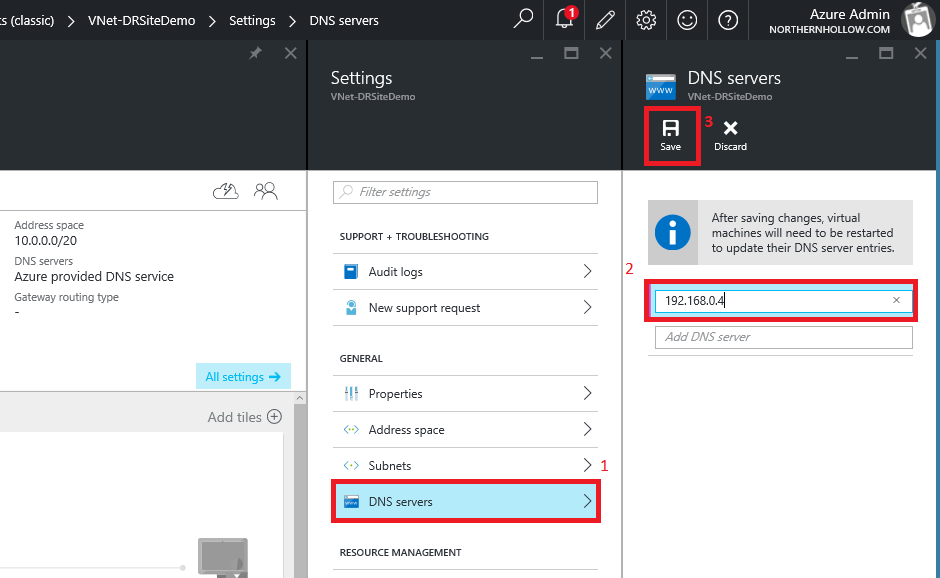
Next, navigate to the Settings of this virtual network; you will need to add DNS servers (specify at least one on-premises AD/DNS server IP address). If you do not do this, you will not be able to resolve internal names or join your VM’s to the local domain.
Step 2: Create a Classic VM
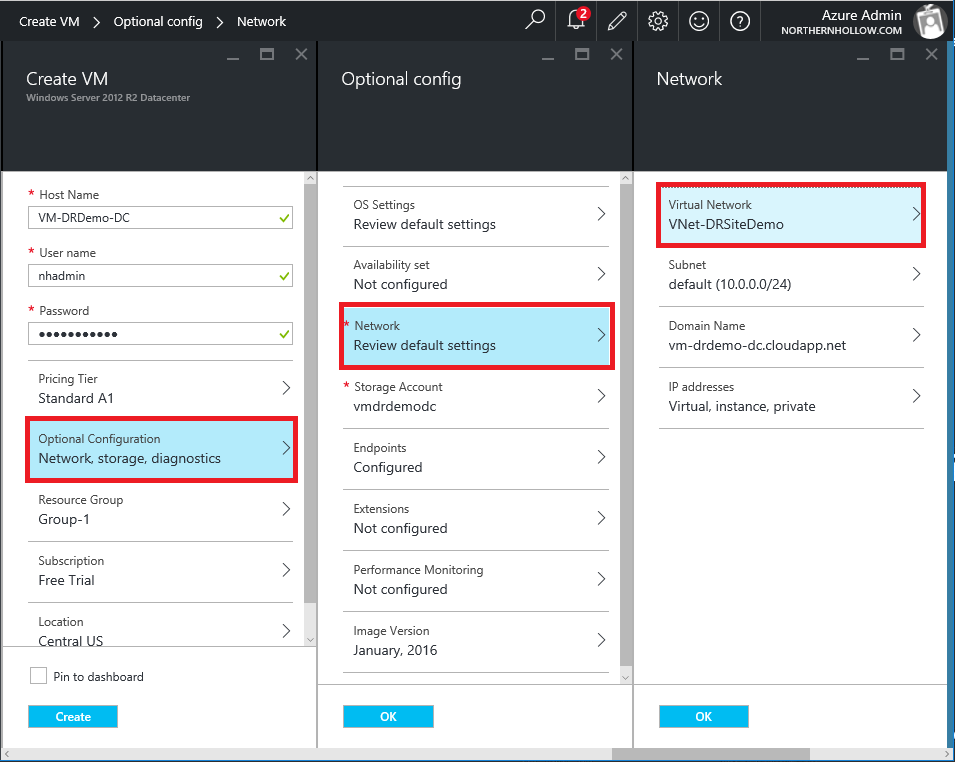
Now we will switch gears a little bit to deploy a new (Classic) Virtual Machine into the Azure Virtual Network. Navigate to New > Virtual Machines and choose Windows Server. Be sure you select the Classic deployment model again.
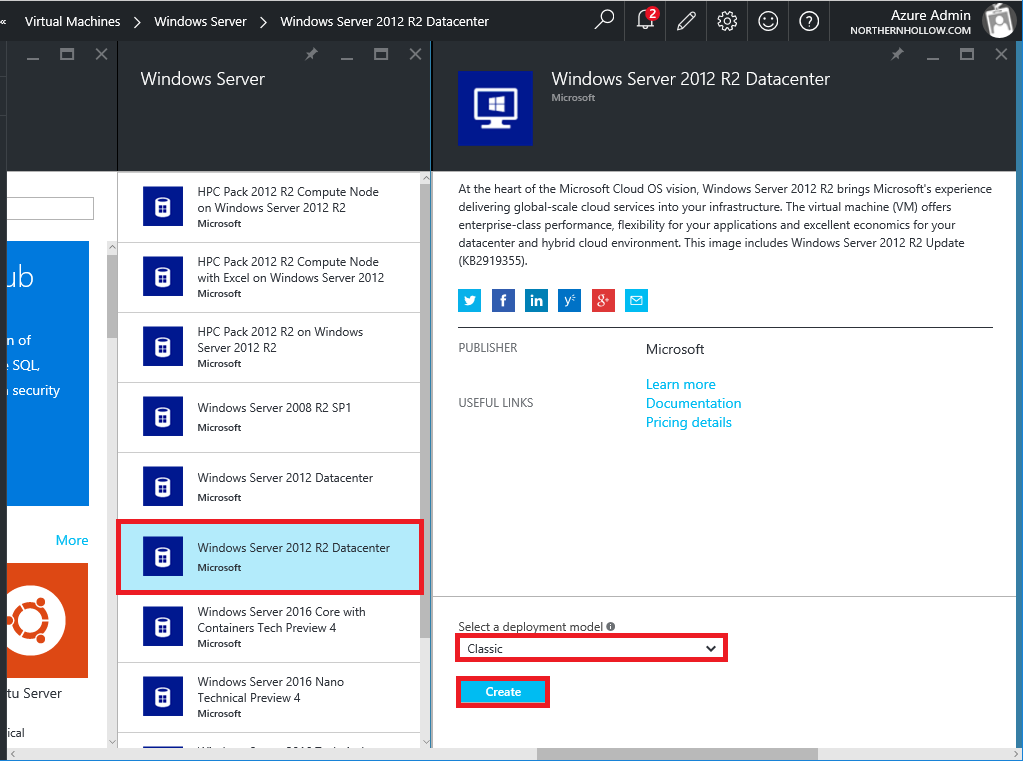
In the following selections, be sure you make appropriate selections.
- Give the VM a name that makes sense for its role in your environment;
- Optional Configuration > Network > Virtual Network, and choose the Existing Virtual Network;
- You can also choose an existing Resource Group.
Click OK on all of your selections and then Create to complete the build of your VM.
Step 3: Connect to the remote Azure Virtual Network via S2S VPN
Switching back to the Azure Virtual Network, we can setup the site-to-site VPN connection. One quick way to accomplish this is by using either the built-in RRAS features in Windows Server, or by creating a connection using the Essentials Dashboard cloud integration features (Windows Server 2016 Essentials Experience role). Otherwise, the recommended configuration would be to use your firewall or other VPN hardware appliance.
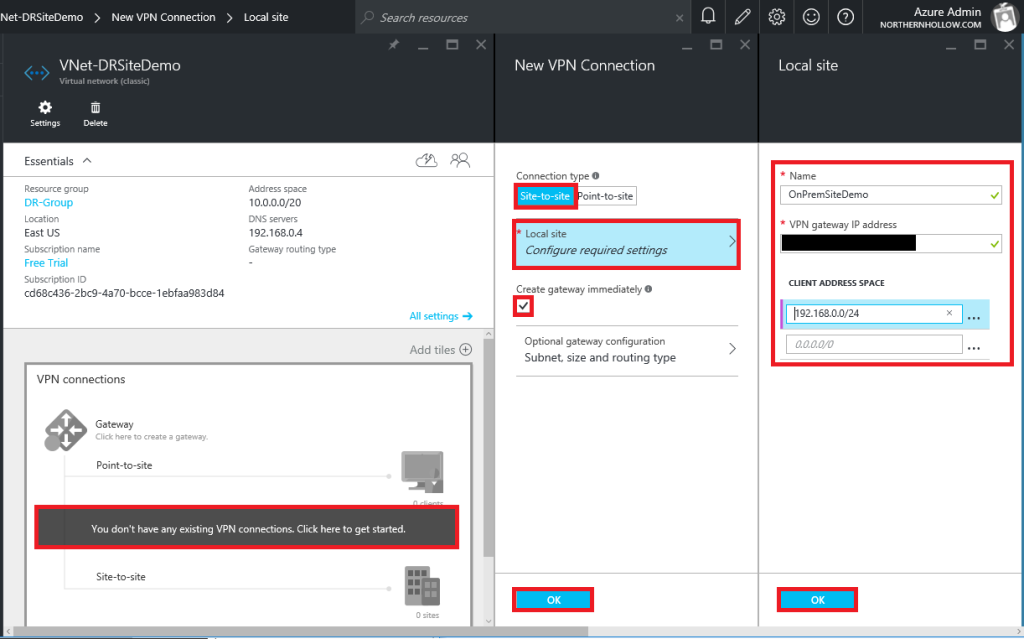
Navigate to the Virtual Network, and click on the VPN diagram to get started. Choose Site-to-site as the Connection type, and specify Local site settings (have your firewall’s external IP ready). Be sure to check Create gateway immediately. Click OK.
Note: you may need to specify Static rather than Dynamic for the Routing Type. Verify with the hardware vendor’s documentation.
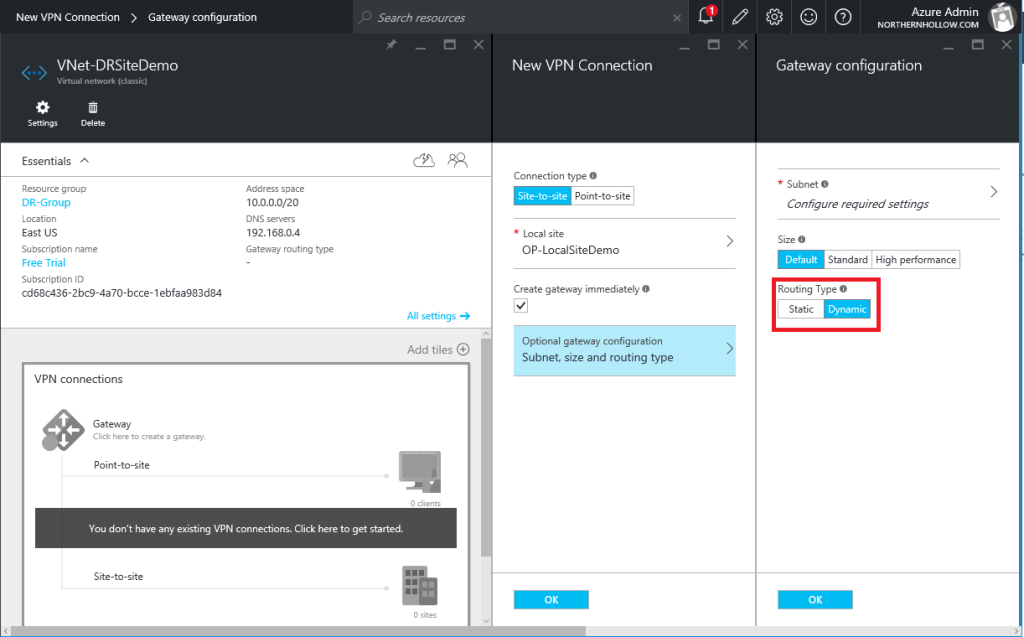
This will take some time to build the gateway, just be patient. If you are unsure how to proceed at this step, that is okay. Google (or Bing) can be of great help. Search Azure site-to-site VPN and your hardware device make/model.
Some folks find it easier to setup the VPN from the Classic portal. For example, to retrieve the pre-shared key, navigate to your Virtual Network and click Dashboard then Manage Key at the bottom of the screen.
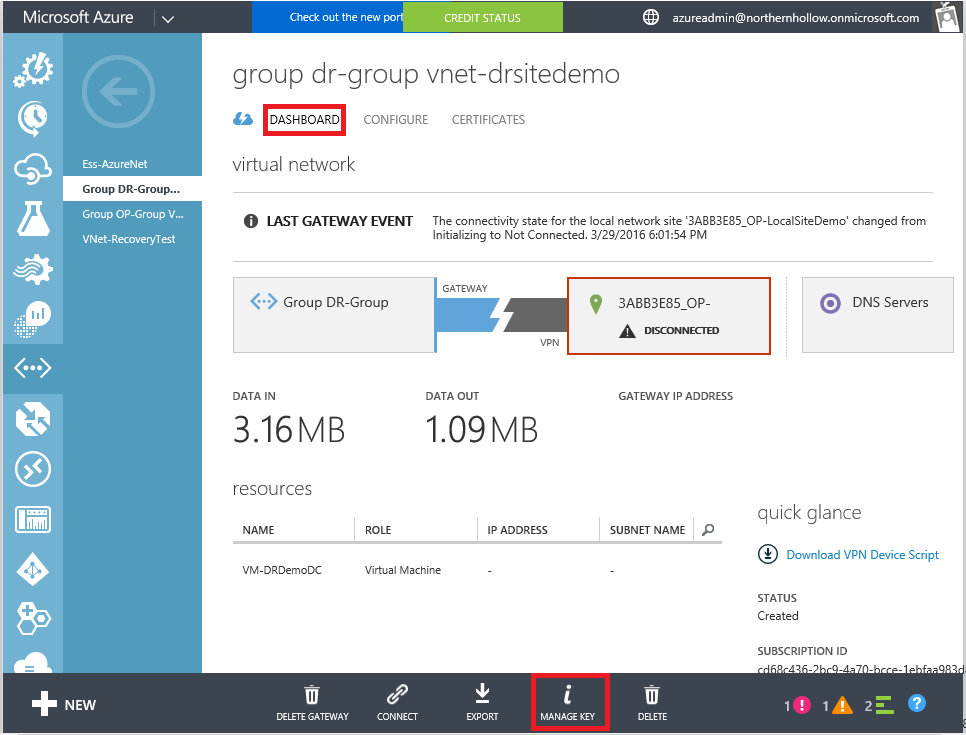
Microsoft also provides scripts for a select few vendors, including themselves (if using RRAS for example). TIP: You can also find the pre-shared key by downloading the RRAS script and searching the text for “SharedSecret”–instead of using the secret for RRAS, you can use it on your hardware-based VPN device.

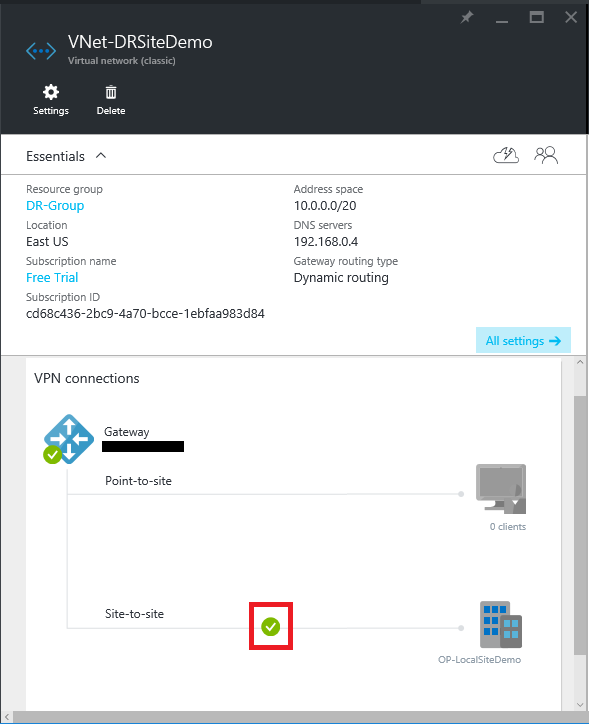
Once you have connected your VPN successfully, you will see a status similar to this in the portal:
Step 4: Join the Azure Virtual Machine to your Network and Promote
Last phase of deployment! Be sure to verify IP connectivity from your new virtual machine in the cloud to your on-premises servers. Make sure Windows firewalls are not blocking ICMP echo requests.
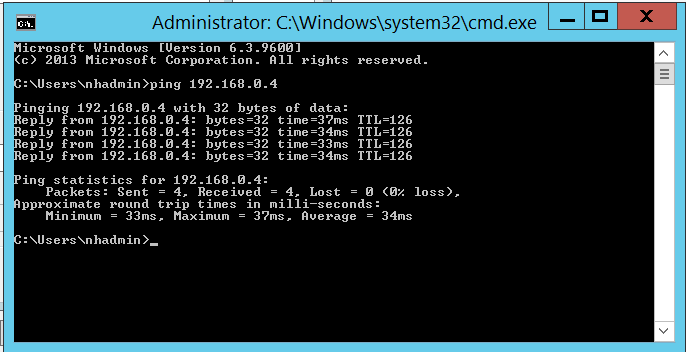
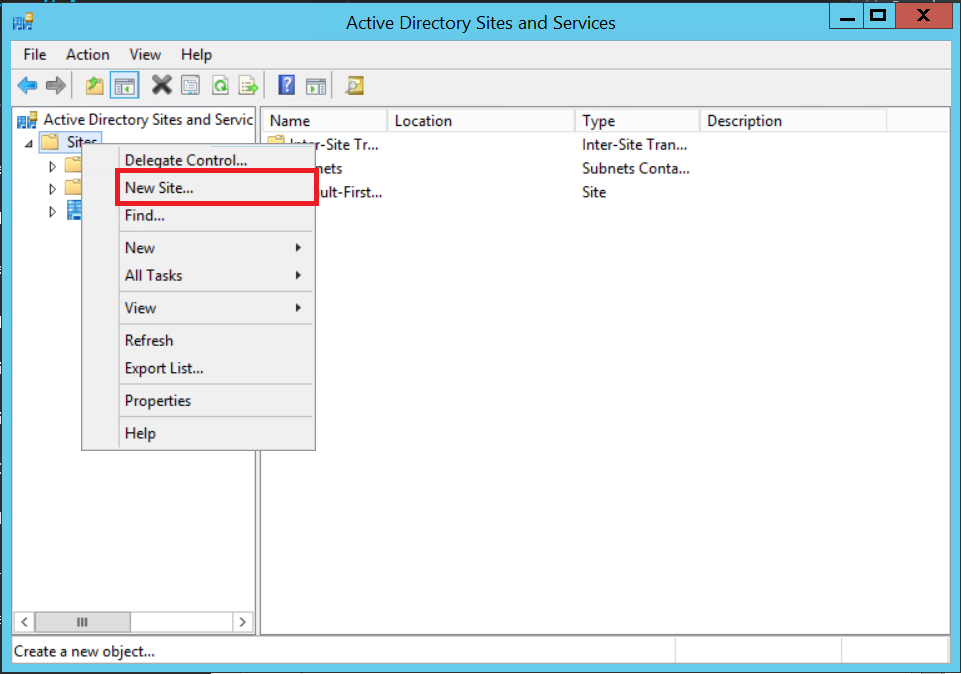
SUCCESS! Now, we will want to create a new Site & Subnet object for this network in Active Directory Sites & Services. Open the console on your local Domain Controller. Right-click on Sites > New Site…
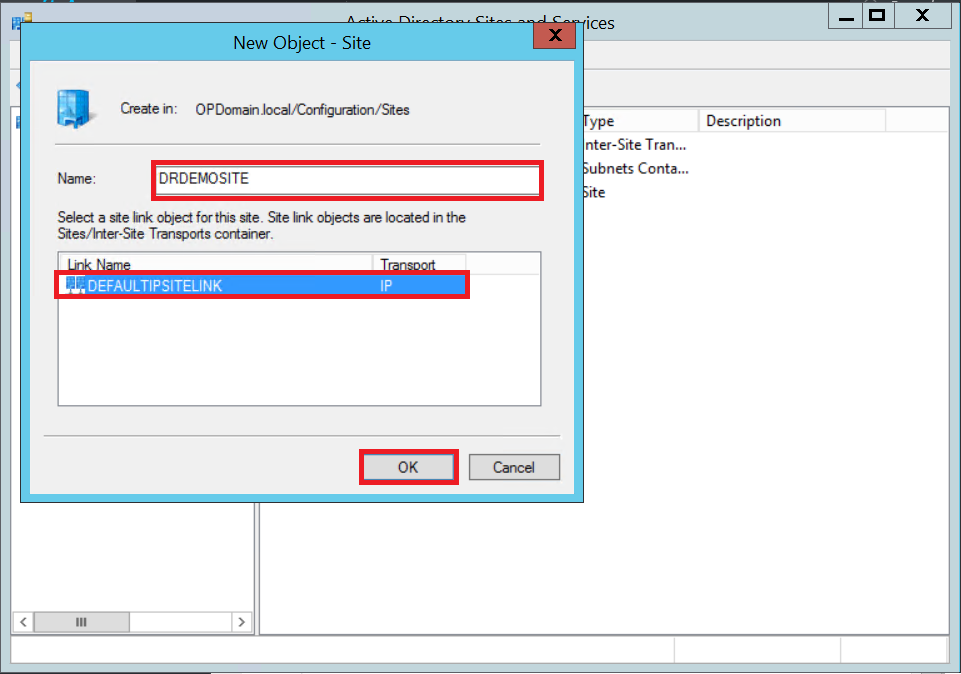
Name the Azure site something descriptive, and choose the default site link. Click OK.
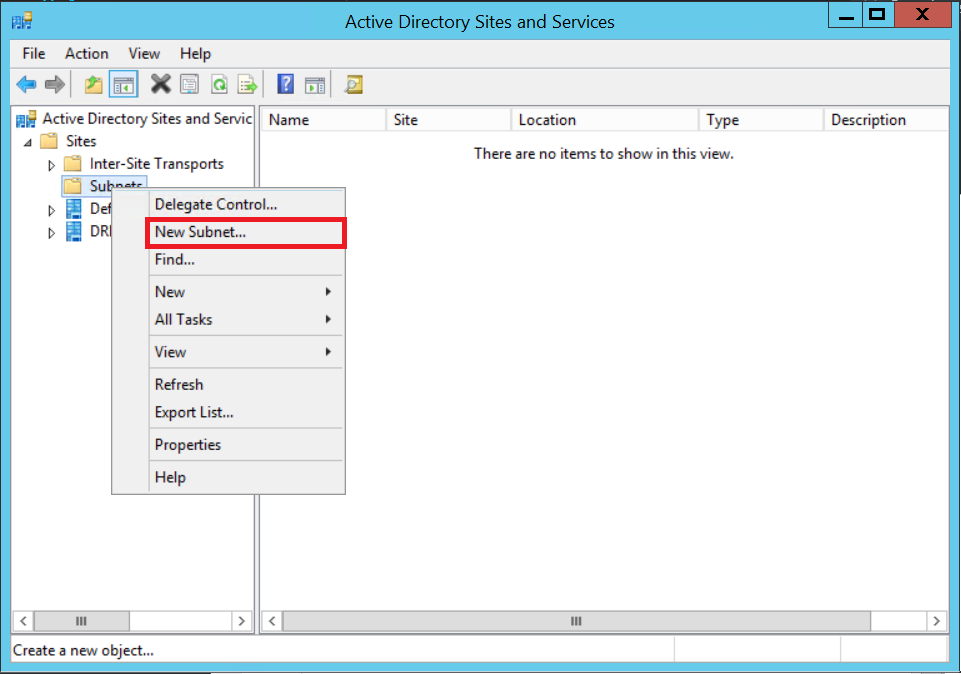
Once that is created, you need to also create a subnet object to describe the IP space. Right-click on Subnets > New Subnet…
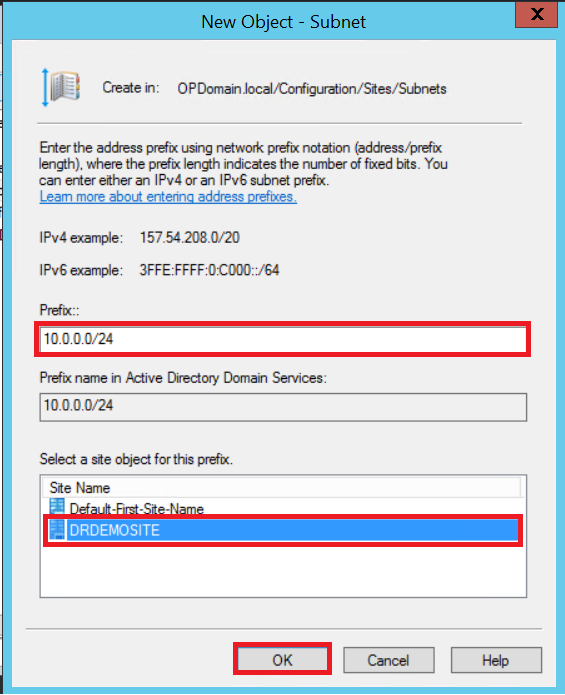
Specify the remote subnet IP range in CIDR format, choose to associate this object with the new site name you just created, and click OK.
Next, RDP to the VM and sign in. If you specified your local DNS servers on the virtual network, then you should be able to join the domain.

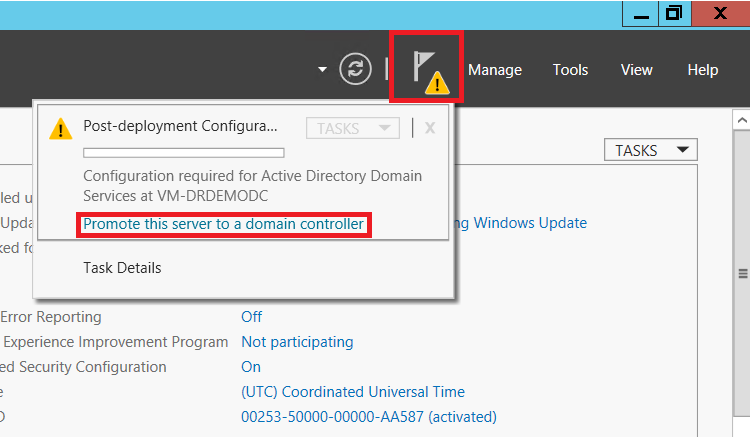
After it comes back online, you can add the ADDS roles and promote the server!
Just be sure you add this DC to the correct site when stepping through the wizard.
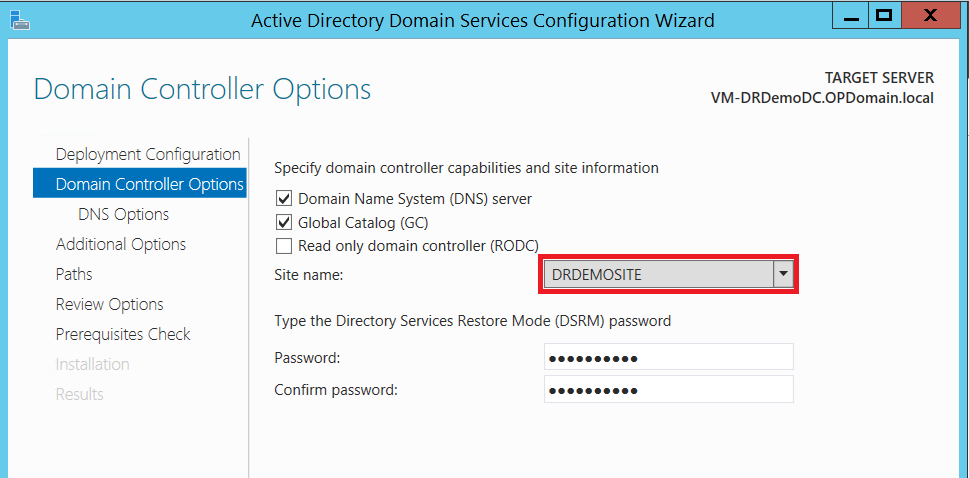
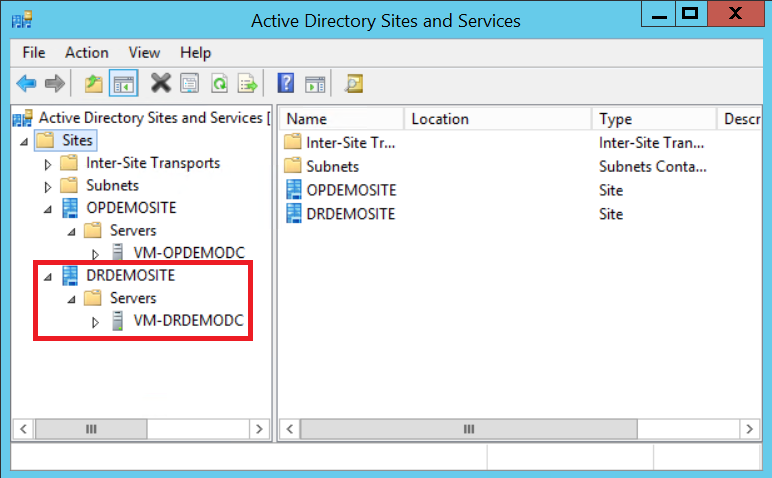
All set! Promotion should be successful, and you should now find your new Domain Controller listed in AD Sites & Services console.
Conclusions
In a relatively short time, you can have a DR site prepped and ready to go. This network is essentially just an extension of your on-premises network with the site-to-site VPN in place, and it can serve many purposes.
- In a Disaster Recovery situation, you can use this network to restore virtual machines that have been replicated from your on-premises servers to an Azure Site Recovery Vault.
- You might choose to deploy a new hosted LOB database or application server on this network, rather than invest in on-premises hardware upgrades/additions/refreshes.
- Consider standing up a DFS file server in the cloud and replicating your file share data to it. Back it up using Microsoft Azure Backup.
Again, these are some of my favorite use cases for Azure IaaS in the SMB. Note: For Site Recovery, I also like to create a separate Virtual Network (without a VPN connection) for performing test restores–that way you do not have to interrupt on-premises services to perform a failover operation. We will do this in an upcoming post, stay tuned!
Comments (2)
I’d like to see some numbers surrounding your statement “for a fraction of what it would cost to build your own co-location.”
Absolutely. Keep in mind that what we are discussing here is simply creating an extension of your existing on-premises environment (not replacing it). As of today, basic S2S VPN to an Azure Virtual Network is $27 USD / month. Adding in a single Basic or even Standard A1 VM to run AD/DNS would bring the total cost to just under $100 USD / month to have a platform ready to go in the cloud, and this could be deployed in a single morning or afternoon. Also, when using Azure for DR, you only have to actually run your VM’s when you are testing failover or when you need to failover due to a disaster event–making it super affordable since that should not happen frequently. I believe cost of ASR is currently listed at $54 USD per VM instance. No second firewall, no server/software purchase, and no co-location fees required. See the Azure pricing page for more up-to-date info if you’re reading this in the future. ;)
Adding more production VM’s to your Virtual Network? Yes, that will add more $, and at some point you will likely hit a break-even with hardware. I have another article on cost comparison–check it out and let me know what you think. Thanks for reading!