How to Replicate Hyper-V VMs to Azure Site Recovery
We have already seen how to setup an Azure Virtual Network for less than $100.00 USD / month in our previous article. Today we are going to see just how easy it is to turn this network into a fully functional DR site using Azure Site Recovery at a fraction of the cost of building a co-location.
Remember: you do not need to pay for VM’s that are not running, and replica VM’s do not run most of the time. Please note that there are other fees associated with Azure Site Recovery: e.g. $54.00 USD/instance/month at the time of this writing (see Azure pricing for more details). For most SMB’s, ASR is a much more affordable solution when compared with owning extra servers and paying co-location fees year-round!
If you already own Hyper-V on-premises, (or even VMware), then you can get started right away, with no other hardware or software required. There are a lot of screens to follow along with, but the process is very straight forward, as you will see. Below is a diagram of what we’re building. This post is just about setting up the replication. We will also cover failover to a “test” Azure Virtual Network, later.
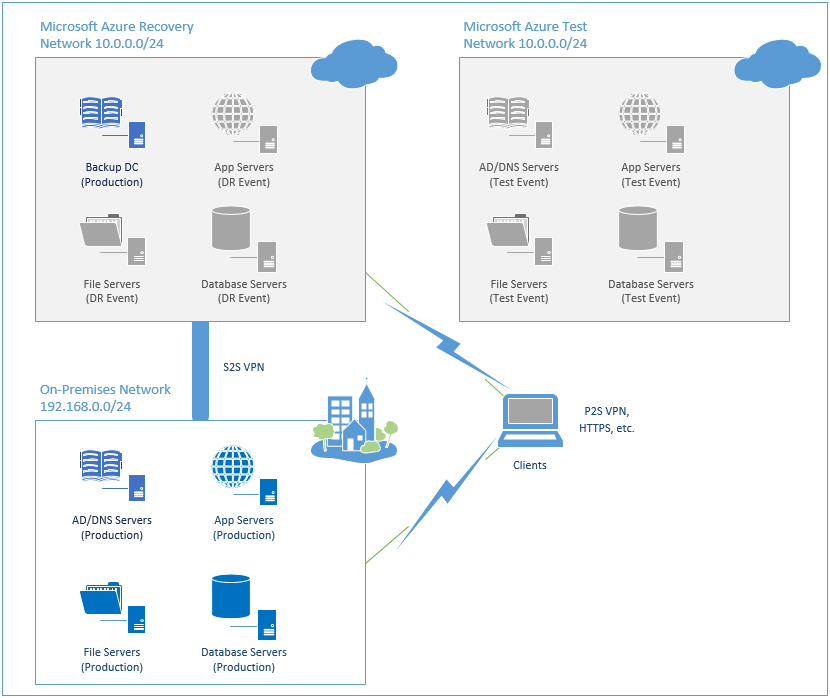
Image credit: itpromentor.com
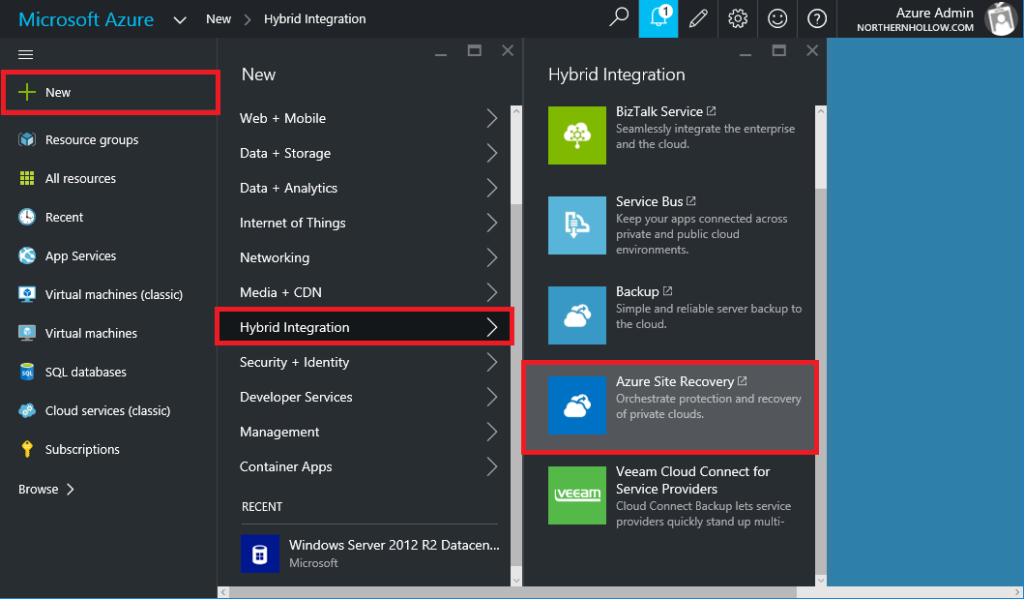
At the time of this writing, the new Azure portal does not yet have full feature parity with the Classic portal, so our work will be done primarily from the Classic portal. Update: Site Recovery vaults are now in preview on ARM. To get there from the new Azure portal, just go to New > Hybrid Integration > Azure Site Recovery.
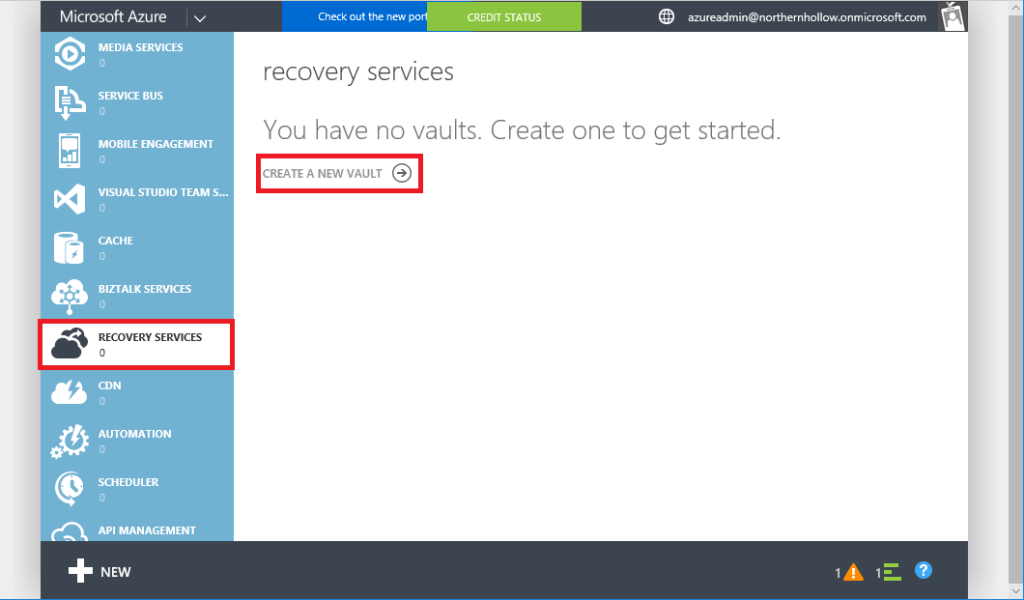
Next, click the link to CREATE A NEW VAULT.
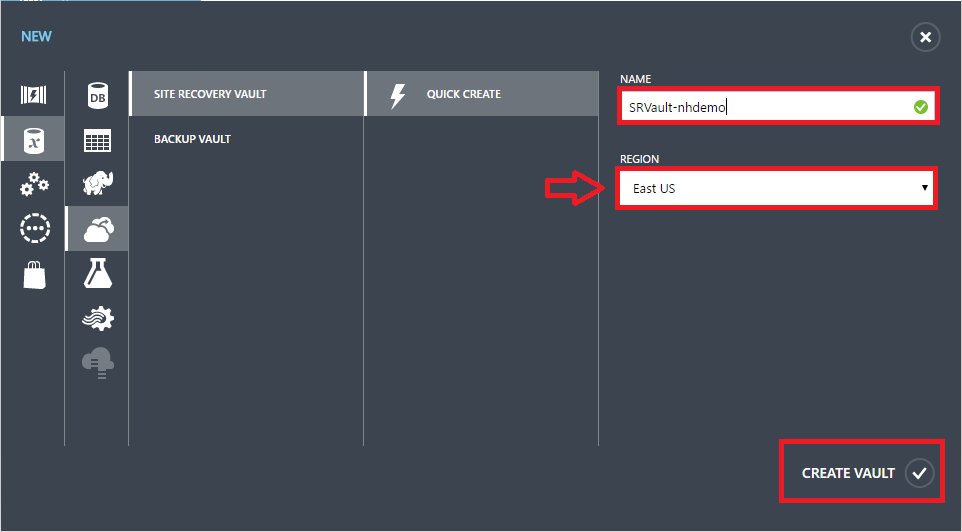
Give the vault a name, and pick a location. Be sure to remember this location for future steps–you’ll want to create your storage account and virtual network in the same regional datacenter.
Once this object has been created, click on it to enter the Site Recovery Quick Start workflow. You can select the appropriate recovery setup option from the drop-down, which in our case is Between an on-premises Hyper-V site and Azure.
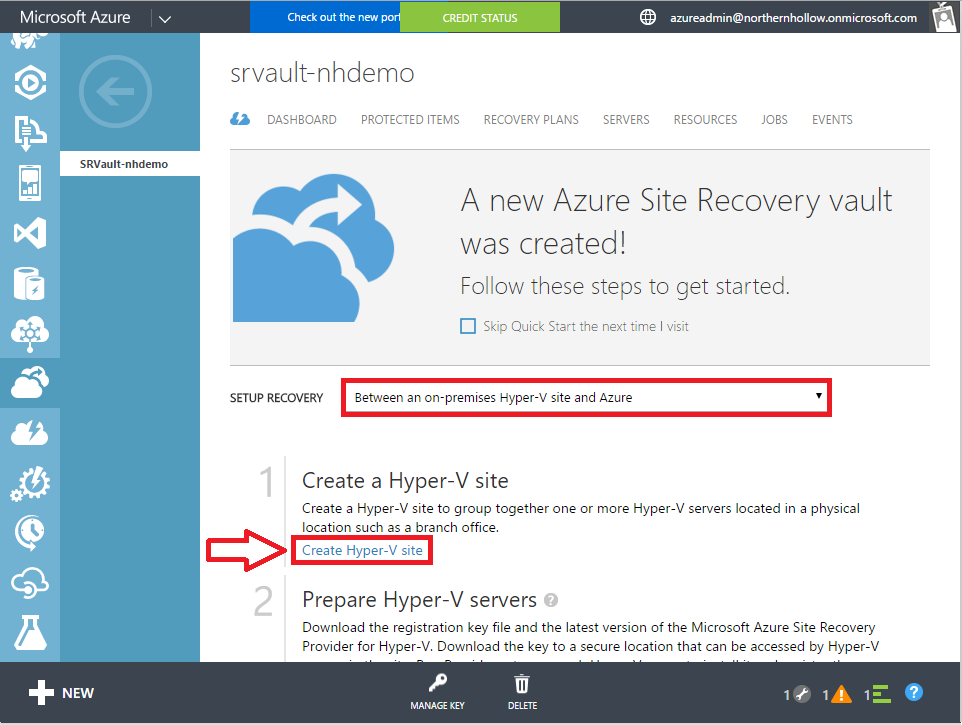
Go ahead and follow the link to complete the first step: Create Hyper-V site.
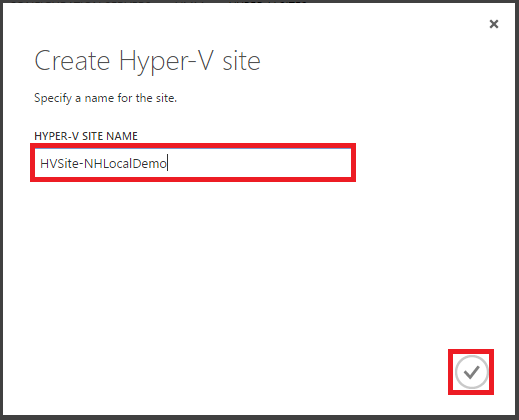
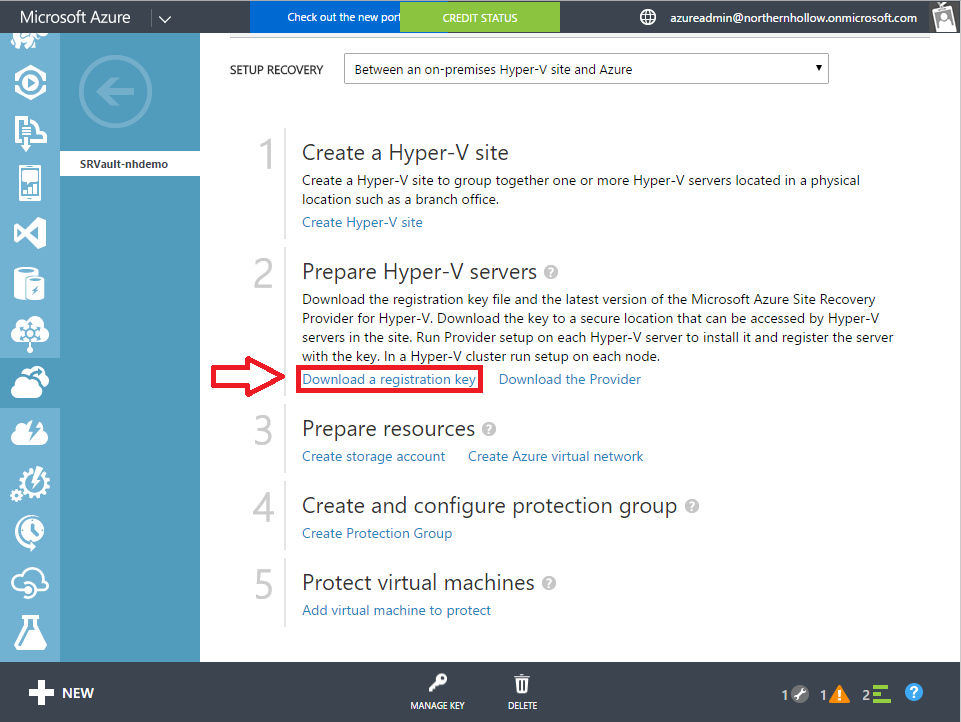
All you have to do is give it a name. When it is done, return to the Quick Start workflow and follow the next step. You will need to download these items to a location accessible from your Hyper-V host server(s). See the following screenshots.

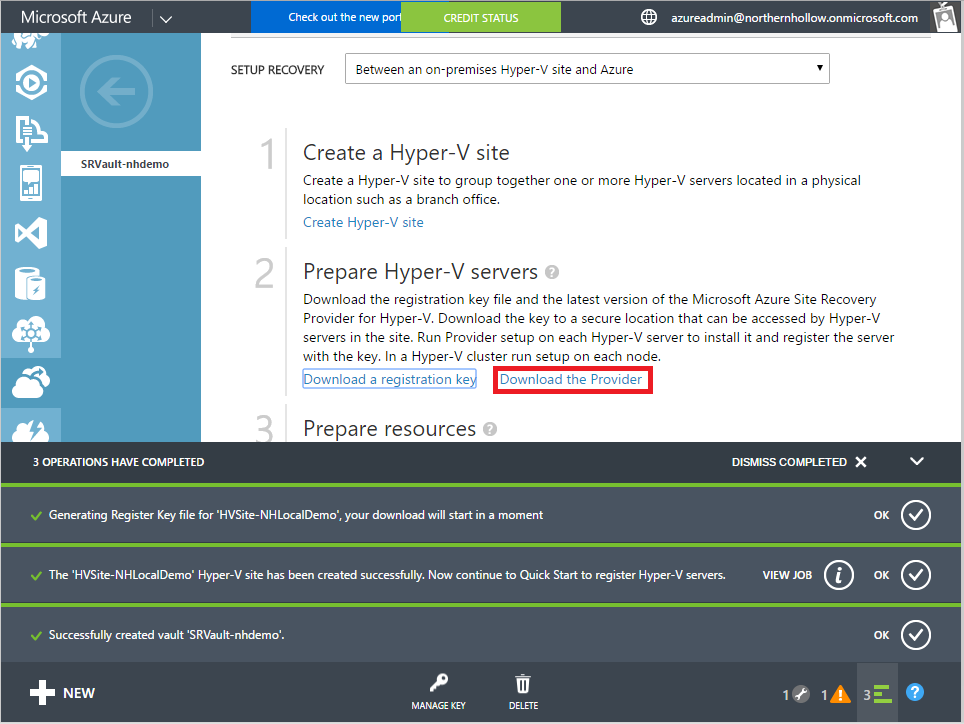
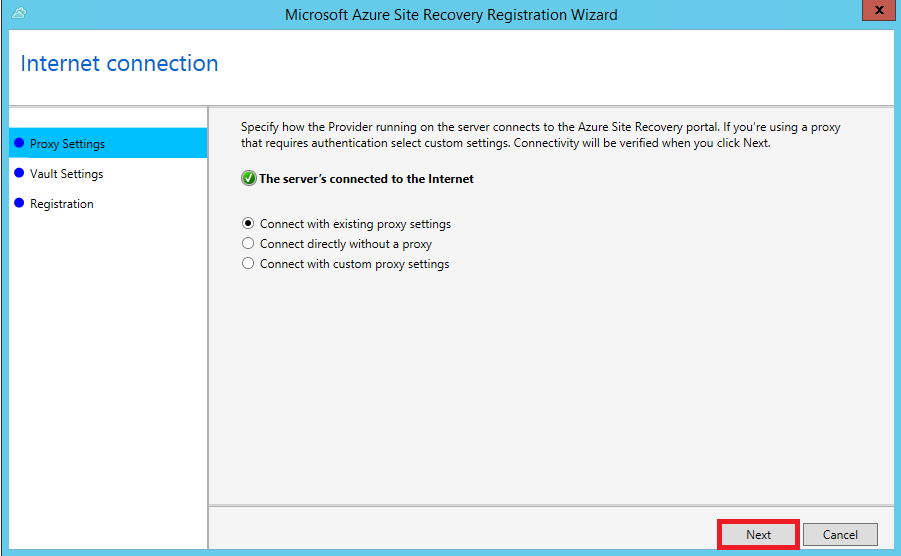
Next we have to run the setup executable for the Site Recovery Provider (an agent that configures the Hyper-V replica settings). From your Hyper-V host(s), find the files you downloaded and run the setup.
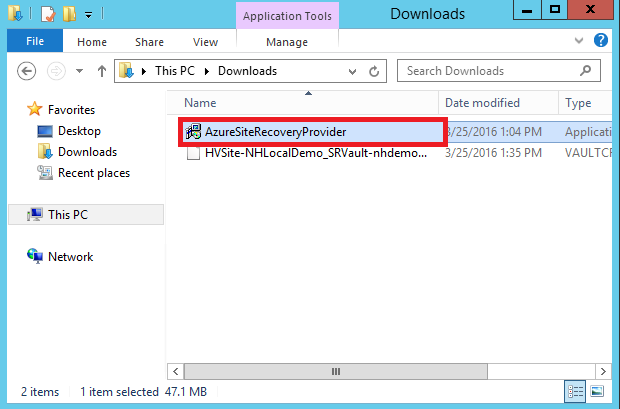
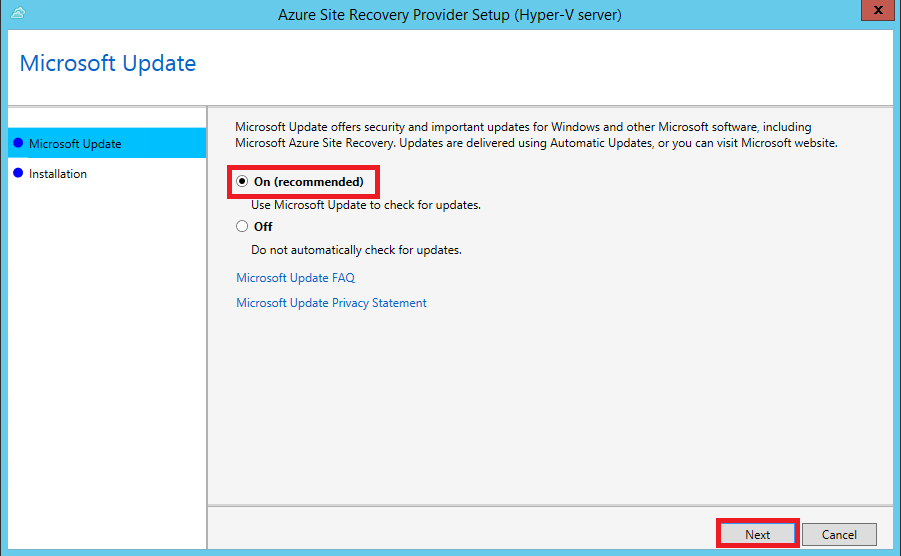
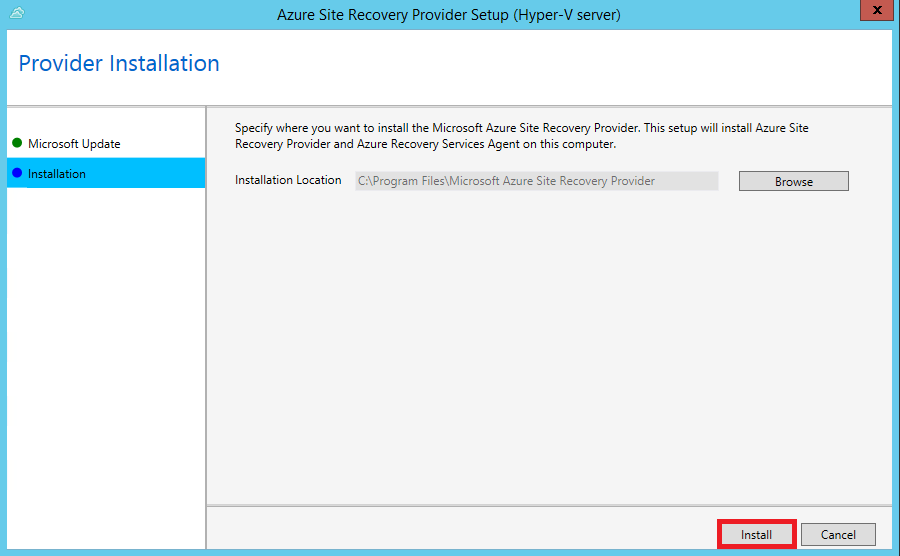
Basically you have a classic “next-next-finish-style” series of wizard screens:
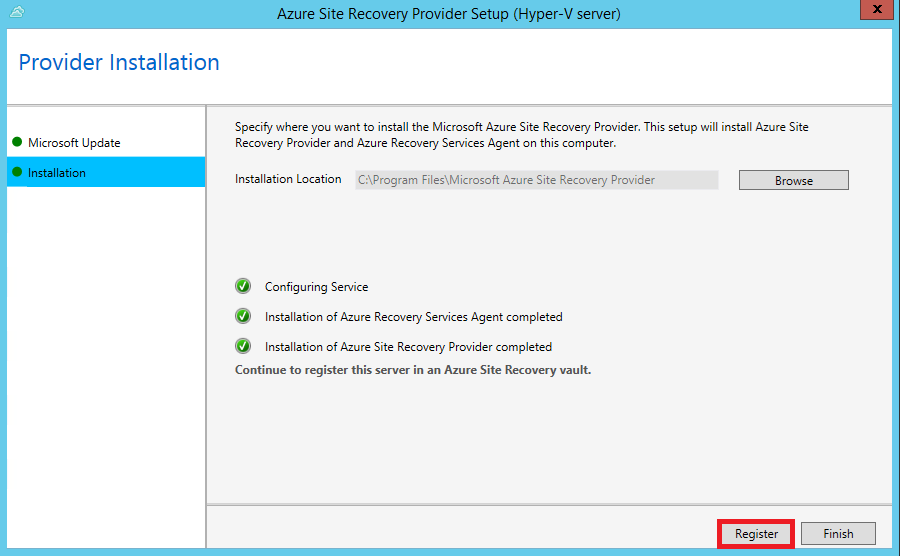
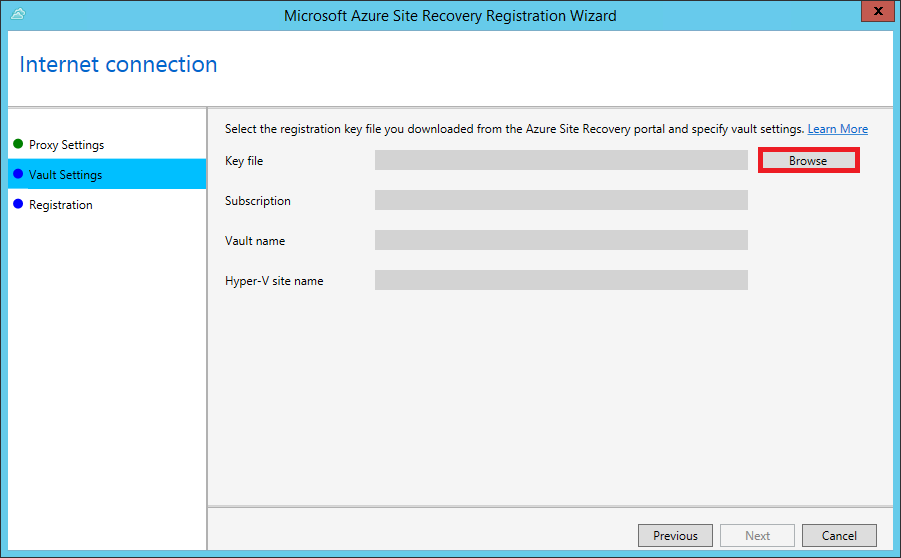
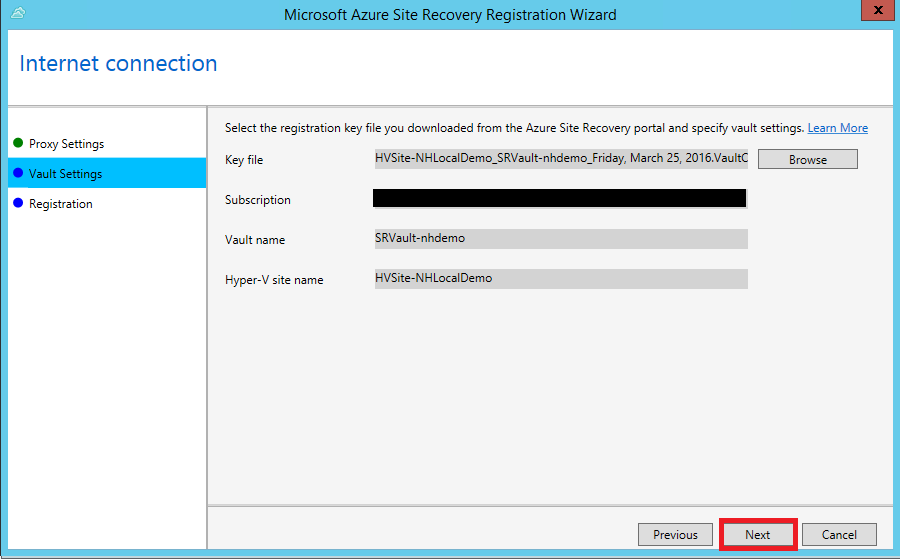
Here is where you need to browse and find the key registration file that was generated in the portal:

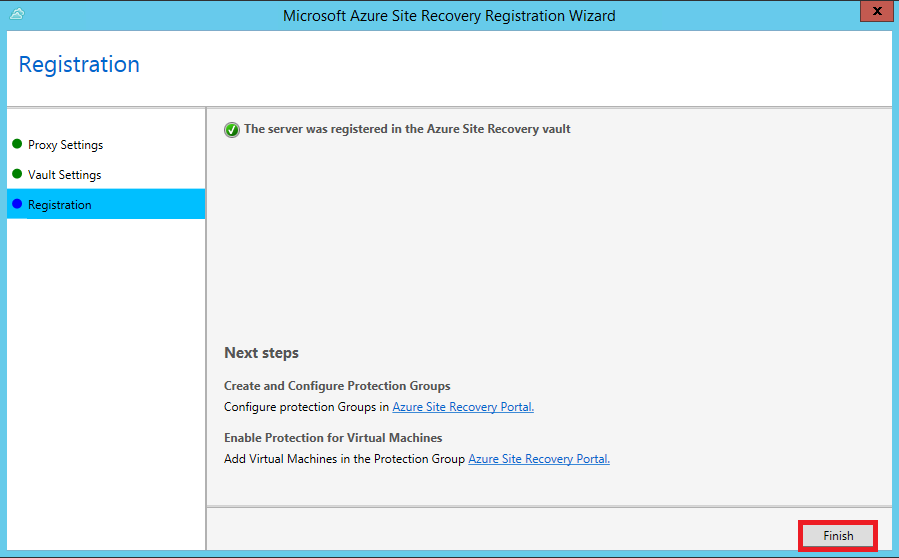
Returning to the Azure portal, we can continue with our workflow on Step 3.
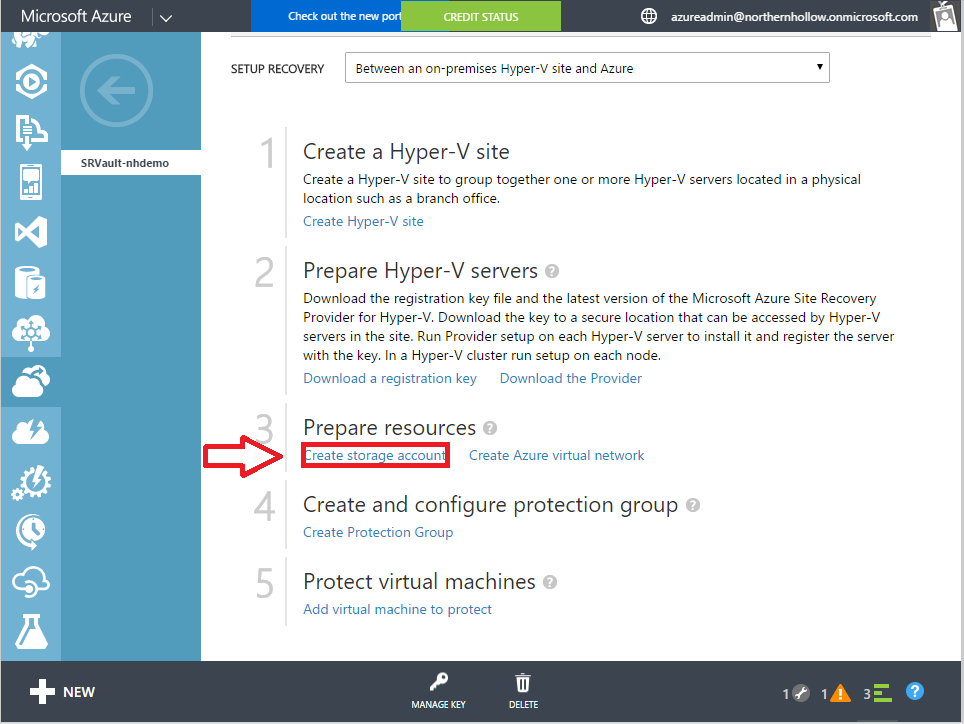
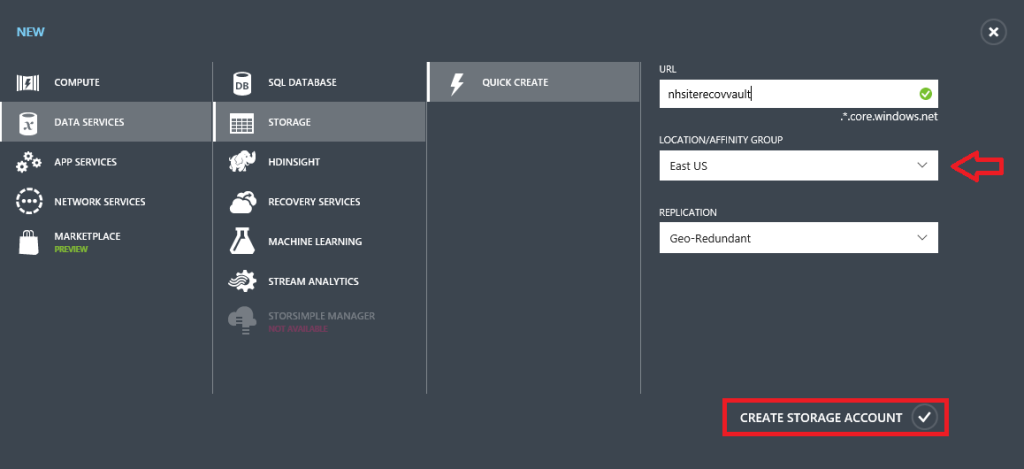
First we create the storage account that will be used to store replicated vhd files. Remember to pick a location or affinity group consistent with your selection for the Site Recovery Vault & Virtual Network.
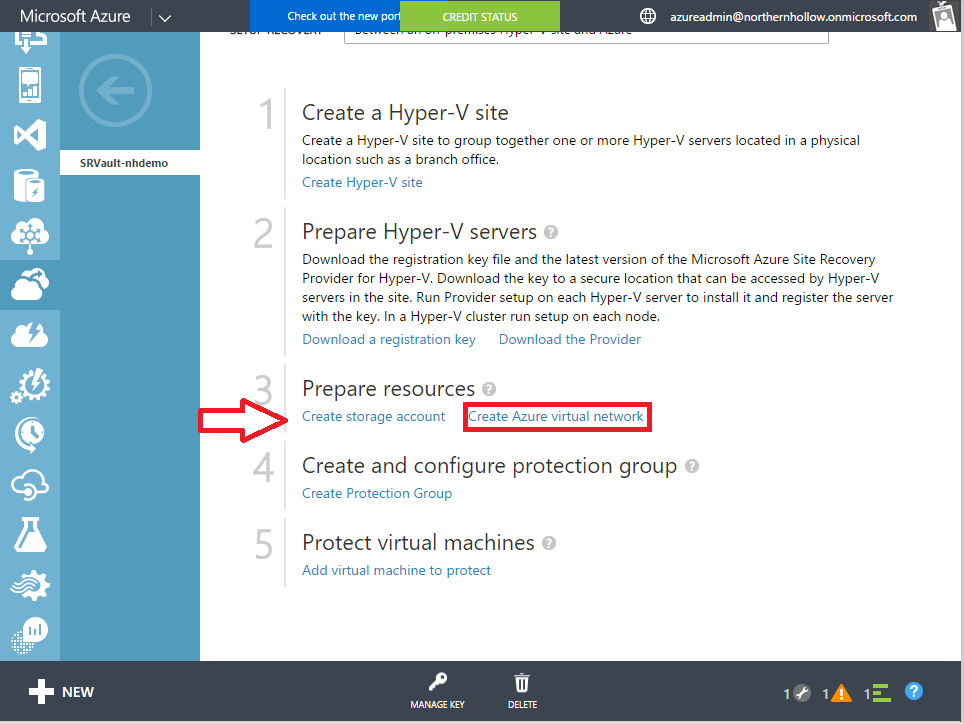
Return to the workflow. If you do not yet have a Virtual Network that you intend to use for testing Site Recovery, you will create one now.
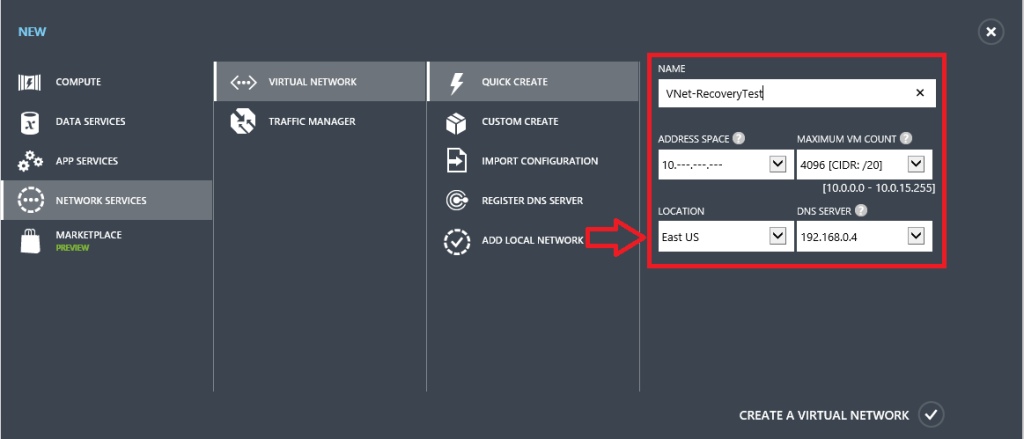
Note: you do not have to specify a DNS server, but this is how the DNS will work: the very first virtual machine that you will restore (typically) will be an Active Directory/DNS server. The assignments in an Azure Virtual Network start on the 4th IP address. E.g.for 10.0.0.0/24, the first IP assigned will be 10.0.0.4. You can add this right away by registering a new DNS server at the appropriate address, or later via the properties of the Virtual Network. Most important is to keep location choice consistent.
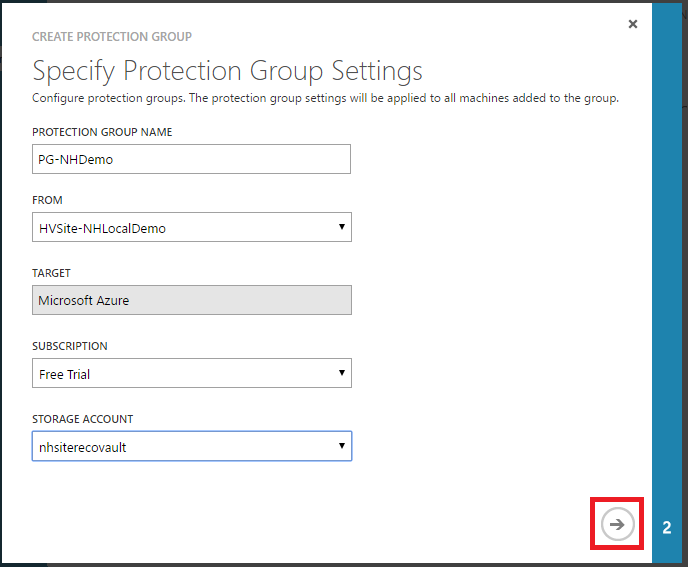
Believe it or not, we are almost done with the hard part! Returning to the Site Recovery workflow again, we can follow the link to Create a Protection Group.
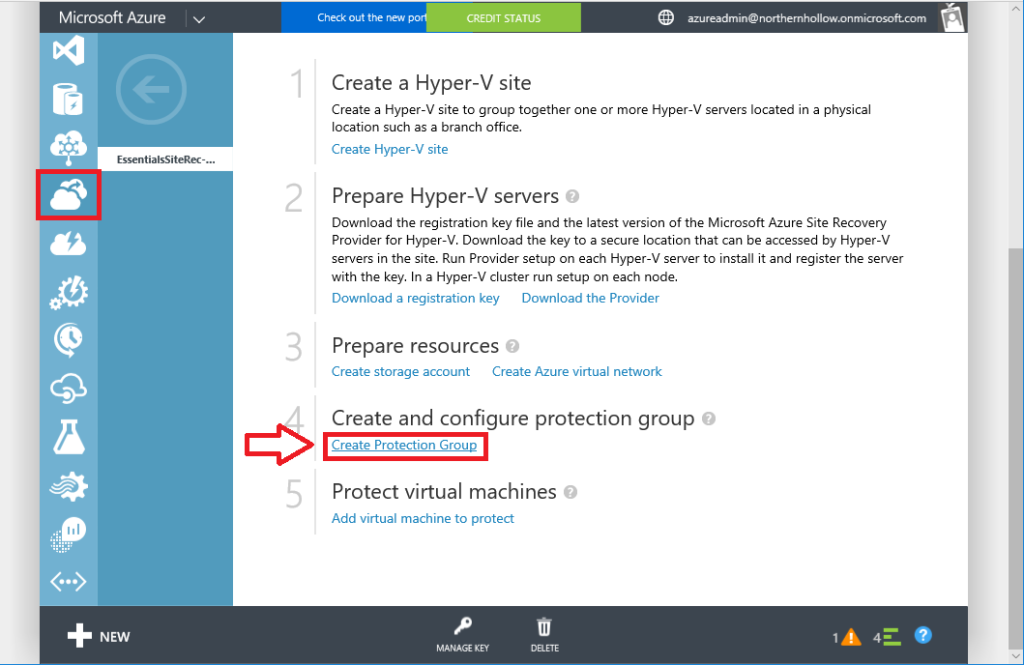
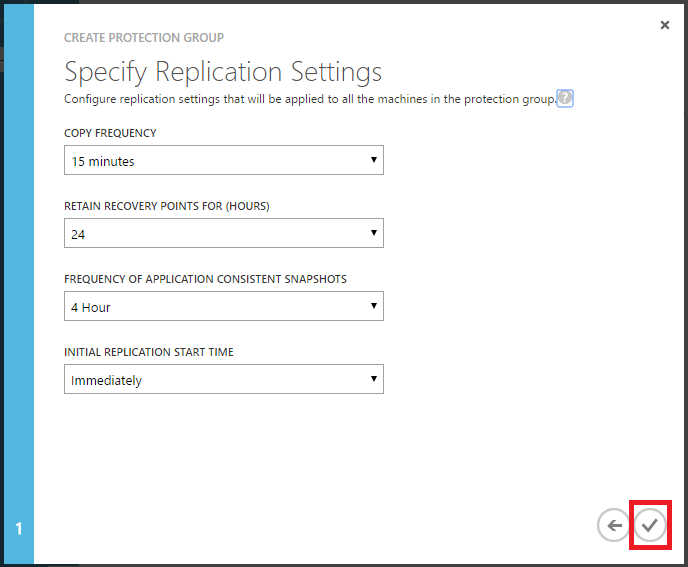
This object is what creates a set of “rules” for a replication job to follow. You can apply these rules to any or all of your VM’s, or optionally create a different set of replication rules for different VM’s (maybe you don’t need all of them replicated with the same frequency for example).
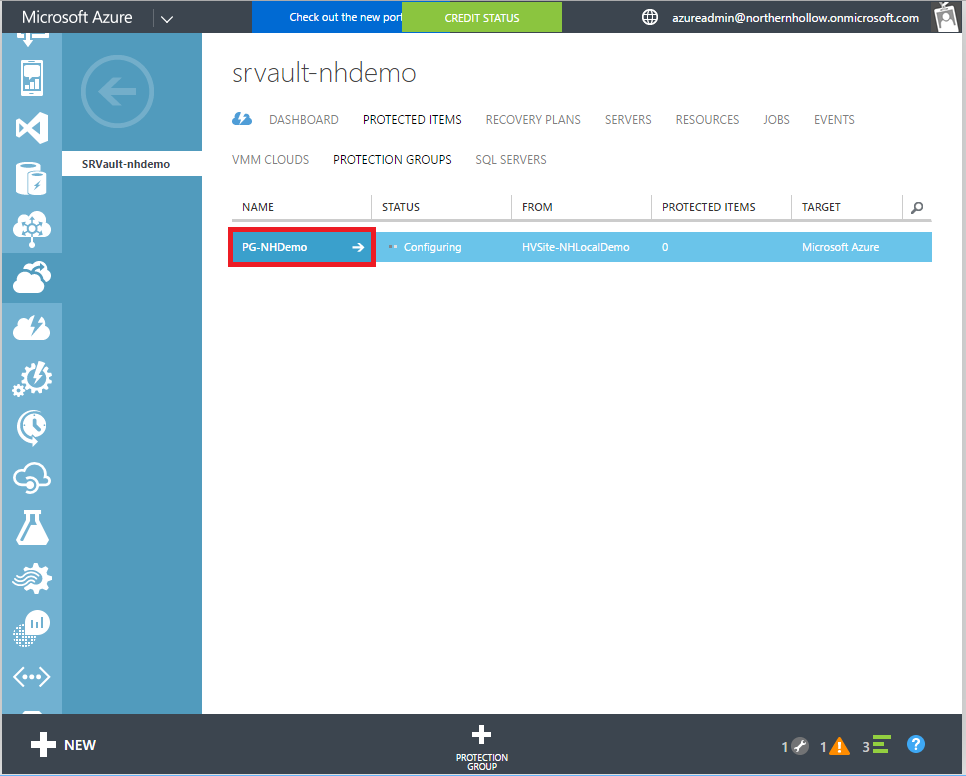
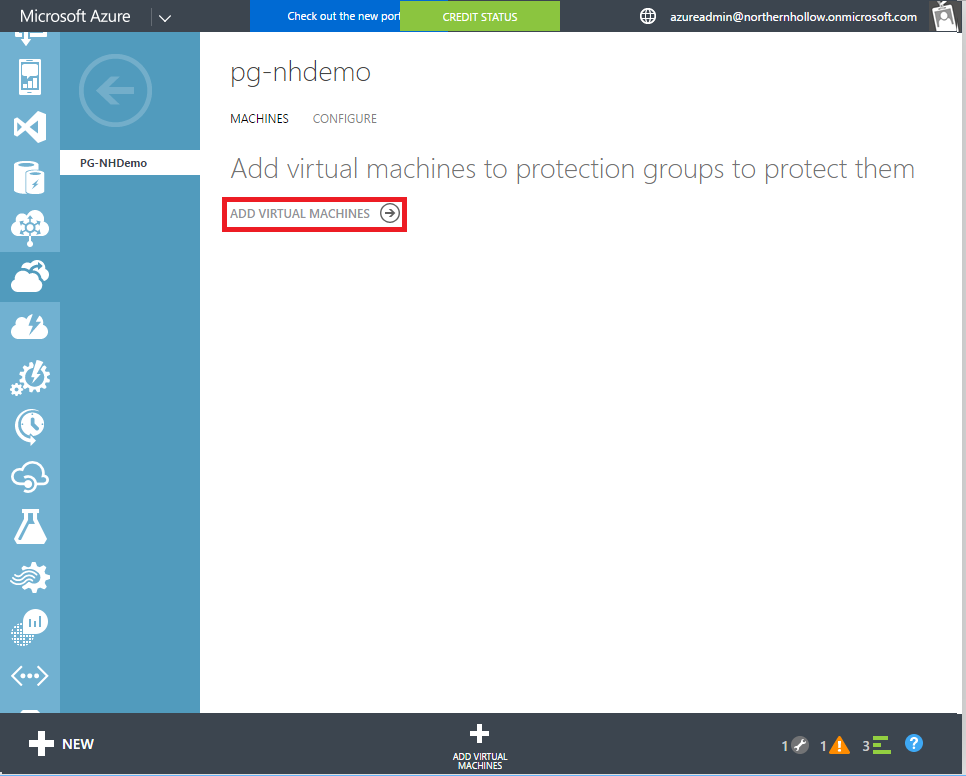
This is probably the only confusing part of the whole process. Just DO NOT return to the workflow for the last step. Instead, you can add virtual machines directly from the Protection Group screen. Under Protected Items > Protection Groups, click the one you created to enter the Protection Group settings.
And click to Add Virtual Machines.
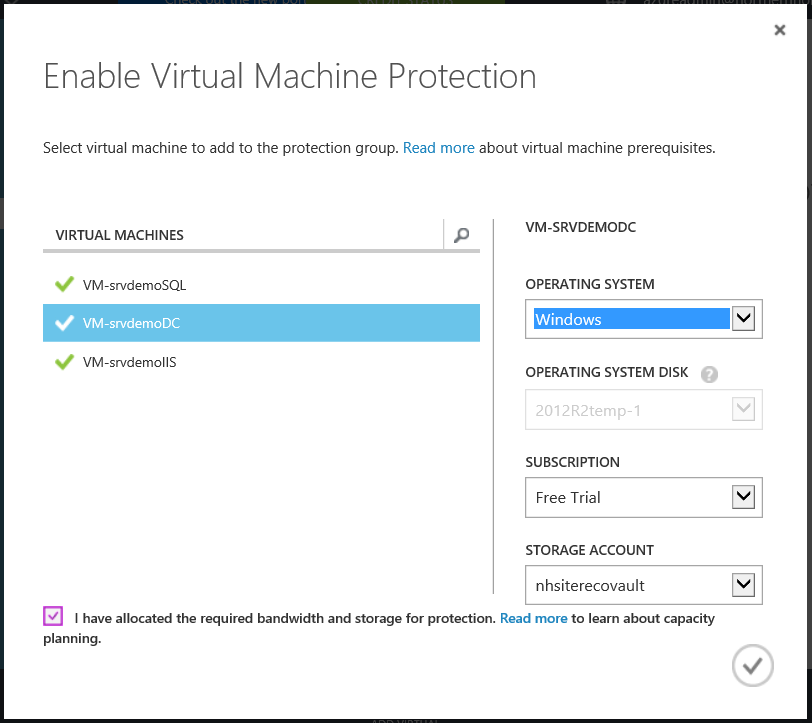
Select the VM(s) that you intend to replicate, and make sure you check the box to confirm you have allocated storage and bandwidth on-premises.*
After you have added each virtual machine, you can return to the Hyper-V server and see the results. You will notice a checkpoint has been created to “freeze” the vhd file(s) in place, and copy them up–the differentials are copied afterward. The replica server is listed as Microsoft Azure.
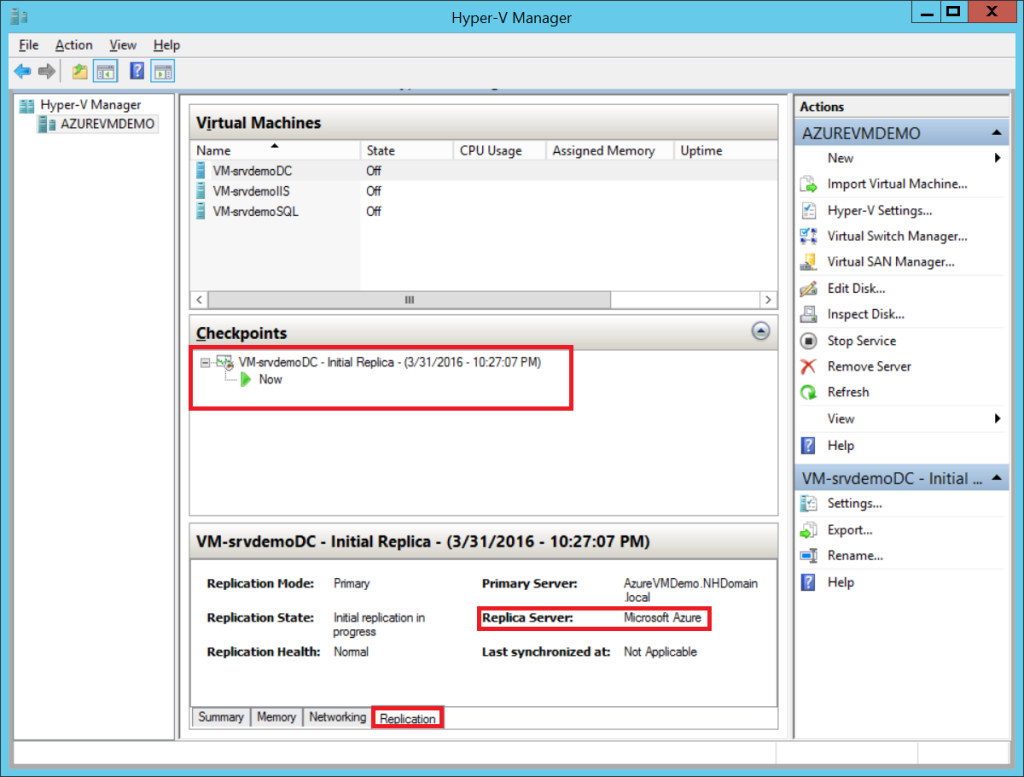
In the virtual machine settings, you can see that the replica settings are not configurable on the local Hyper-V server–all modifications, including removing the replication, would take place from the Azure portal.

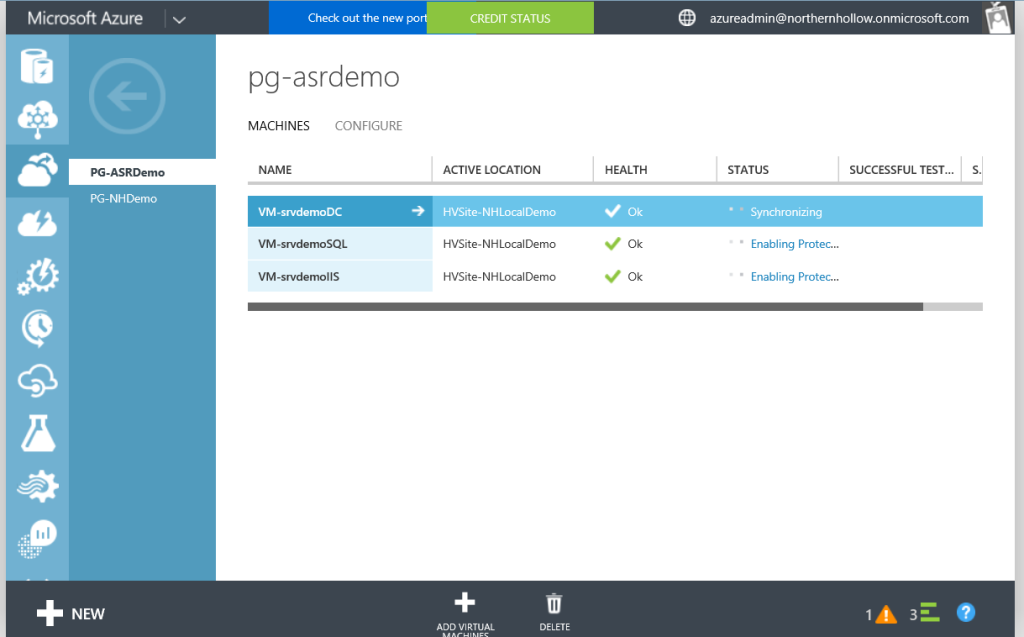
In the portal you can watch replication status (it could take a while depending on your bandwidth–that’s why I would only recommend this solution if you have a reliable high speed Internet connection).
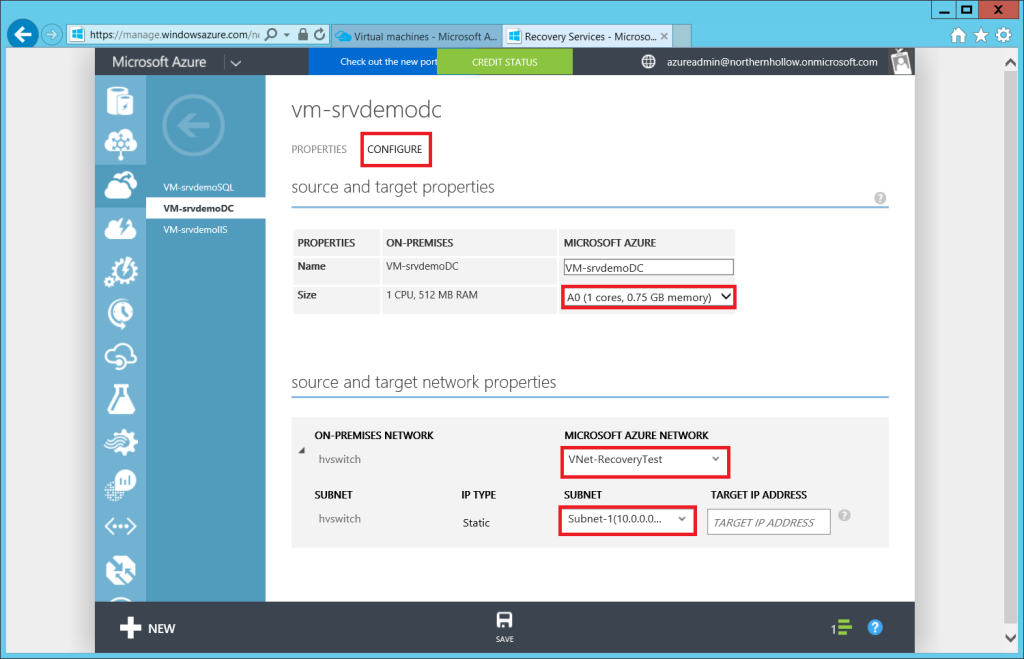
On each VM, you will want to check out the size and specify a recovery network. Click on the VM and go to the CONFIGURE tab. You might not like the default selections here, so don’t skip this step!
And that pretty much concludes the process.
Monitoring Replication Health
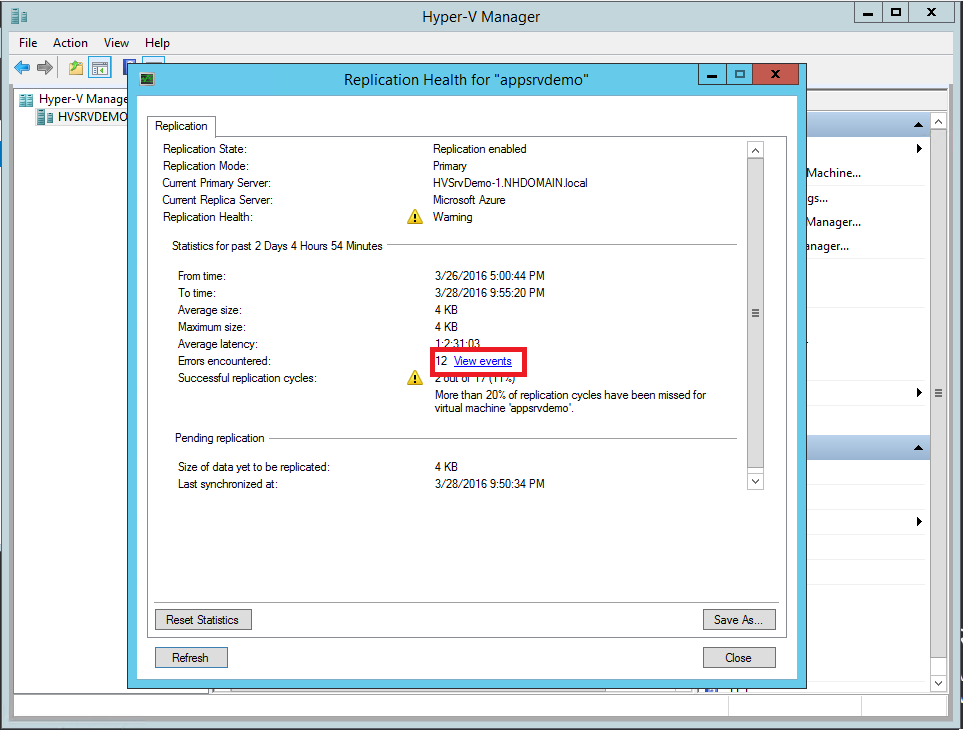
One more “gotcha” that you need to be wary of when working with this solution. Replication health is important to keep an eye on. You can view Replication health right on your Hyper-V server.

You will not get alerts for this unless you set something up for yourself manually. Just something to be aware of. Service providers: I recommend enabling your monitoring agents to alert on replication events. Click View events (if applicable).
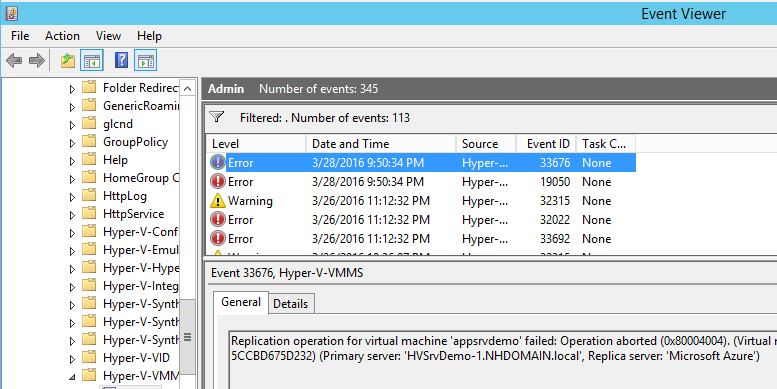
You can see which events are associated with failures from the Event Viewer.
In conclusion, Azure Site Recovery is a fantastic “poor-man’s” solution for providing a reliable Disaster Recovery site. Just be sure that you have a way to enable monitoring so that you can respond appropriately, and of course you will want to create a Recovery Plan and test it periodically–we will go over that process in our next post.
Footnotes:
*There are some best practices for enabling Hyper-V replica to Azure Site Recovery. For example, you will need extra disk space because the process requires temporary checkpoints–just some things to be aware of.
Leave a Reply