Tutorial: How to Setup Azure Virtual Network with Windows Server Essentials and a Hardware VPN Appliance
Most tutorials on Azure Virtual Network and site-to-site VPN rely on Windows Server’s RRAS role to create a quick and dirty VPN connection for demonstration purposes. But in a real world production environment, this is hardly ever the case; the better option by far for reliability and simplified routing is to use a perimeter device such as a hardware VPN appliance or firewall.
Getting an Azure Virtual Network setup is the first step to enabling a number of different small business solutions, including:
- Azure-hosted backup domain controller/DFS file server
- Azure-hosted line of business application server
- Complete migration of on-premises VM’s to Azure, or
- Azure Site Recovery / virtual machine replication for DR purposes
In this tutorial, we will use the on-premises Windows Server Essentials integration tools to establish a site-to-site VPN with Azure using our firewall at the perimeter of the network. In my example, I am going to use a WatchGuard, although this can be done with many other hardware vendors as well: SonicWall, Cisco, Fortinet, Juniper, etc.
There is a great resource from Microsoft that links to various articles by these vendors to configure their specific devices & settings for use with Azure virtual networks. But the Windows Server/Azure side settings are essentially the same throughout. So combining my article with this other resource will probably get you where you need to be.
Note: I have a separate tutorial on configuring the Azure Virtual Network without Windows Server Essentials integrations (just via the Azure portal) here.
Pre-requisites:
- You will need Windows Server 2016 Essentials or Windows Server 2016 Standard/Datacenter edition with the Essential Experience role enabled, and all the latest updates.
- You will require an Azure subscription.
- You need to have a compatible perimeter/hardware device for your VPN; mine is a WatchGuard M series firewall (they all have the same OS regardless of model number)
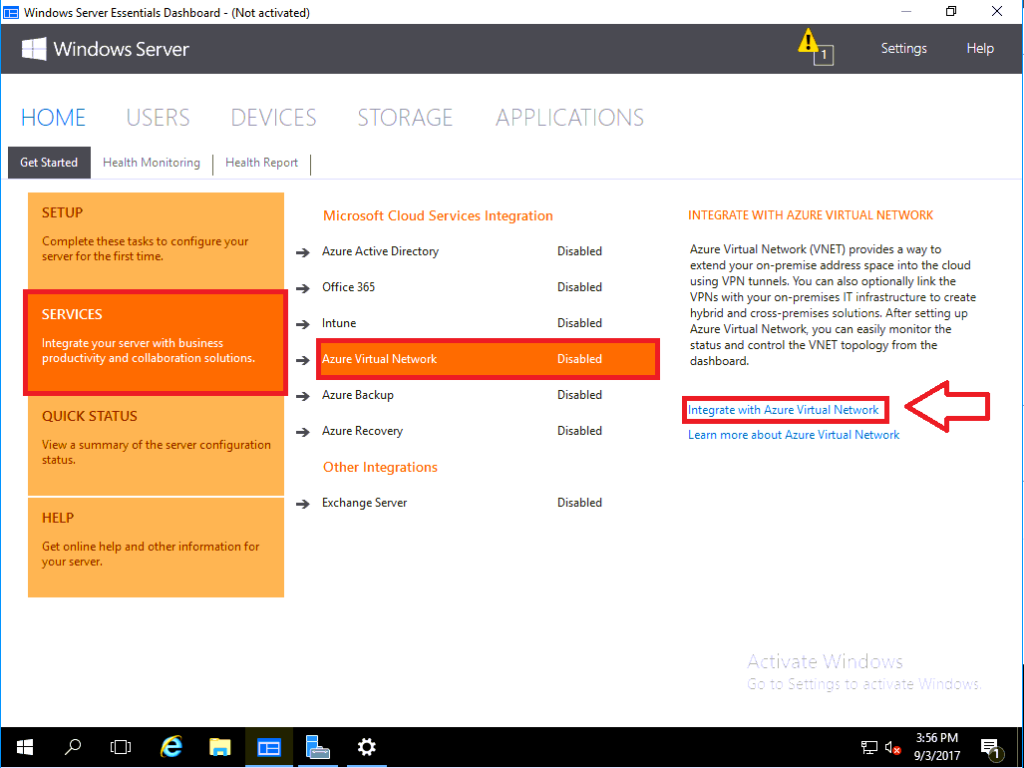
Step 1. Run the Azure Virtual Network wizard
From the Windows Server Essentials Dashboard Home screen, choose Services > Azure Virtual Network, and click on Integrate with Azure Virtual Network.
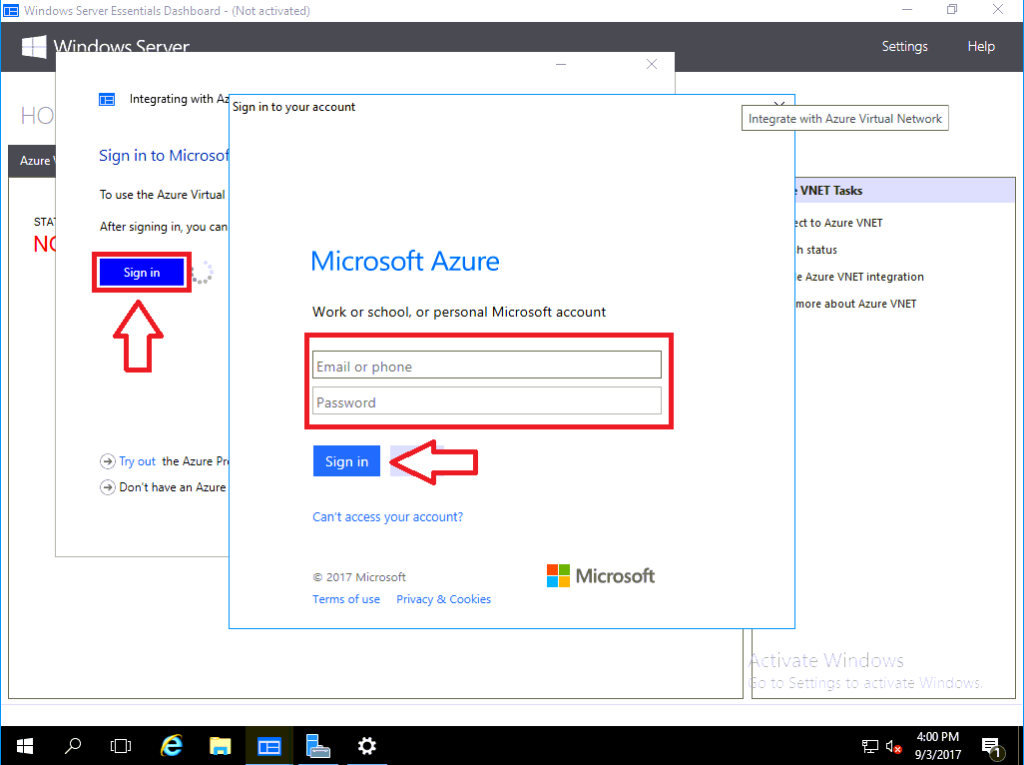
Let’s step through this very simple wizard. First you will need to sign into your Microsoft Azure account, and choose your subscription, then click Next.
On this next part, you need to give some kind of descriptive name to the Azure virtual network as well as the local corporate network. These names will correspond to objects that you will be able to see in the Azure portal, later. You cannot choose an IP address space for the Azure VNET in this wizard, it will pick those for you. Choose a Location where you want to host your Azure-based network & virtual machines.

At this point in the wizard, you are presented with a screen entitled Set up VPN device, and you have a choice.
- Use my Windows Server as the VPN server in this network
- Use my VPN router
The second option is the more preferred one, which we are covering in this deep dive tutorial, because in most small business networks, we like to use the firewall as our gateway device. Having the VPN controlled here as well provides a reliable hardware-based VPN connection, with the least complicated routing configuration for our small business network. So we pick the second option for Use my VPN router, and are immediately surprised with another fork in the road.
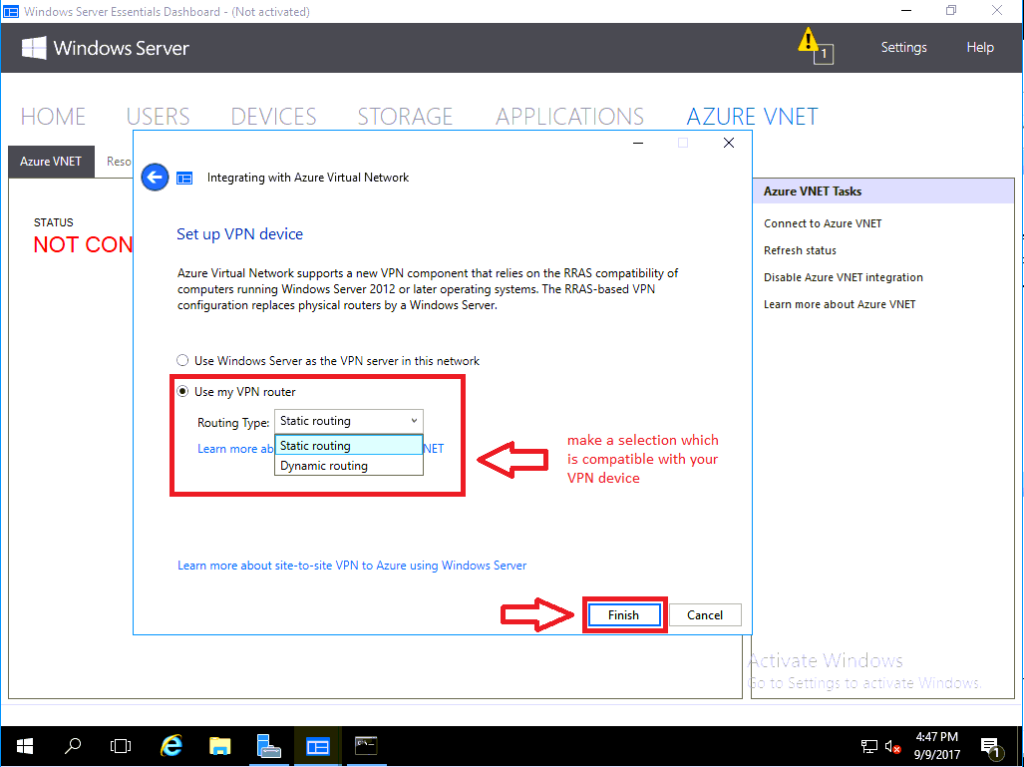
- Static routing – this will create a Policy-based VPN in Azure
- Dynamic routing – this will create a Route-based VPN in Azure
Which one is the best option? See here for the long answer. But in short, you just need to go check Azure’s compatibility list for your device. You might be restricted to Static (which is totally fine for most SMB environments), but if you are able, I’d suggest choosing Dynamic. Dynamic is the “fancier” option supported by many (but not all) firewall appliances, and allows more efficient routing updates as well as more complex network designs, if that is ever a requirement. For my WatchGuard firewall, I will pick the Dynamic option, because I see that it is indeed supported in the above link.
Now we finish the wizard. Click Close.
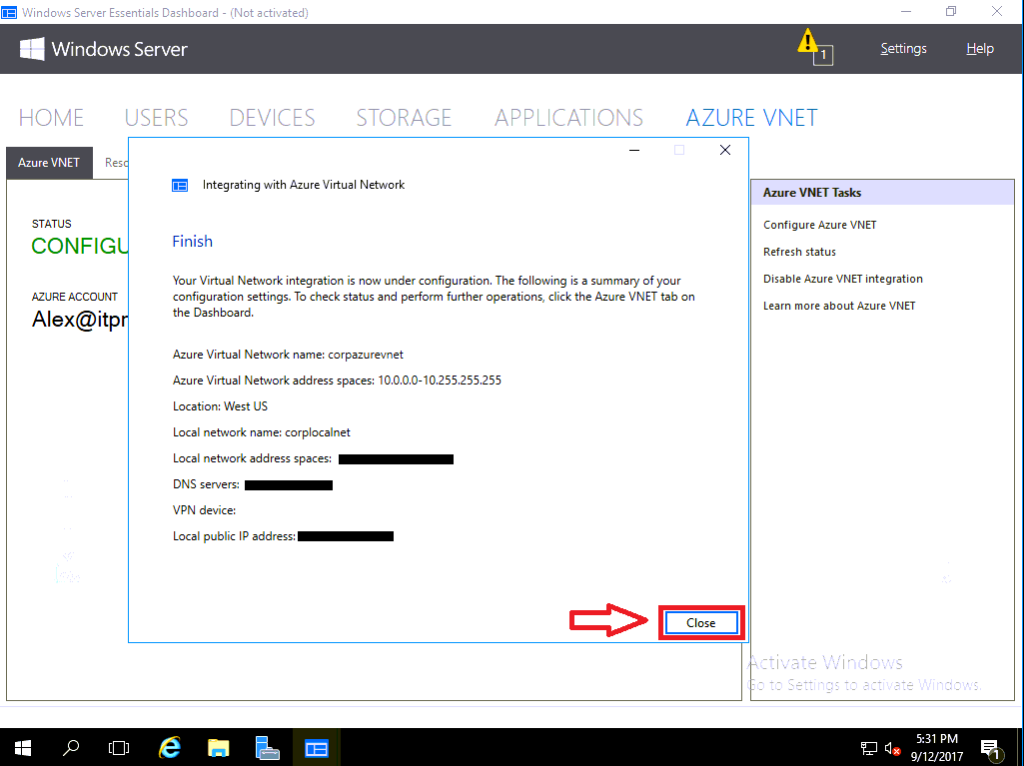
You will notice that the Windows Server Essentials Dashboard now has a new plugin enabled, for Azure VNET. From here, we can see the status is Configuring.
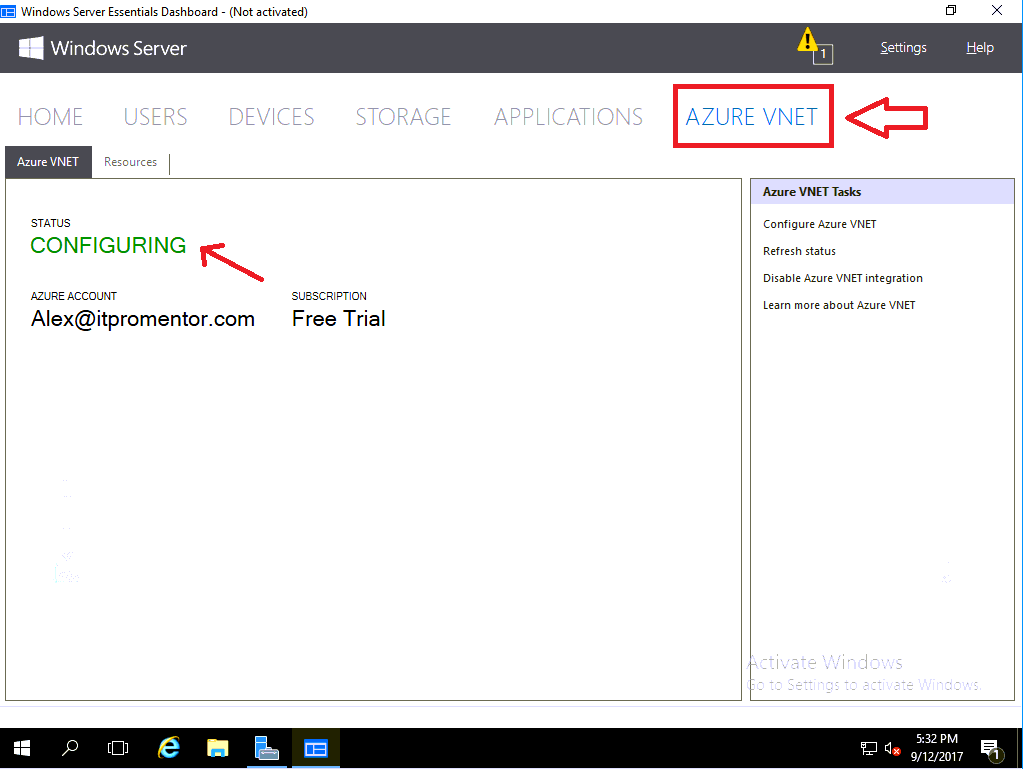
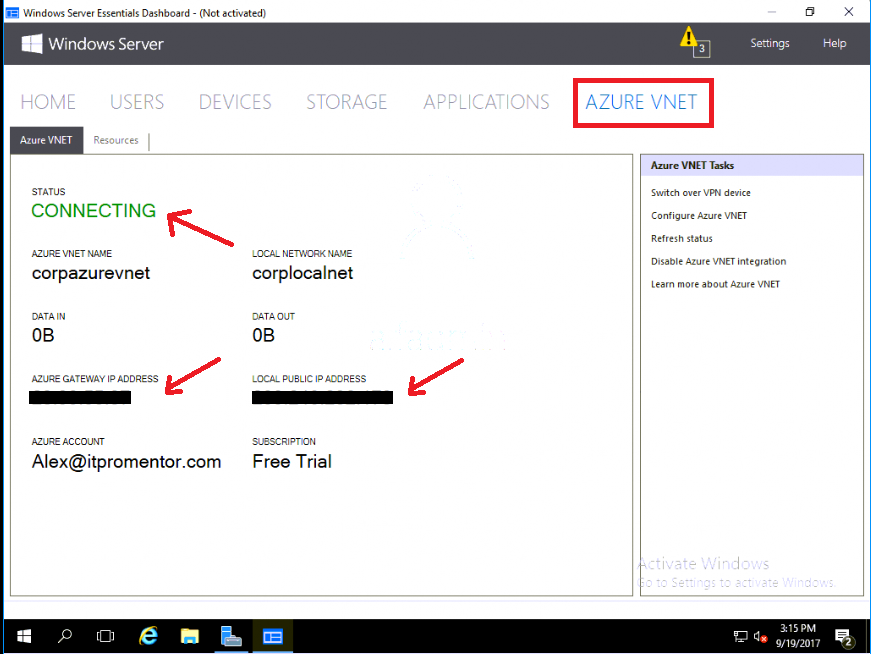
It will take a long time to complete because it is provisioning a new IP space in the cloud, and a public IP for you to use, but eventually the status we want to see on this screen will say Connecting, and it will also reveal to us the public IP addresses that we need to use when configuring our VPN device.
While you are waiting for everything to become provisioned, go to the next step, and customize the objects that were created in Azure portal, if needed. This part is time sensitive, read on.
Step 2. Verify the settings in Azure Portal
Now before we actually go into the part where we setup the hardware VPN device, let’s just take a quick tour into the Azure portal, and check over the new objects that were created for us, making sure that everything looks right (we can also adjust them here if we want to). Click on All resources to see everything in one view.
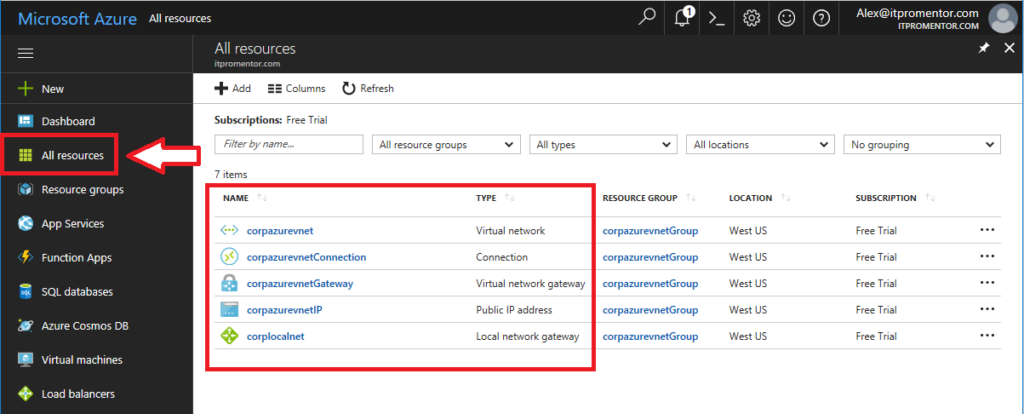
Here are the objects we have created for us by the Essentials wizard:
- Virtual Network: This is the Azure Virtual Network that you gave a name to in the wizard, and into which you can deploy Azure-based virtual machines
- Connection: This object represents the VPN tunnel between your on-premises VPN device and the Azure Virtual Network gateway
- Virtual network gateway: This object is a software VPN device created in Azure to support your VPN connection, and is actually just a small Windows VM running RRAS
- Public IP address: You need a public IP in order to connect your firewall to the Virtual network gateway
- Local network gateway: This is the object with a name that you picked to represent your on-premises network
Let’s go look at each one briefly for more detail, and customization options.
NOTE: You only have a limited time to customize objects in this window, because they are time-sensitive. Once the public IP and connections are fully built in Azure, the associated objects become “frozen” and if you want to edit them, you may need to delete/recreate. Most notably, if you want to edit your Local network gateway object, it may be impossible without deleting the associated Connection object first, and then re-creating it after you make your edits. Just something to be aware of.
Local Network Gateway
Not an optional step–I always recommend checking the Local network gateway object over first thing. Click on it from All resources. Now go straight to Settings > Configuration. In some cases, I have noticed that the Essentials wizard does not populate the local network address space. This is important, however, since it tells the Azure Virtual Network what subnets are available through the VPN connection.

Not having this filled out properly could mean that you have no communication between your networks, even though the VPN will be successfully connected. Note: some orgs have additional subnets, besides just one for data. For example, users & computers might be on a different subnet than servers, or WiFi users might have a separate subnet. If the subnet needs to communicate with the Azure Virtual Network, be sure to add it here. Save your edits.
Virtual network
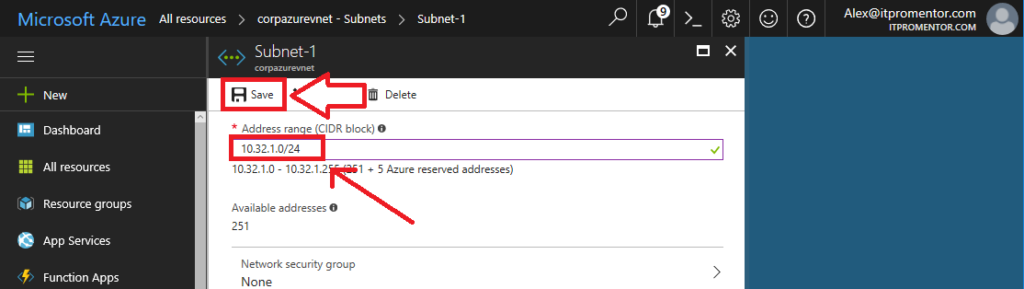
From All resources, click on your Virtual network. In here, there are two main things I want to bring to your attention. First, look at the Subnets under Settings. The wizard picks this stuff on it’s own (in my case, 10.0.0.0/11), but you might want to customize this address space. NOTE: this step is totally optional and depends on your preference/requirements, but I suggest reading it over.
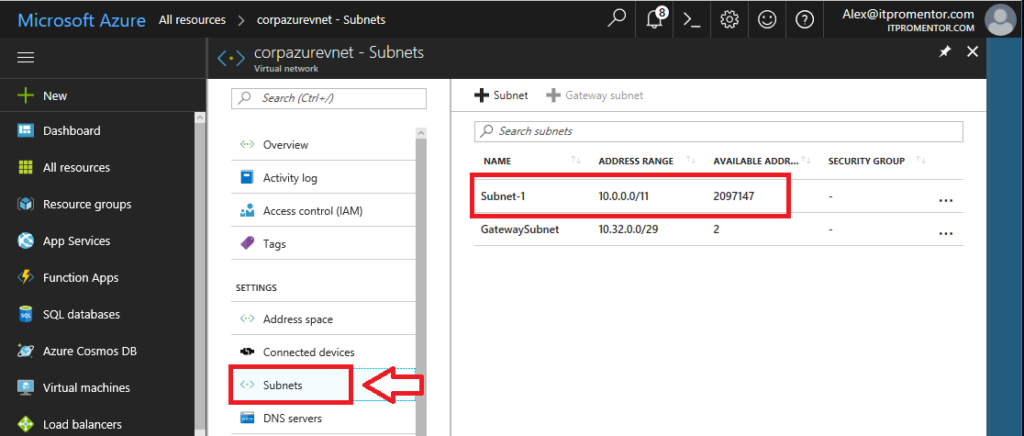
See, I might want to use some of the 10.x.x.x ranges in other sites or locations that I add in the future, so I wouldn’t want my Azure network eating all that unnecessary space. You may be somewhat limited in selection here, since the wizard also already picked out a subnet for your gateway, and that can’t be changed easily without deleting and re-adding. But I notice that my gateway subnet has a 10.32.x.x prefix, and I’d like to keep my other Azure-based subnets in line with that. So this is what I’m going to do. I’ll edit my first subnet to become 10.32.1.0/24, dramatically shrinking it from that massive 10.0.0.0/11 range. Be sure to Save your edits.
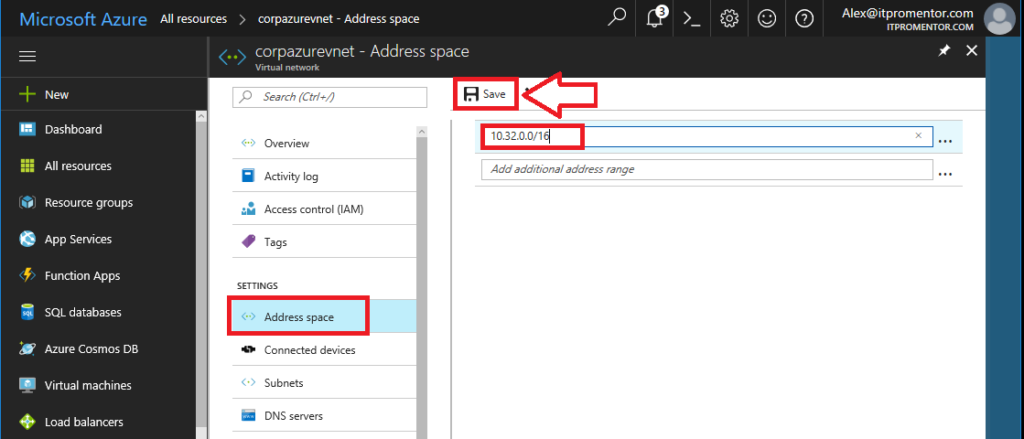
And then I can also choose to restrict the overall address space to 10.32.0.0/16. This leaves plenty of room for me if I want to add more subnets to Azure in the future, also. Click on Address space under Settings. Then edit and Save.
Next click on DNS servers. Here is where you can specify DNS servers for the Azure Virtual Network to use. If you plan to join the VM’s in Azure to your local domain and manage them like you would any local server, then you will need to have at least one on-premise DNS server address specified here, or joining your local domain will not be possible. There are other options like Azure AD Domain Join, but that is not an equivalent to joining your real, on-premise AD domain. Save your edits.

If this will be a brand new domain, or if you will replicate your VM’s into Azure including your Domain Controllers, then you would need to input the IP addresses that your Domain Controllers are likely to have (these can be statically set in advance). Just be sure you are inputting legitimate AD/DNS server addresses for whatever your needs are. Mostly this is on-premises DNS servers in the small business environment.
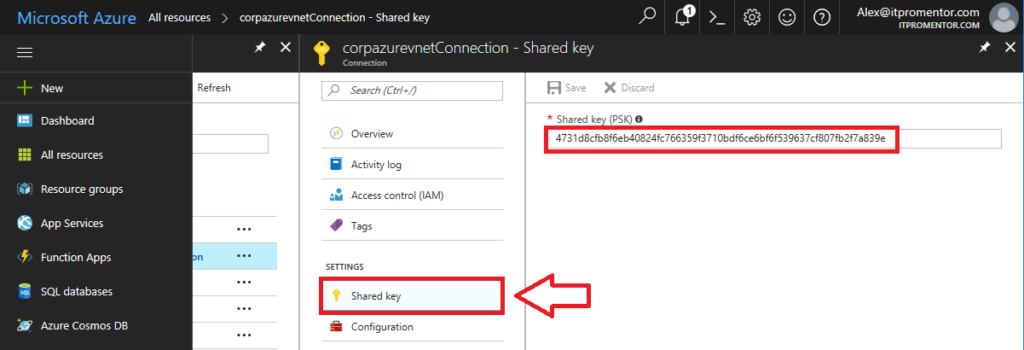
Connection (get your pre-shared key)
This step is NOT optional–you need your pre-shared key in order to configure your device. Go back to All resources, and click on the Connection object. Go to the Pre-shared Key. You can copy the complex string it created for you, or create your own custom string and Save it from here.
Virtual network gateway
Optional step. This object is the software VPN device that is configured in Azure. Click on it from All resources.
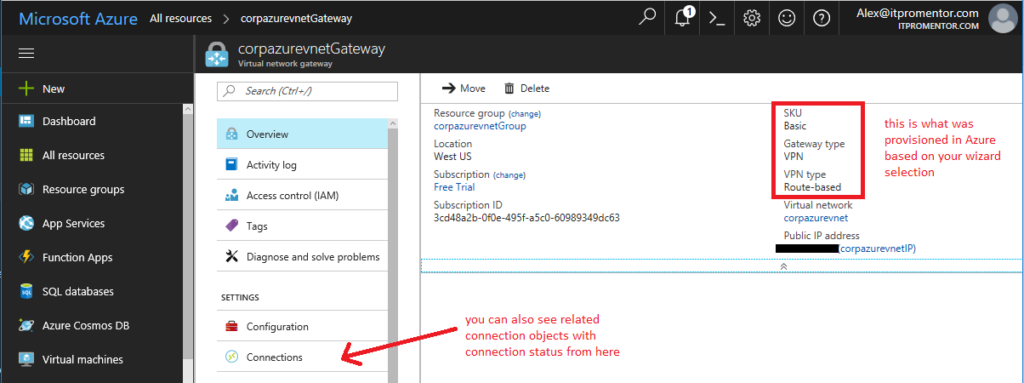
Here we can see that we have a Route-based VPN, as opposed to a Policy-based VPN. Since I chose Dynamic in the wizard, it picked Route-based for me. You can also check out the associated Connections (from this area it is possible to add multiple Connections to different sites, for example) from here.
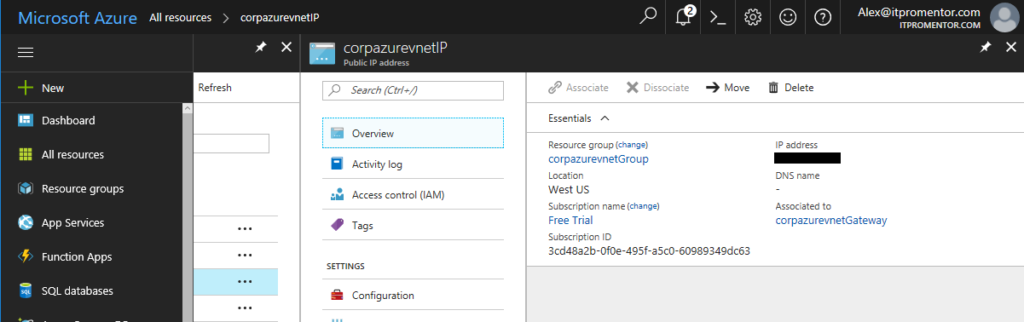
Public IP Address
Optional step. You already have the public IP by looking in the Windows Server Essentials console, so you don’t really need to go look at it in here, but you might want to anyway, just for fun.
Step 3. Configure your perimeter device
This is going to look very different for every hardware vendor / device out there. So it is impossible for me to cover it here. I have done one for WatchGuard that you can see here, as an example. But I cannot stress the importance of this resource enough, so go check it out, and you are likely to find instructions that will help you complete the connection on your own device.
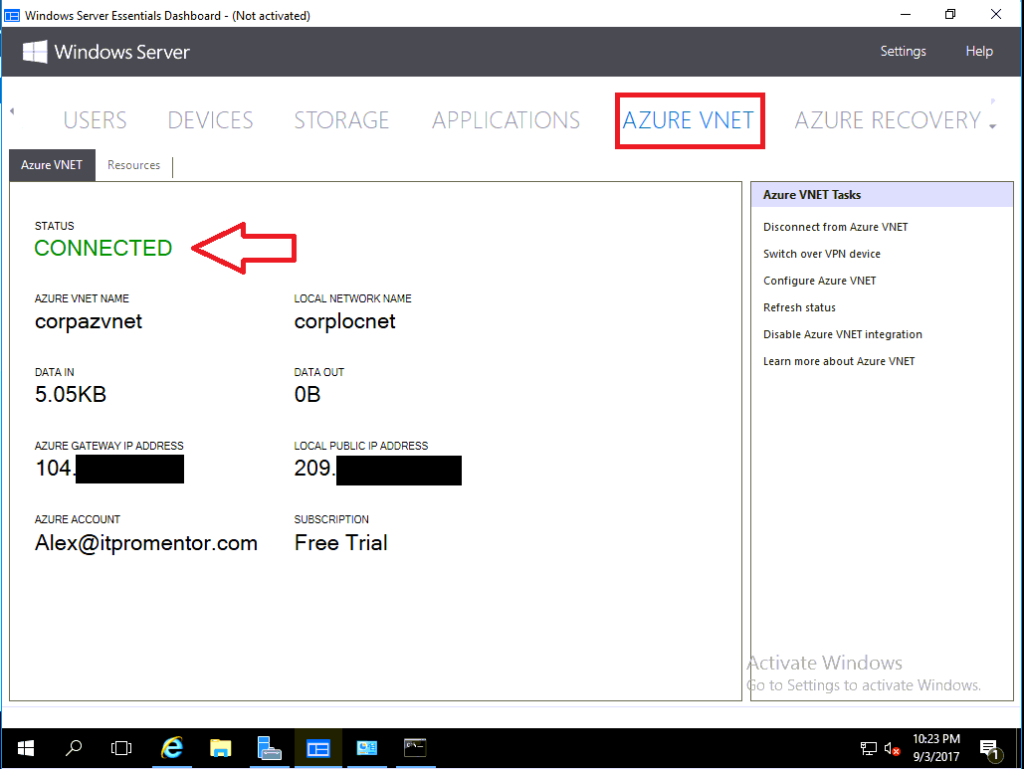
Once you have completed the necessary steps on your device, you will see the connection status update in all places–the Azure portal, your VPN appliance and also the Windows Server Essentials Dashboard:
In Review
In this tutorial, we saw how to configure the Windows Server Essentials integration for Azure Virtual Network with a firewall or hardware VPN device. This is the preferred configuration for a production environment, rather than using Windows Server / RRAS. We also learned a bit about what is happening behind the scenes when you run this Wizard, and how to customize the network it created for you. These are the basics to remember:
- Run the Essentials Wizard and choose which type of hardware VPN (static or dynamic)
- Go to the Azure portal and verify/customize your settings, especially:
- Local network – your local address space
- Virtual network – address space, subnets and DNS
- Connection – get your pre-shared key, or create your own
- Configure your VPN device
If you follow the steps carefully in that order, you should not have troubles with your Azure Site-to-Site VPN setup.

Leave a Reply