How to configure Advanced Threat Protection (ATP) part 1: anti-phishing
In a previous post, I covered some of the basic anti-spam/anti-malware protections included with Office 365/Exchange Online. Today I want to explore an add-on subscription called Advanced Threat Protection (ATP), which leverages some fancy pants machine learning and other advanced AI-like tech to detect zero-day and other advanced threats. The product comes bundled with Microsoft 365 Business by default, which thrills me to no end since you have to go all the way to E5 in the Enterprise licensing track to get it, but again it is also available as an add-on ($2.00 USD/user/month) to any other Exchange Online or Office 365 subscription/bundle. I recommend it for all my customers nowadays.
Note: ATP also applies to content beyond just Exchange Online–with capabilities of protecting content across Office 365 apps such as SharePoint and OneDrive also.
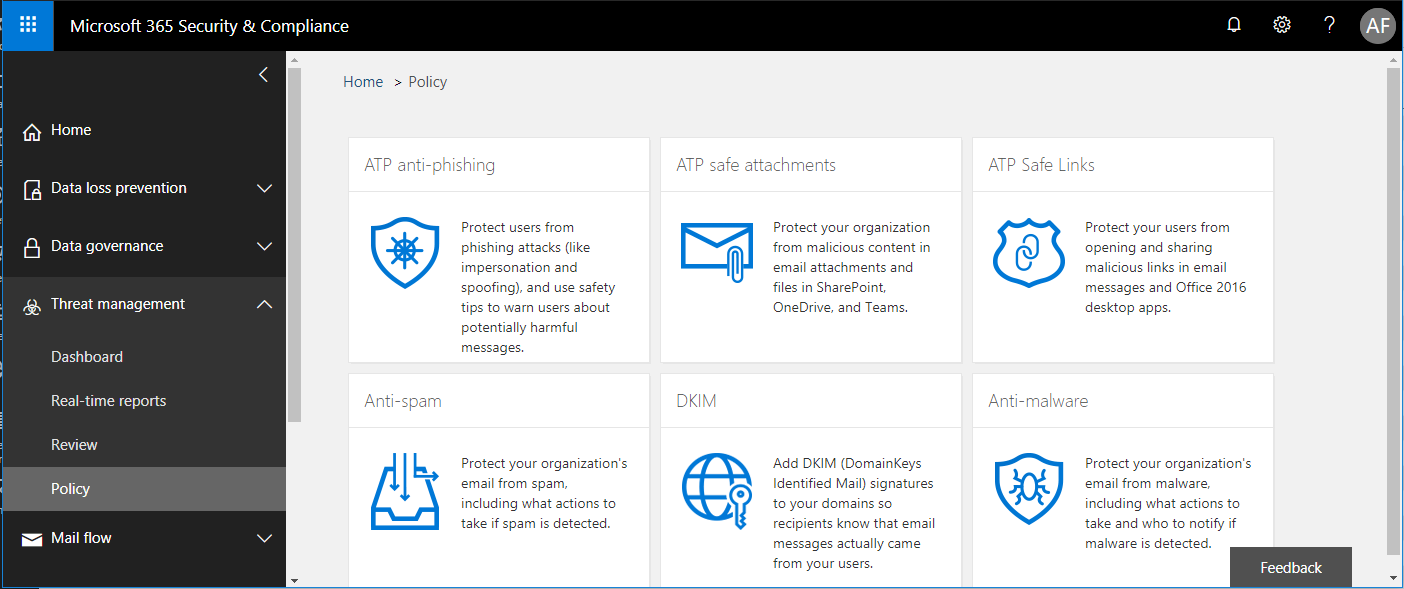
The first feature we will explore is the new Anti-Phishing measures, which you can configure from the 365 Admin portal > Admin centers > Security & Compliance. Estimated time to complete: 15-20 minutes.

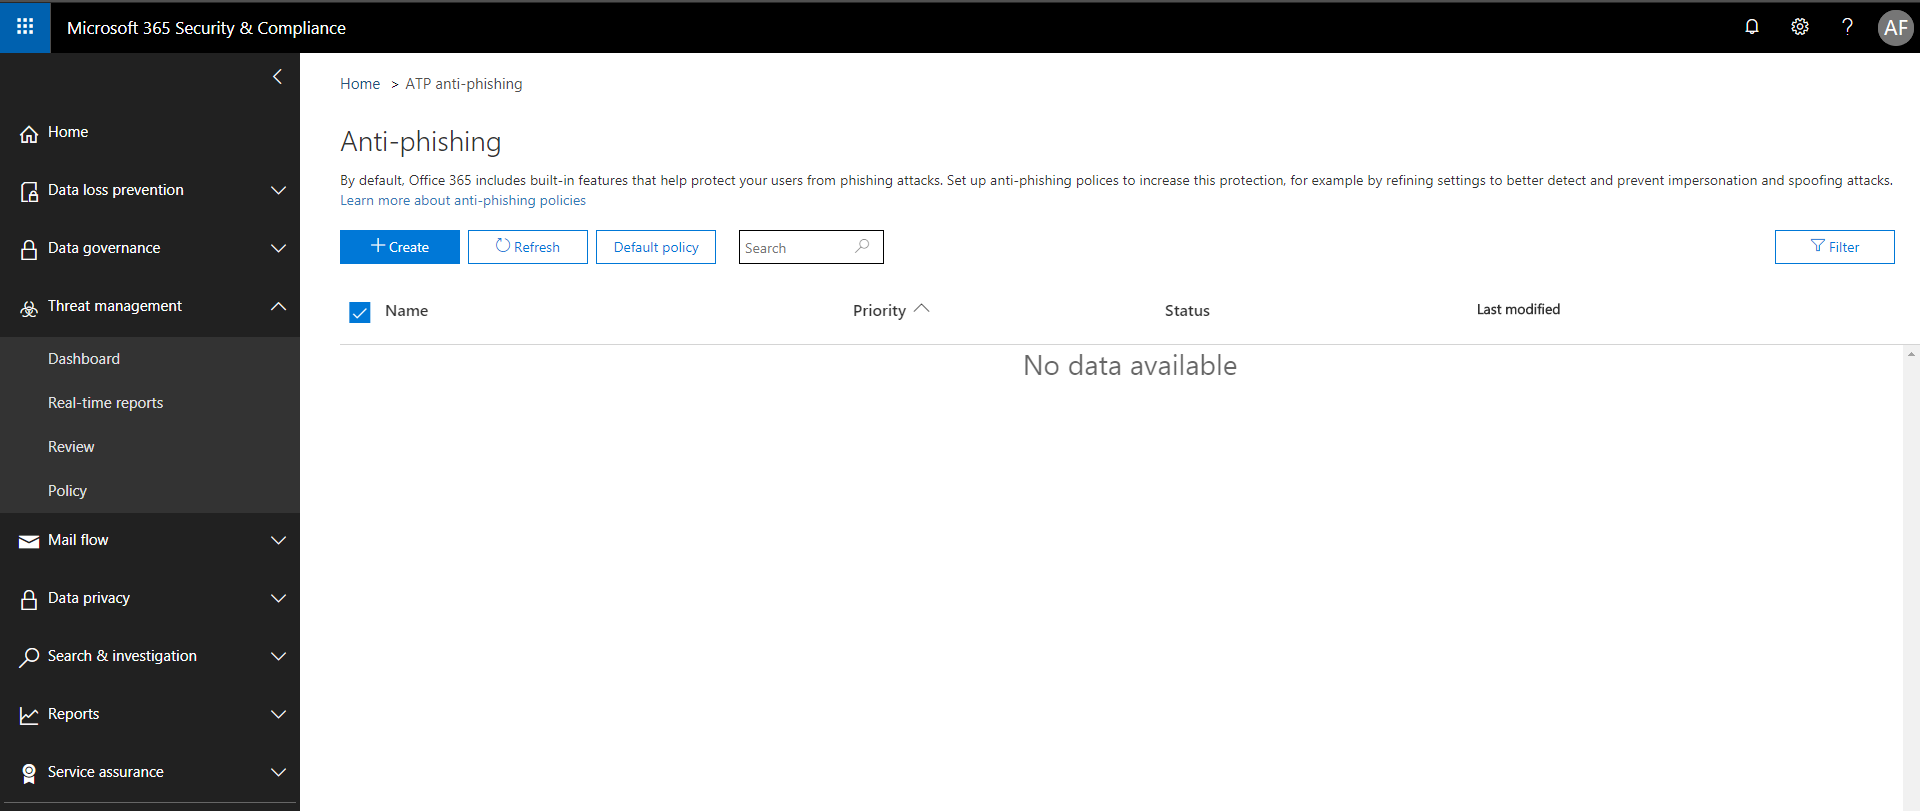
Find Threat management > Policy from the left menu. Choose ATP anti-phishing.
Simply choose to + Create a new policy.
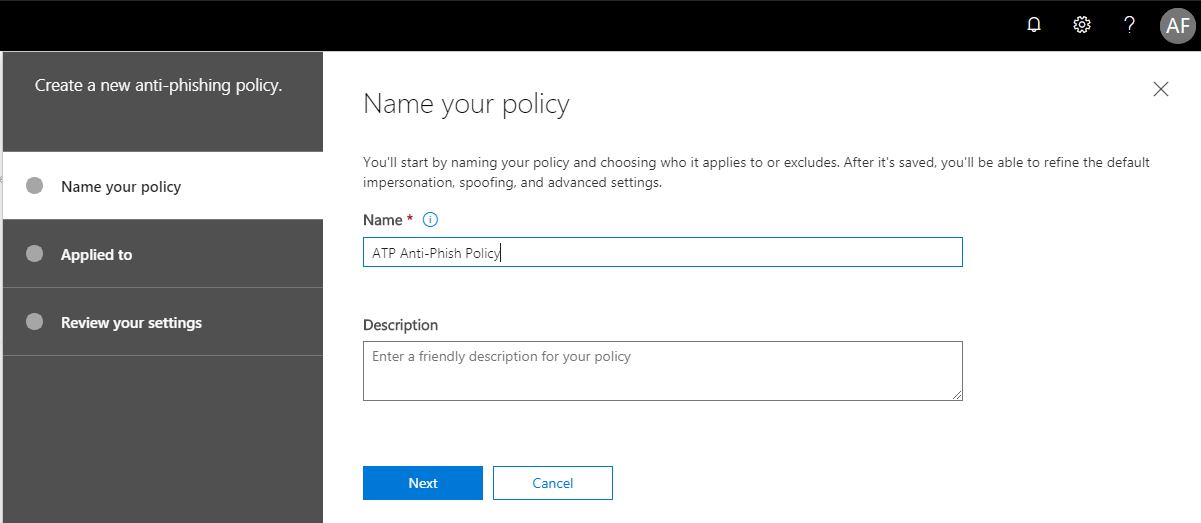
Give it a name and Next.
You have to add a condition, for how this policy is applied. I normally apply this policy to the entire domain, but you can also use group membership, or some combination of a group/domain and exceptions. After completing the conditions, choose Next.

Now you basically Create this policy, so that you can go back and actually edit the individual settings. Seems backwards I know.

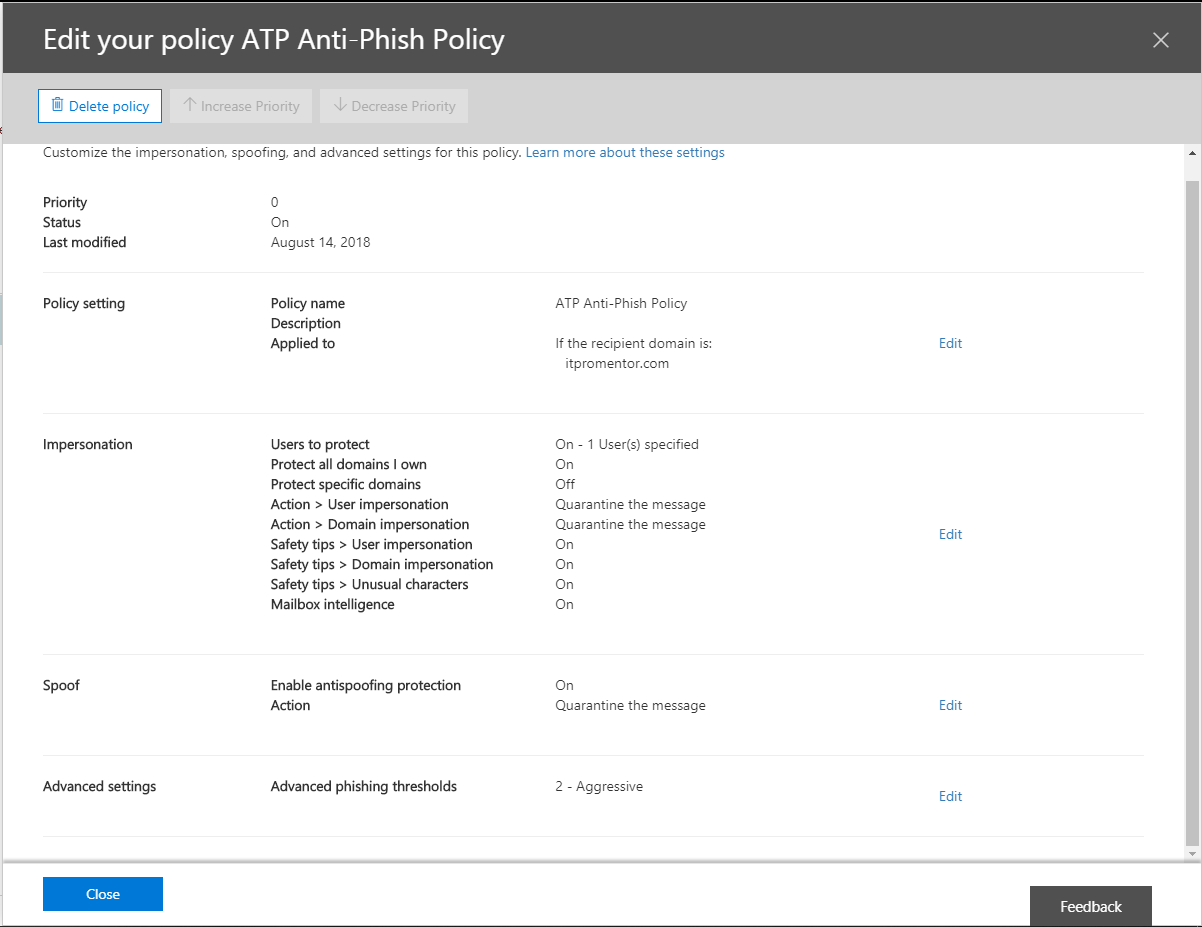
First Edit the Impersonation settings. You can only choose up to 60 users to this, they recommend focusing on key roles such as CEO, CFO, etc. Since I’m Chief Awesome Sauce here at ITProMentor.com, I added myself to this list.

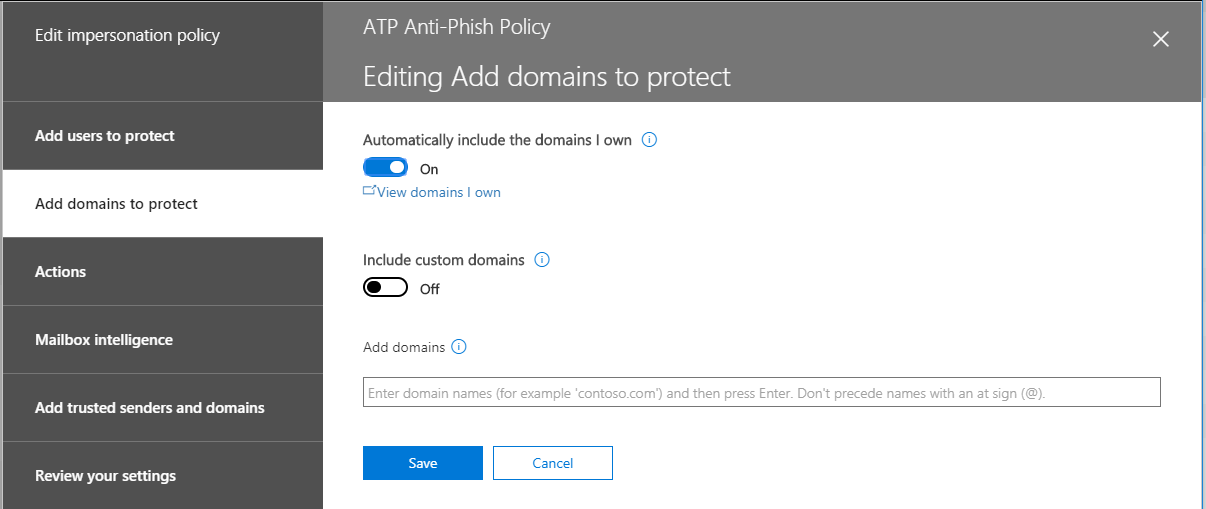
This is self-explanatory, you can choose which domains to include.
Now you can begin to choose some actions. In this example I am choosing Quarantine, but you may prefer to redirect this message to an administrator, for example. Check out the Turn on impersonation safety tips link on this page, also.
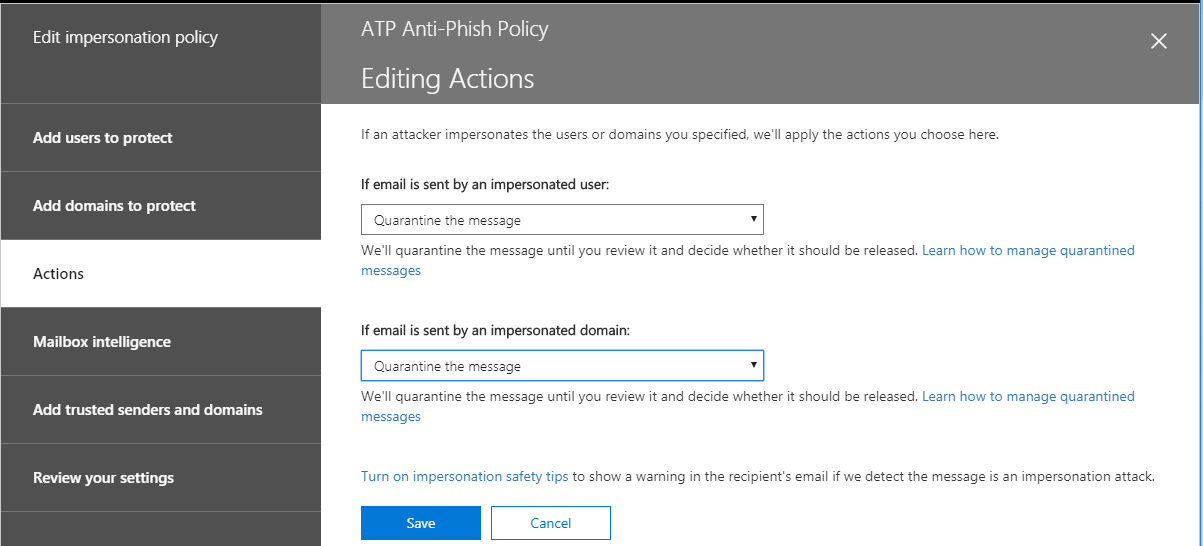
These notifications can help warn users if impersonation is suspected.

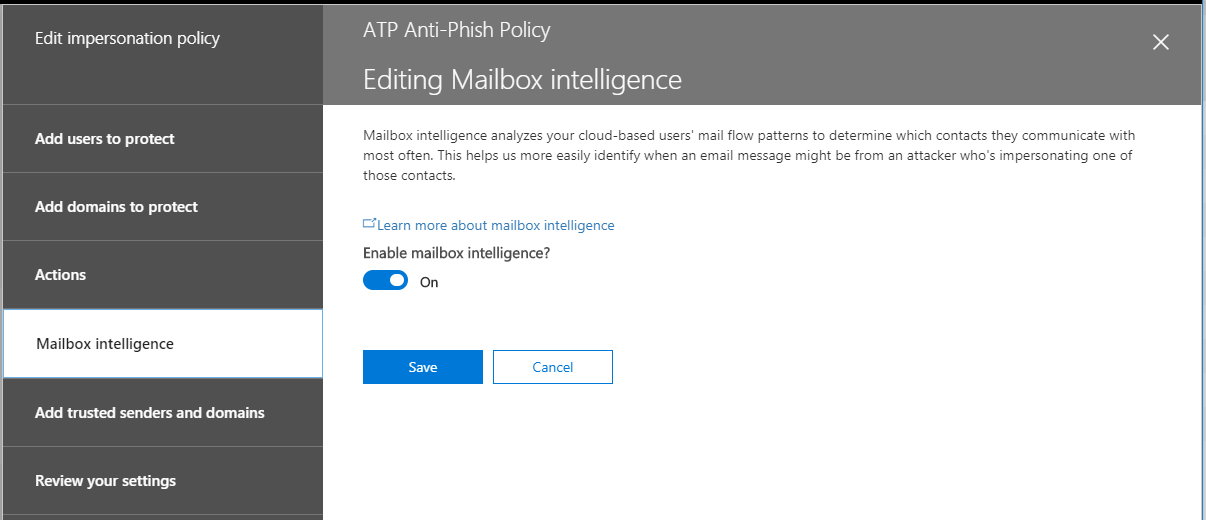
Here is where the machine learning comes in–Mailbox intelligence will figure out what mail flow patterns are “typical” in the org, and then applies this learning to look for anomalies. If that’s too Big Brother for you, leave it off. I’ll leave it on for a while and report back my findings.
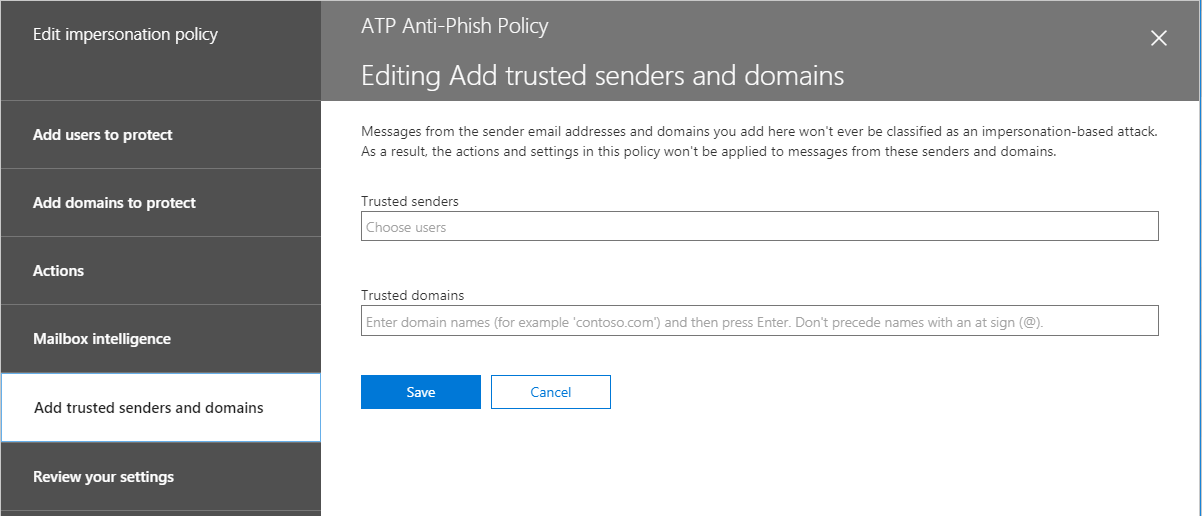
It is also possible to exclude certain senders and domains from this policy–like a whitelist. If you have the same added to your anti-spam policies, etc.–doesn’t matter, you have to add them here also.
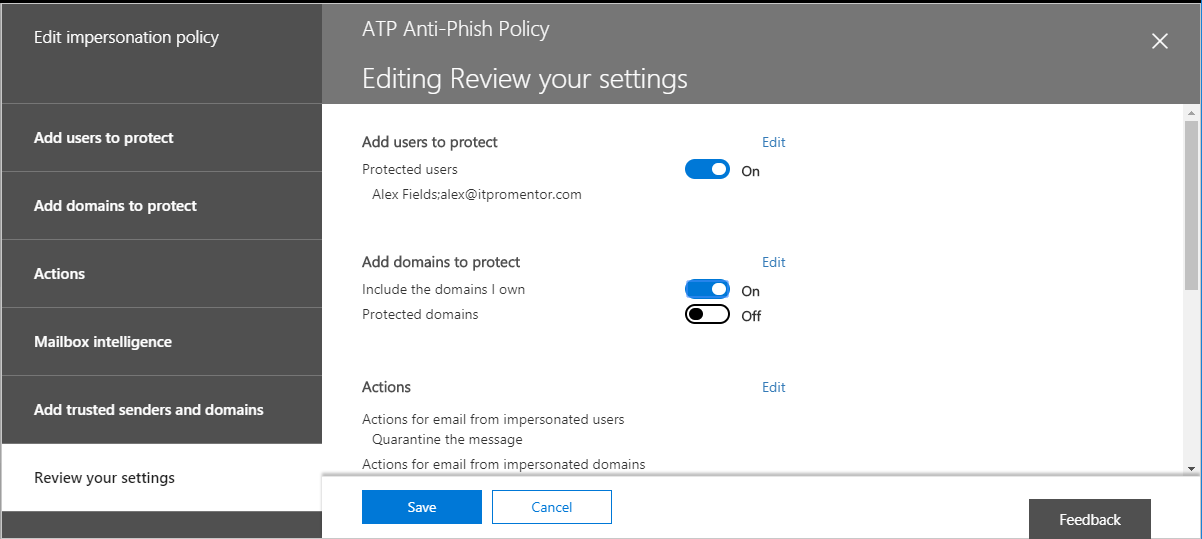
Now you can just review the settings and Save.
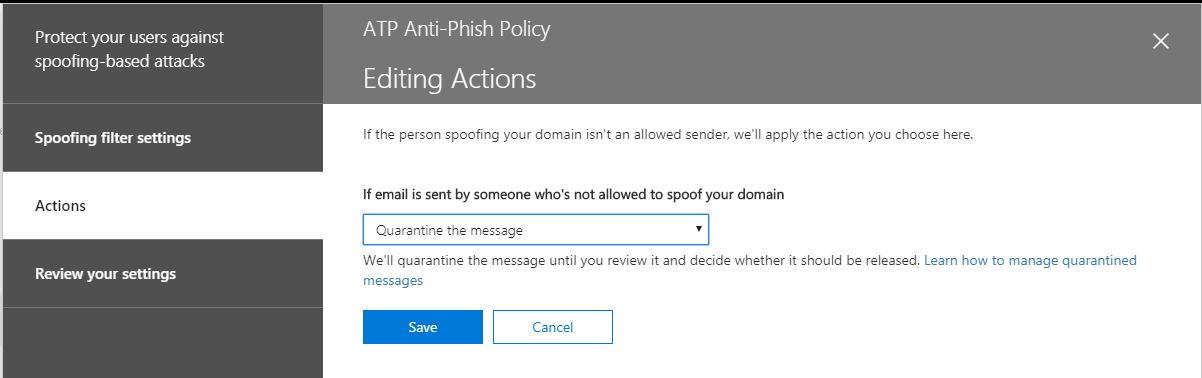
Next edit the Spoof settings of the policy. They have this action set to Junk mail folder by default, but I prefer Quarantine. Choose Save.
Last you can edit the Advanced settings. There are four different levels of aggressiveness. It is on 1 (Standard) by default, but I am going to test 2 (Aggressive).

If you like, you can review your settings for the policy again.
That concludes the review of this first feature set within Advanced Threat Protection (ATP). Of course, there are some more basic anti-phishing/anti-impersonation things you can do with standard Exchange mail flow rules, for example, but we’ll cover those options another time. These are a bit more serious, and use some more complicated technology to increase the intelligence behind the detection techniques. Security is all about layers, after all. This is a good one to have.
Comments (23)
Very usefull Alex, as always! :-)
Thx!
Hi there,
Is this feature supposed to be available for Business Premium? My small business has it but I went to look into this and didn’t see the option under S&C, just anti-malware and anti-spam. Thanks.
No, not Business Premium–That is an Office 365 subscription. It is included with Microsoft 365 Business, which is a different subscription (that also includes Business Premium).
Never mind – missed that you wrote “Microsoft 365” not “Office 365” for the plan that includes the ATP features. Thanks.
I have an office with 30 users which includes 3 owners. I purchased ATP licenses for all 30 users, and I’ve activated it for all 30 users. For the impersonation settings, should I list all 30 or just the 3 owners who are the ones getting spoofed. What is the difference between applying the policy to the entire domain and only listing 3 users in the impersonation policy? Did I not need to purchase ATP for all 30 of my users?
You can apply the protections to as few or as many users as you like. For small offices I usually apply to everyone. But for example, it is also possible to apply anti-phishing to 3 users and safe links and safe attachments to every user (these are other features included with ATP).
Something worth noting; when you enable ATP for an O365 tenant; technically it is enabled for all users on the domain even if you don’t “assign” or purchase more than one license. Yet another grey area of Microsoft licensing…
Yeah technically to be in congruence with their EULA’s you’d want to license every user who will be protected by the features. It would be possible for example to create an ATP user group and scope the policies only to apply to those groups, but I typically just apply it to all domains, all users.
How many hours does it usually take to setup ATP p1 for 21 users in a small office?
Minutes
does that mean, it includes configuring it and setup as well?
Yes, you can simply step through the wizard, or what I like even more, is just running a script that will do it for you, like the one I publish on GitHub. Time to update that in fact. I should post it this week with the new mailbox intelligence protection feature for all mailboxes in the org.
Hi Alex,
With the “add users to protect” and “add domains to protect” – are they reliant on each other? If I wanted to set up an ATP anti-phishing policy to protect an organisation, is it just possible to select “add domains to protect” and add the all domains I own option, or would I still need to pick the top 60 users that are likely to be phishing targets? Would just using the domains option provide sufficient protection?
They are treated separately. I normally just choose domains that I own. You could add outside domains that you frequently correspond with if you choose targeted domains. Also the same is true of the 60 users–does not have to be internal users. Also, it is not necessary now to add internal users specifically since we have the mailbox intelligence protection option for the whole org.
Thanks for a good guide, however i´m not entirely with you on the differance between Users to protect vs Domains to protect. Why would i not want to protect an entire domain? Seems like keeping a list of specific users to protect up to date a bit of a hassle for some orgs.
Because if i understand it correctly, if i don´t fill any specific users on “users to protect” and then fill in my own custom domains in “domains to protect” it will protect all adresses from that domain?
Protecting different things: there is user impersonation attempts, and there are domain impersonation attempts. An example of a user impersonation could be mimicking the display name of a user who is in the company, and sending that in from an outside place, attempting to pose as that person. Then there is domain impersonation–this could be attempting to use the actual domain name, or attempting to use a domain that is “close” the actual domain name, for instance.
Amazing dude thanks
As always – nice reviews, Thanks :)
Is anyone using the Orca-report from Powershell to manage these settings?
Totally–this blog post is a bit old, but I have one about this as well. Soon, the ORCA will be available in the GUI/web admin portal also, along with an easy button to apply either standard or strict protection in one click.
Hello, thank you for sharing your knowledge and expertise. What is the difference between Mailbox intelligence, Mailbox Intelligence>Protection, and Mailbox Intelligence>Action? Thank you again for sharing.
From: https://docs.microsoft.com/en-us/powershell/module/exchange/new-antiphishpolicy?view=exchange-ps
The EnableMailboxIntelligence parameter specifies whether to enable or disable mailbox intelligence, which is artificial intelligence (AI) that determines user email patterns with their frequent contacts. Mailbox intelligence helps distinguish between messages from legitimate and impersonated senders based on a recipient’s previous communication history. Valid values are:
$true: Mailbox intelligence is enabled. This is the default value.
$false: Mailbox intelligence is disabled. The values of the EnableMailboxIntelligenceProtection and MailboxIntelligenceProtectionAction parameters are ignored.
The EnableMailboxIntelligenceProtection specifies whether to enable or disable taking action for impersonation detections from mailbox intelligence results. Valid values are:
$true: Take action for impersonation detections from mailbox intelligence results. Use the MailboxIntelligenceProtectionAction parameter to specify the action.
$false: Don’t take action for impersonation detections from mailbox intelligence results. The value of the MailboxIntelligenceProtectionAction parameter is ignored. This is the default value.
This parameter is meaningful only if the EnableMailboxIntelligence parameter is set to the value $true.
If you set this parameter to the value $false when the value of the EnableMailboxIntelligence parameter is $true, no action is taken on messages based on mailbox intelligence results (for example, lack of communication history). But, but mailbox intelligence can still help reduce impersonation false positives based on frequent contact information.
The MailboxIntelligenceProtectionAction parameter specifies what to do with messages that fail mailbox intelligence protection. Valid values are:
NoAction: This is the default value. Note that this value has the same result as setting the EnableMailboxIntelligenceProtection parameter to $false when the EnableMailboxIntelligence parameter is $true.
BccMessage: Add the recipients specified by the MailboxIntelligenceProtectionActionRecipients parameter to the Bcc field of the message.
Delete: Delete the message during filtering. Use caution when selecting this value, because you can’t recover the deleted message.
MoveToJmf: Deliver the message to the recipient’s mailbox, and move the message to the Junk Email folder. The message is moved only if the junk email rule is enabled on the mailbox (it’s enabled by default). For more information, see Configure junk email settings on Exchange Online mailboxes.
Quarantine: Move the message to quarantine. Quarantined high confidence phishing messages are only available to admins. As of April 2020, quarantined phishing messages are available to the intended recipients.
Redirect: Redirect the message to the recipients specified by the MailboxIntelligenceProtectionActionRecipients parameter.
This parameter is meaningful only if the EnableMailboxIntelligence and EnableMailboxIntelligenceProtection parameters are set to the value $true.
So basically, turn the feature on (first setting), then specify whether you want to take actions when impersonation is detected (second setting), and then last specify which action to take (third setting).
Hi Everyone,
Is there a setting in ATP to notify us if we receive an email from a newly registered fake domain? (Like a way to let us know this domain has been created recently via ATP)