Tutorial: How-to Setup Azure Site Recovery using Windows Server Essentials, Part 3: Failover
In part 1 of this series, we covered the pre-requisites for Azure Site Recovery using the Windows Server Essentials integration features. In part 2, we configured the Azure Virtual Network using the Essentials Dashboard plugin, and replicated our VM’s. Now in this final part of the series, we are going to perform a planned failover.
Preparing for planned failover
Sadly, these crucial preparation steps do not exist in the Essentials Dashboard, so you will have to configure them in the Azure portal. Too many people skip these parts, and end up having trouble with their failovers. That doesn’t have to be you today–read on.
Step 1. Set static IP addresses before you failover
It would be nice to know what IP addresses your virtual machines will have in the cloud in advance of failover, wouldn’t it? When you setup the Azure Virtual Network, the wizard chooses an address space for you, most likely 10.x.x.x, if you’re on-premises network has an address space like 192.168.x.x or 172.16.x.x.
If you only have one VM to protect, then given a 10.x.x.x network, on failover you are probably going to get 10.0.0.4 (the first three IP’s are always reserved in Azure). But with multiple virtual machines to failover, there are no guarantees you will get these VM’s to come up in the order you want by default. However, you can set it up statically in advance.
In the Azure portal, click on your Recovery vault. Scroll down to find Replicated items.
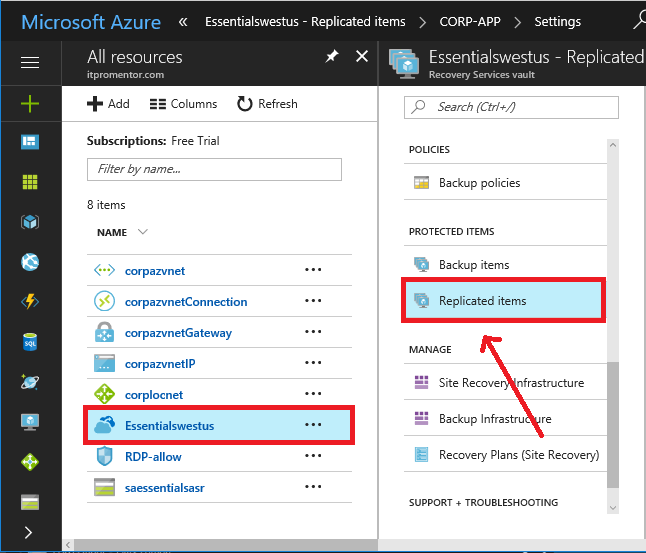
Choose a VM that has finished replicating.

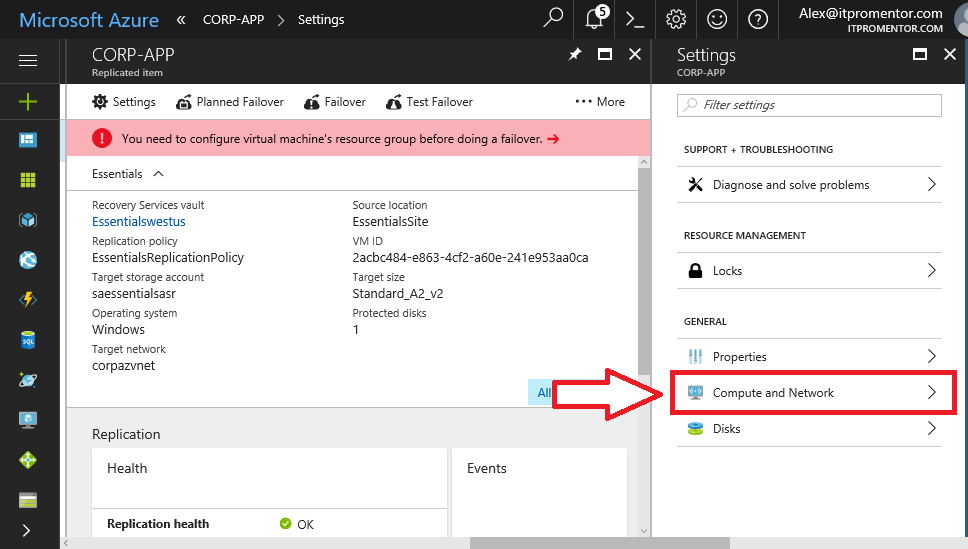
Click on Compute and Network. (Also notice how it says: You need to configure a virtual machine’s resource group before doing a failover–we’ll do that as well in the next step).
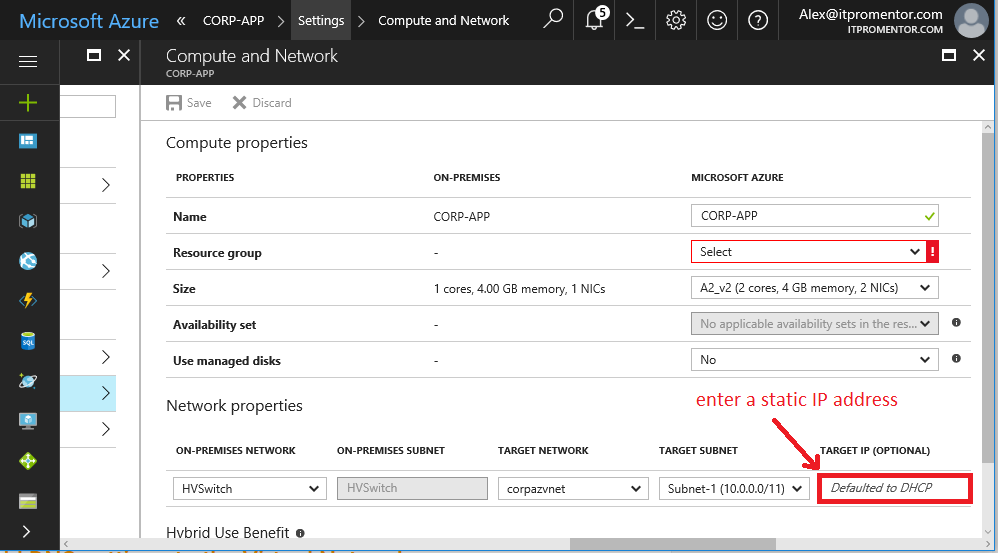
Enter a static IP address where it says Target IP (Optional). I am going to choose 10.0.0.15 for this App server, which is in the range of the target subnet.
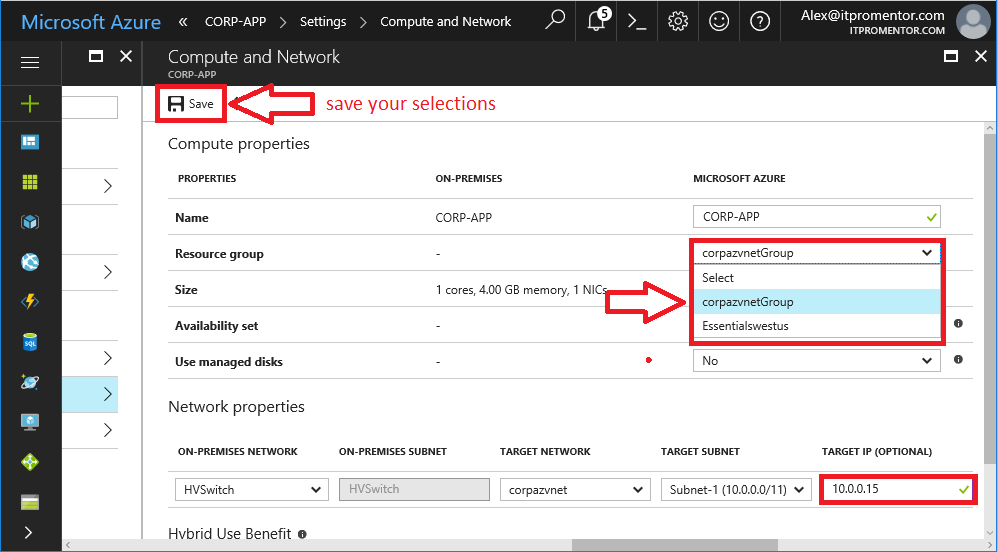
Step 2. Set your resource group before you failover
While you are here, you can also associate the virtual machine with your Azure VNET Resource group. A Resource group is a way of grouping together related items in Azure. Be sure to Save your changes at the top.
Step 3. Add DNS settings to the Virtual Network
You also want your VM’s to know where DNS lives when they are restored into the new network. Click on the Virtual network object. Click DNS servers. Choose Custom and input the DNS server address that you expect to have available in the virtual network. Click Save.
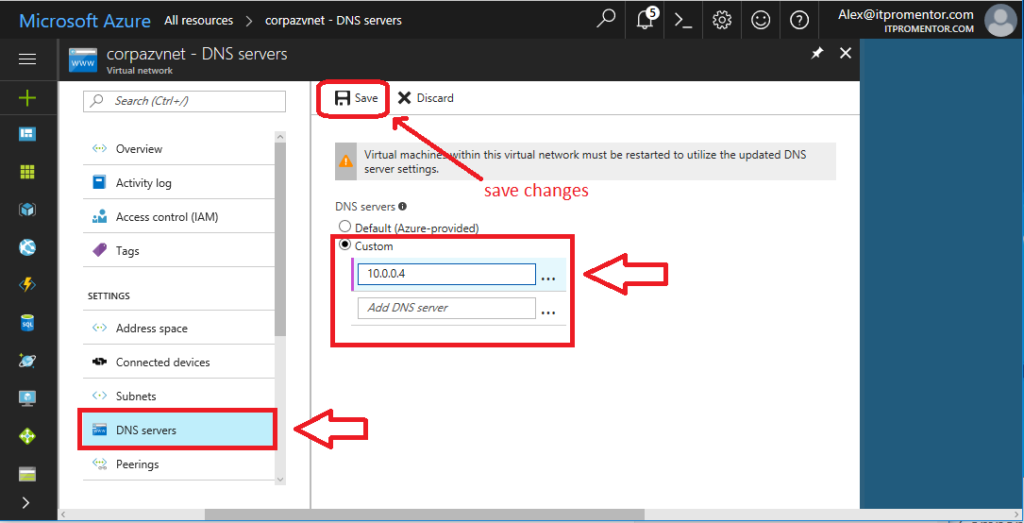
Depending on the scenario you are trying to enable here, you could input the future address of your Domain Controller in a failover situation (make sure to set that static IP in advance like we just did), or, if you plan to use Azure VNET for other purposes, you might decide to input the on-premises IP address of your DC(s).
These other scenarios include keeping your on-prem servers, but adding a new server for HA, or to host a new application. Or, you could leverage these features as a migration tool, moving seamlessly from on-premises VM’s into the Azure cloud.
How to initiate a Planned Failover
In my failover test, I am going to use my App server, rather than my Domain Controller.
Step 1. Use the Failover wizard in the WSE Azure Recovery console
Go to WSE Dashboard > Azure Recovery. Click the VM, and choose Failover.
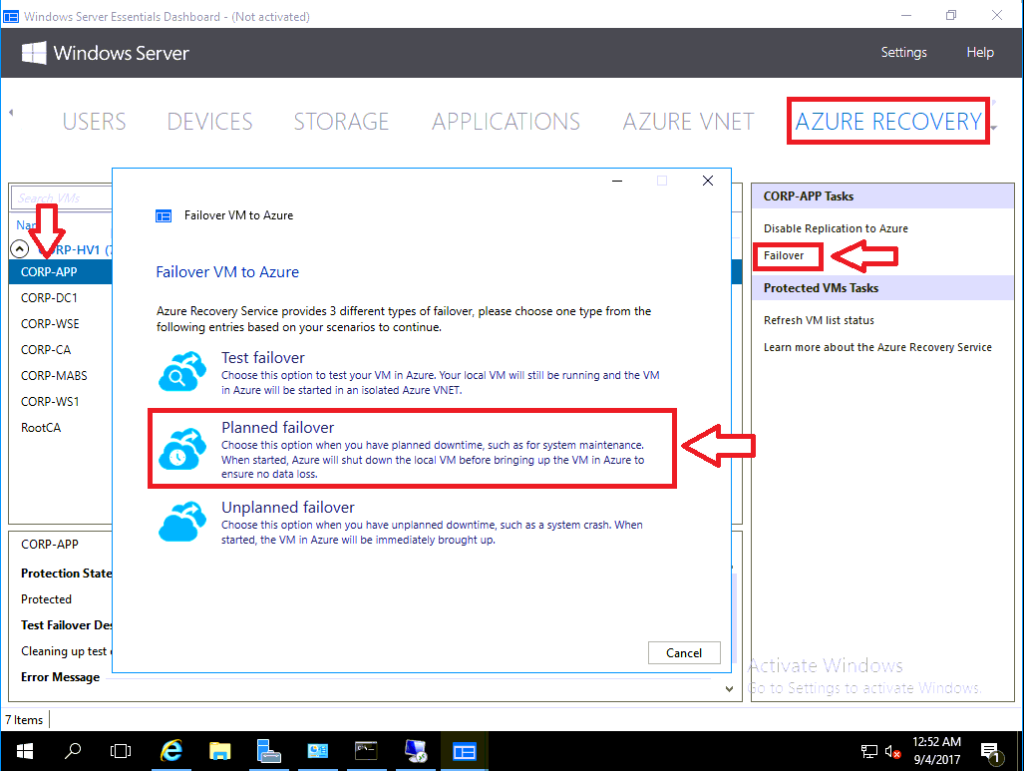
You will see that we have three different options, depending on our scenario.
- Test failover – The on-premises VM will remain running, but a copy of it will be booted up in Azure purely for testing purposes.
- Planned failover – The on-premises VM will be shutdown first, and then booted up in Azure
- Unplanned failover – Usually this is necessary only if you’re already down–it is hard to imagine someone actually clicking this unless the Essentials server is separate from the production Hyper-V host.
In this tutorial, I am going with a Planned failover, just for this one App server. Although most people will feel more comfortable with Test failover, I wanted to demonstrate a full failover and failback in this series.
On the next screen, just pick your Azure VNET and Subnet-1. Click Next.

The following screen you just have to confirm the same with Next, and then Finish the wizard. 
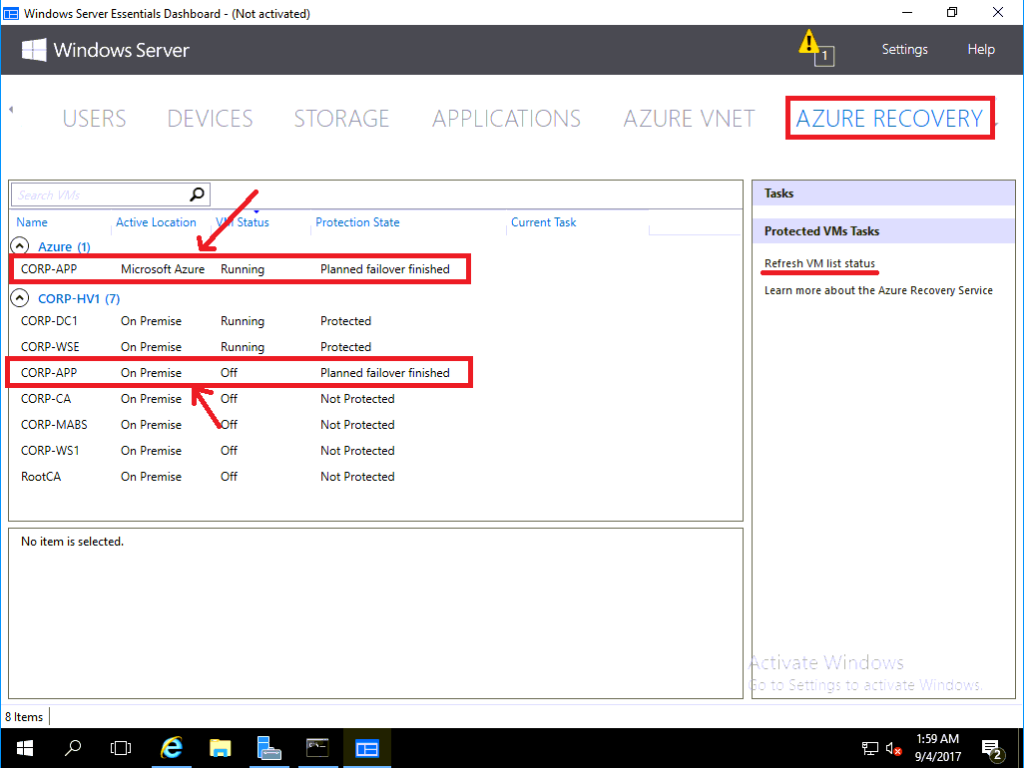
Returning to the Azure Recovery screen, we can see that the status has updated again.

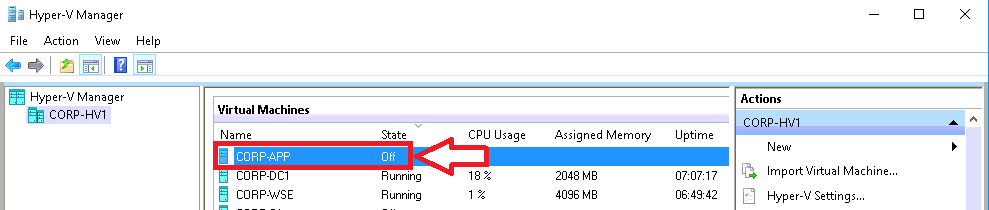
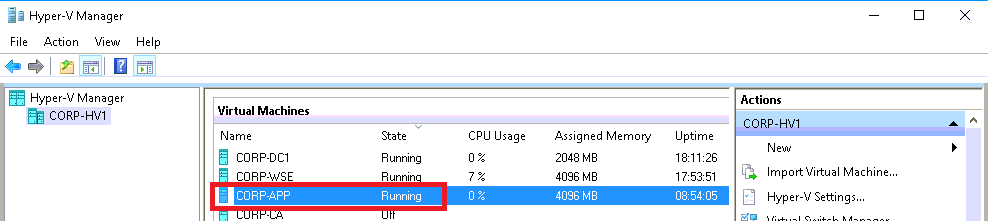
In Hyper-V we can also verify that the VM is indeed powered off.
It will take quite a while for this process to complete. Another break is in order. If you get bored, you can check out the status in Azure portal. Go to your recovery vault, scroll down to find Replicated items and click on the status of the VM.
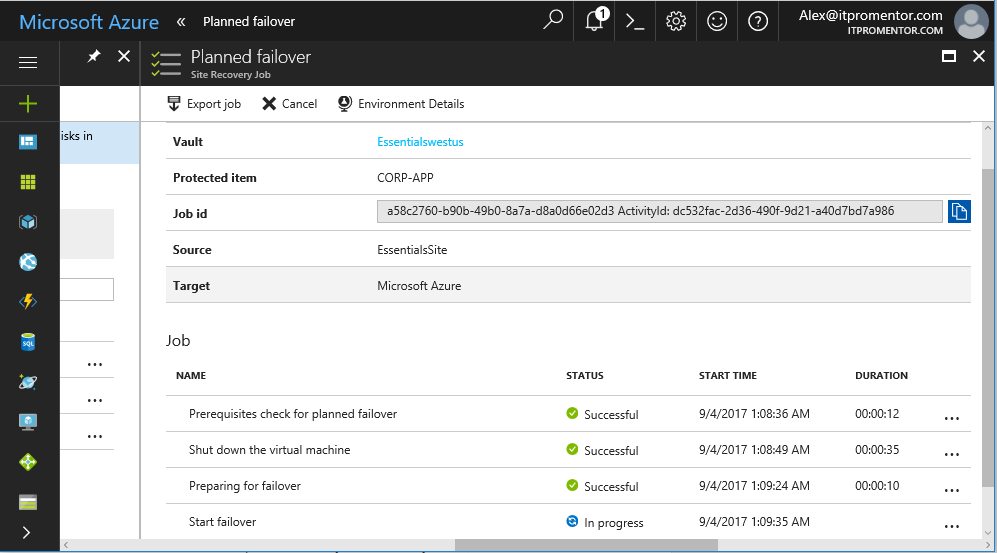
Like I said, you can just take a break–this will be a while. Eventually, you will see the status update in all places.
Azure portal > Site recovery vault > Replicated items > VM status:

WSE Dashboard > Azure Recovery plugin:
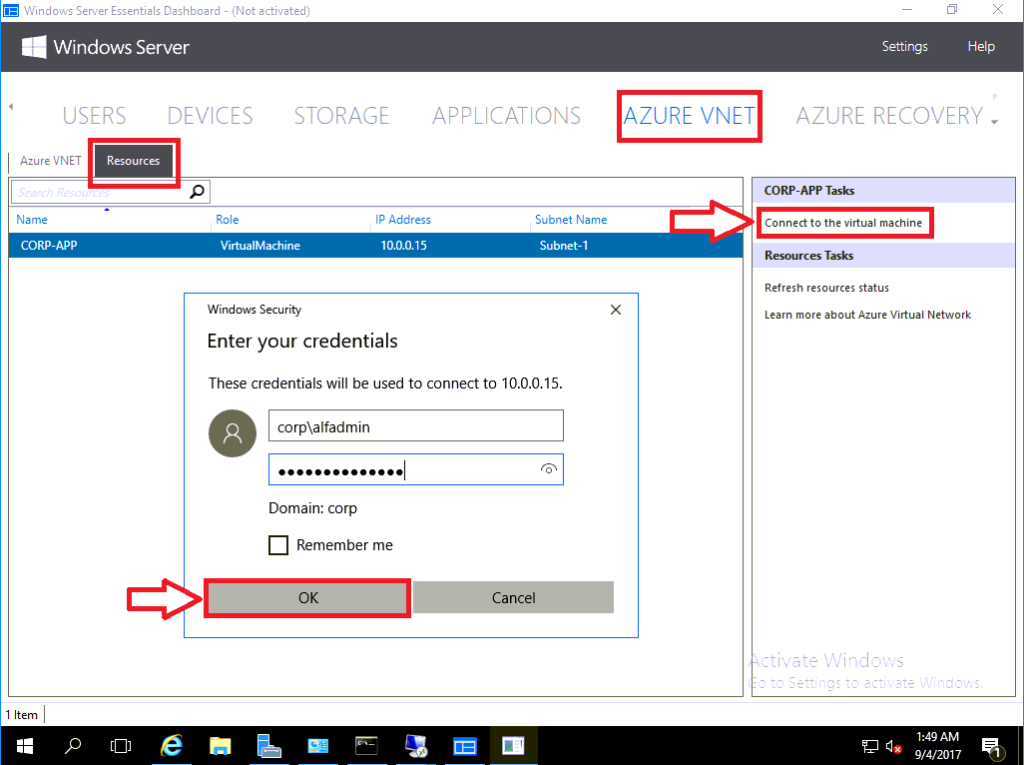
WSE Dashboard > Azure VNET plugin > Resources tab:

Notice that it picked up the IP address we chose for it in advance!
Step 2. Validate the failover
From WSE Dashboard > AZURE VNET > Resources: Click on Connect to the virtual machine. This action will launch an RDP connection to the VM. Note: RDP must be enabled on the VM before failover, or else you will not be able to connect.
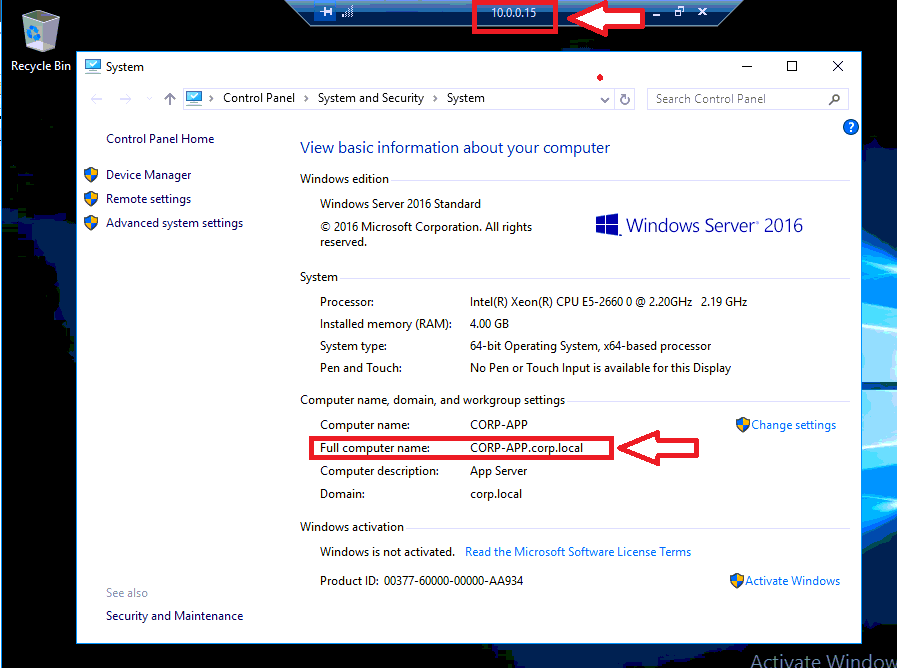
And now we find ourselves back on the desktop of our App Server, at the new IP Address of 10.0.0.15.
This completes the test failover. Go ahead and Commit this failover. From the WSE Dashboard > Azure Recovery, find the Protection State now reads Planned failover finished. Select the VM in Azure and click Commit failover. Click Yes.

Notice that you also have the option to Disable Replication right now. Meaning that this can be used to migrate on-premises VM’s into Azure, and not bring them back down with a failback.
Failback to the on-premises server
Now you can also initiate a failback to the on-premises servers.
Step 1. Initiate the failback
Select the Azure VM again in WSE’s Azure Recovery plugin, and click Failback. Select the synchronization option you want–you can choose to shutdown the VM and synchronize the data, or leave it running and synchronize, requiring another step to complete the failover later. I am going to pick the first option. Click Finish.

Again the status changes (Failback initiated), and again we wait. In my experience, failback to on-premises takes much longer than failover to Azure.

When it is complete, the VM will be started up on the Hyper-V host.
Step 2. Finalize the failback
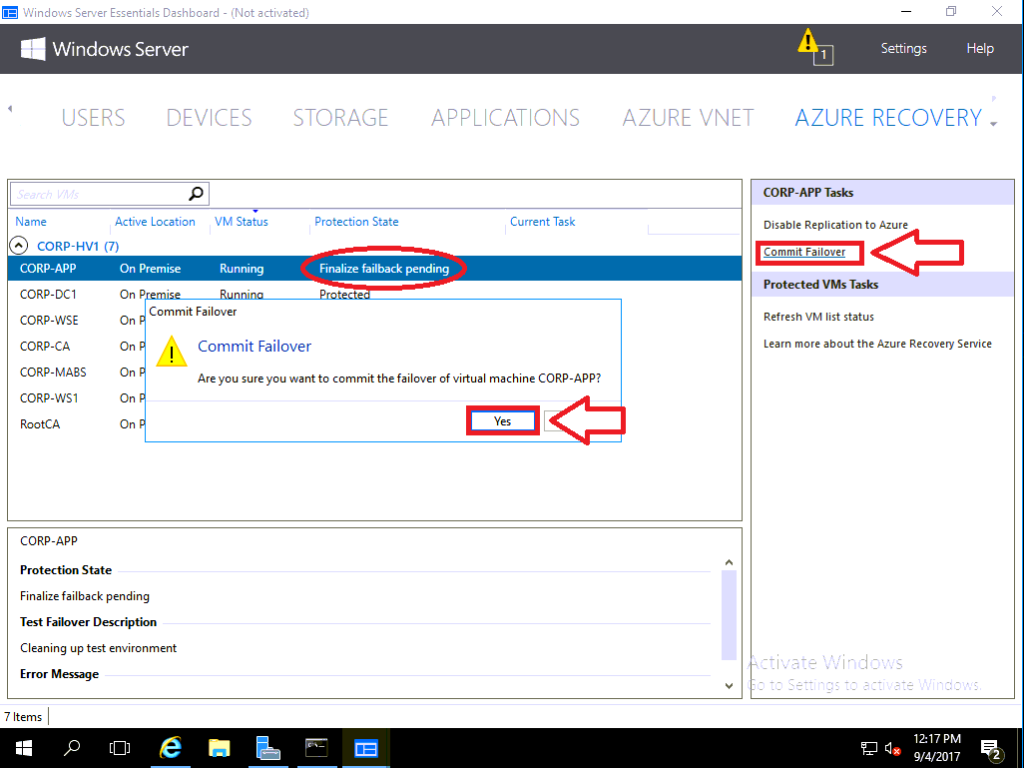
After you confirm it is running on the local network, you can return to the WSE Dashboard under Azure Recovery. The status is changed again to Finalize failback pending. To finalize, click Commit Failover. Choose Yes.
Step 3. Re-enable the protection
Eventually the status will change again from Finalizing failback to Failback finalized. At this point, if you click on the VM again, you will see that we have to re-enable the protection. Click Reprotect. Choose Yes to the Reverse Replicate prompt.
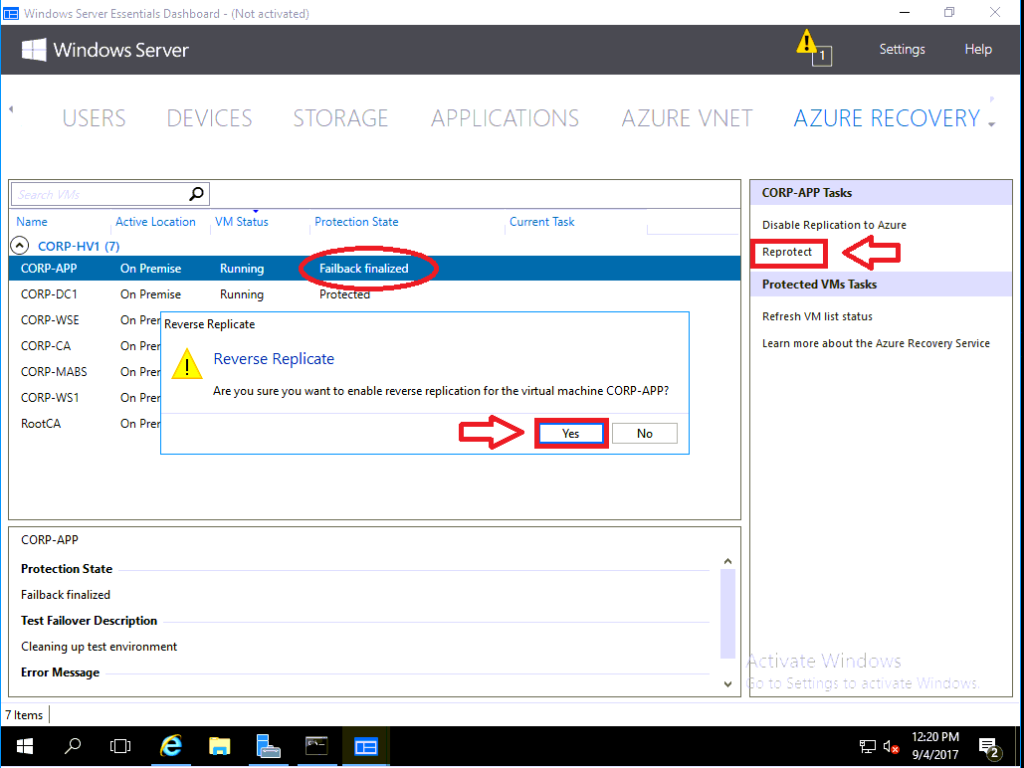
The status will change back to Protected, and you are done.
Conclusions
In this tutorial series, we covered the pre-requisites for setting up Azure Site Recovery using the Windows Server Essentials Dashboard. As well, we demonstrated how to configure the necessary components (Azure Virtual Network and Azure Recovery using the WSE Dashboard), and finally, we demonstrated how to prepare for and execute a planned failover event.
Windows Server Essentials does make this process somewhat easier than setting it up from the Azure portal, but there is still a lot of room for improvement with this product. For example, the wizard should open the requisite firewall rules on the Hyper-V host and Windows Server Essentials VM. It would also be preferable to allow us to define static IP addresses for protected VM’s, and setup Azure VNET DNS settings. And I would like to see it work right 100% of the time, for example by correctly identifying the local address space so that you don’t have to do that step yourself half of the time.
But that’s what we’re here for, right? Consultants are still finding no shortage of employment opportunities, it seems.

Comments (3)
Excellent tutorial Alex!
Alex, You’re tutorials have been very helpful. Thanks. One question I would have is will this solution allow us to extract and recovery files and folders from the protected VM’s or is this just designed as a disaster recovery solution? Would Azure Backup server be a better application for that and can they be intergrated.
Thanks,
This is DR, not backup. Correct–Backup would be Azure Backup, Azure Backup Server, etc.