Tutorial: How-to Setup Azure Site Recovery using Windows Server Essentials, Part 2: Configuration
Windows Server Essentials (or the Essentials Experience role) can be leveraged to quickly provision a full Disaster Recovery site in the cloud, and replicate Virtual Machines from your on-premises Hyper-V server(s) to Azure. The built-in integrations that make this possible are Azure Virtual Network and Azure Site Recovery.
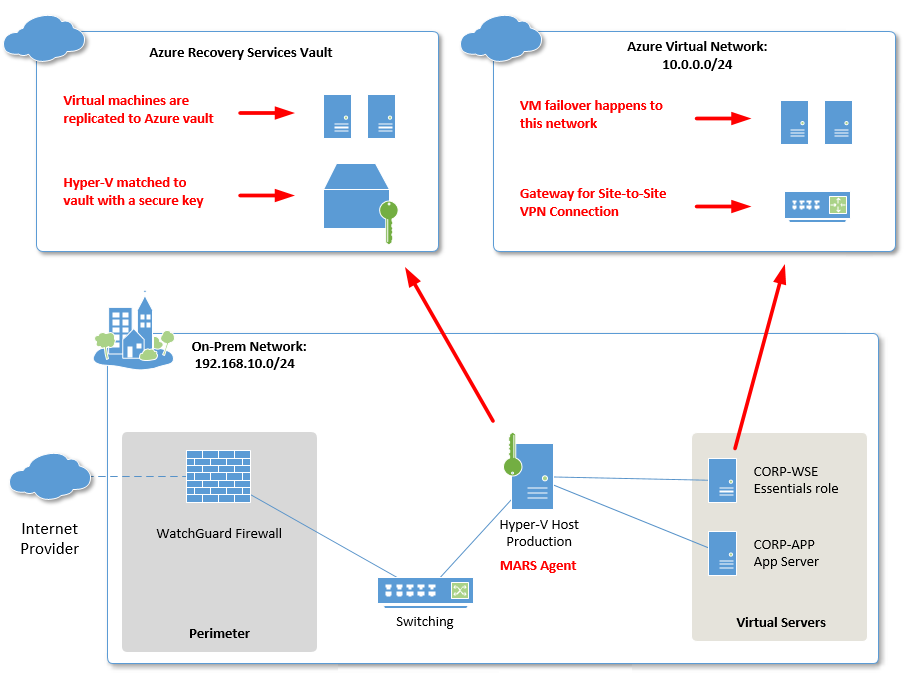
Image credit: Alex Fields, ITProMentor.com
The previous post in this series covered the pre-requisites that are needed on the Hyper-V server(s) as well as your Window Server Essentials or Essentials Experience Server. Now we will continue, configuring the Azure Virtual Network, and Azure Site Recovery.
Step 1. Setup Azure Virtual Network using the Windows Server Essentials Dashboard Integration Wizard
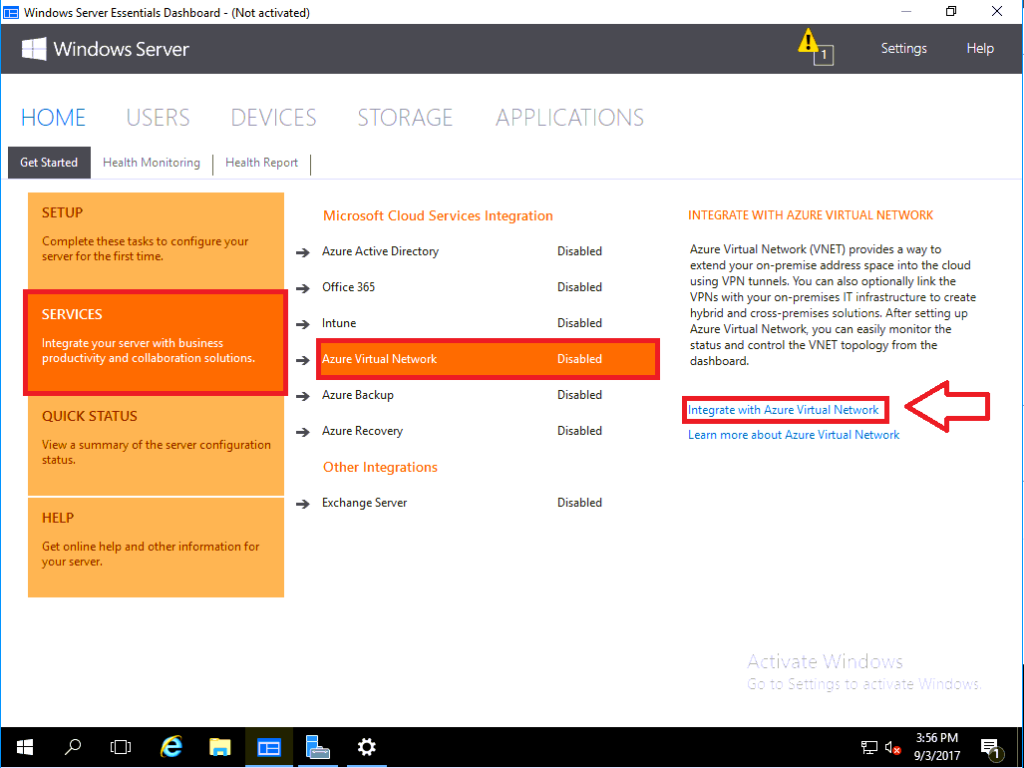
Navigate to the Windows Server Essentials Dashboard and enable the Azure VNET integration: Services > Azure Virtual Network > Integrate with Azure Virtual Network.
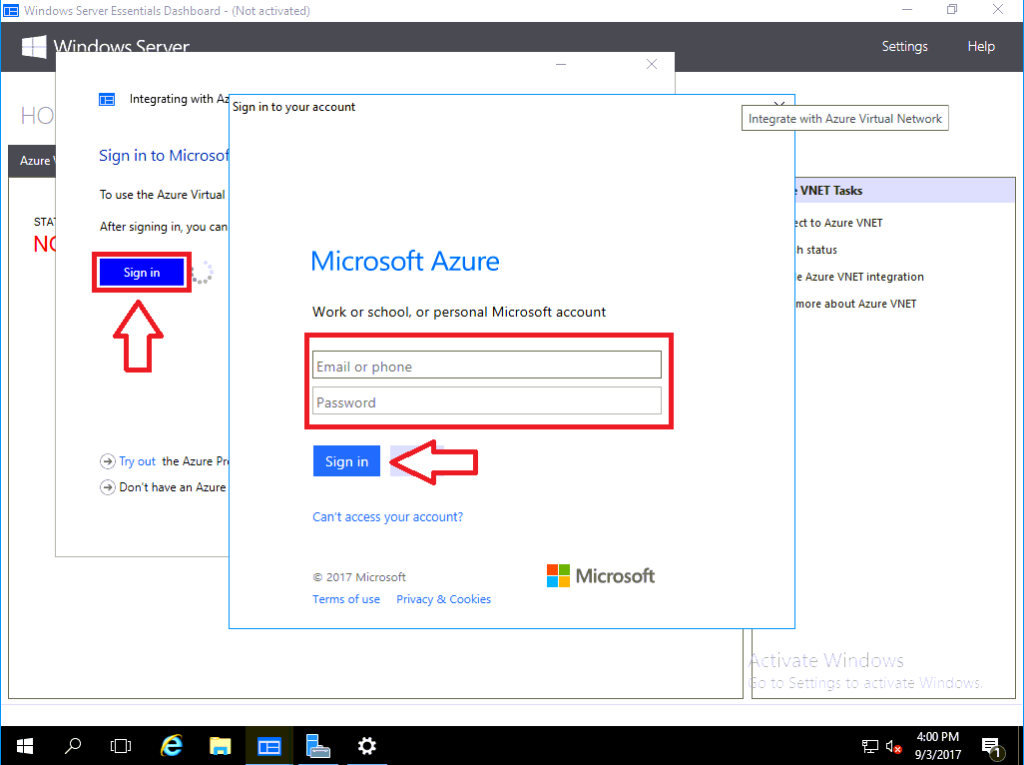
Sign in to your Azure account
Choose a subscription. What is depicted here is a Free Trial, obviously okay for a lab server, but in a production scenario for your customers, you will want to use their regular paid subscription.

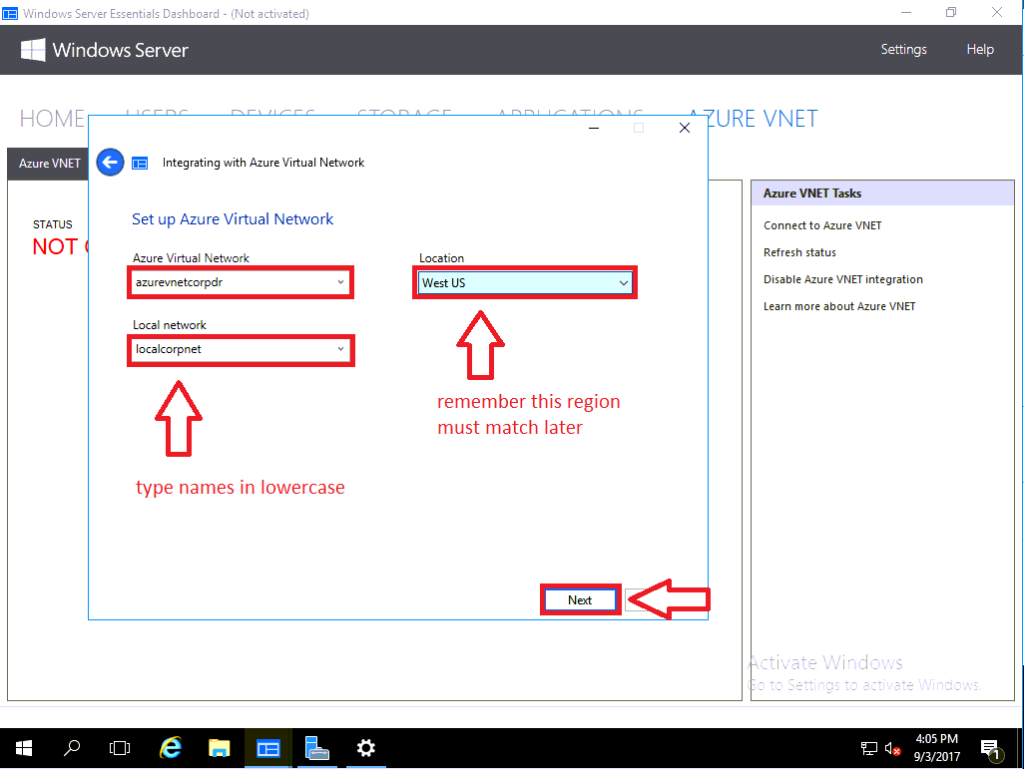
Give your Azure Virtual Network and your Local Network a name in lowercase letters only, and choose an Azure datacenter Location. Remember this location for later, as you need to keep it the same moving forward. I suggest East or West US, if you are in the United States.
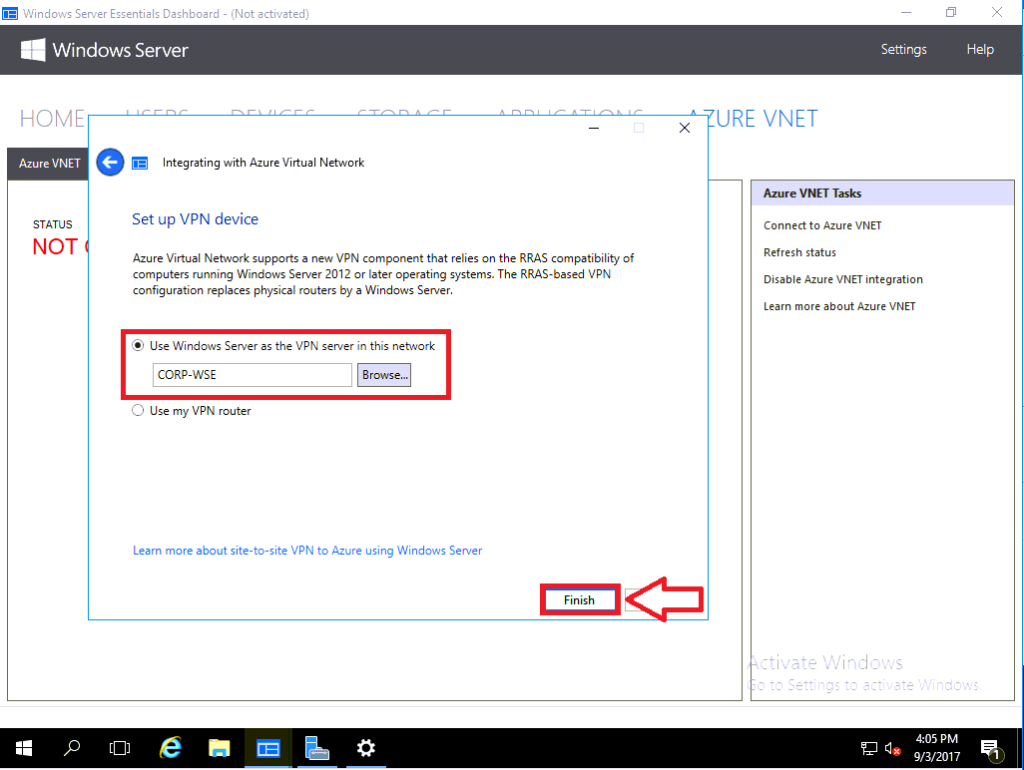
Next you will specify how your local network connects to Azure. The best solution for long-term deployment would be to use your own firewall or gateway VPN router. For the purposes of this tutorial however, we will just use Windows Server (RRAS).
Now we wait while Azure builds the Virtual Network. The status will say Configuring. This can take quite a while, so it’s a good time for a break. An extra long break.
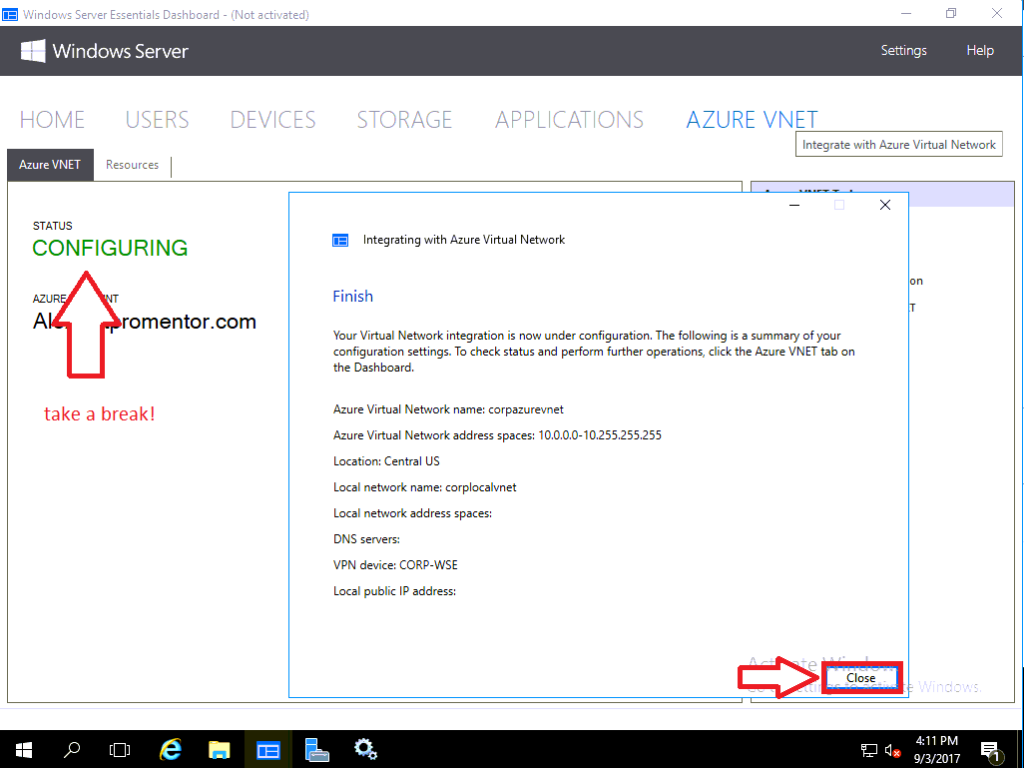
IMPORTANT: If you notice at this point that the local network address space is undefined on this Summary/Finish screen, then you might have to add it yourself in the Azure Portal. In my testing this has been an issue about 50% of the time. If you don’t have this right, you will not be able to connect to your virtual machines after failover. Click Close.
Step 2. Verify your local address space in Azure portal
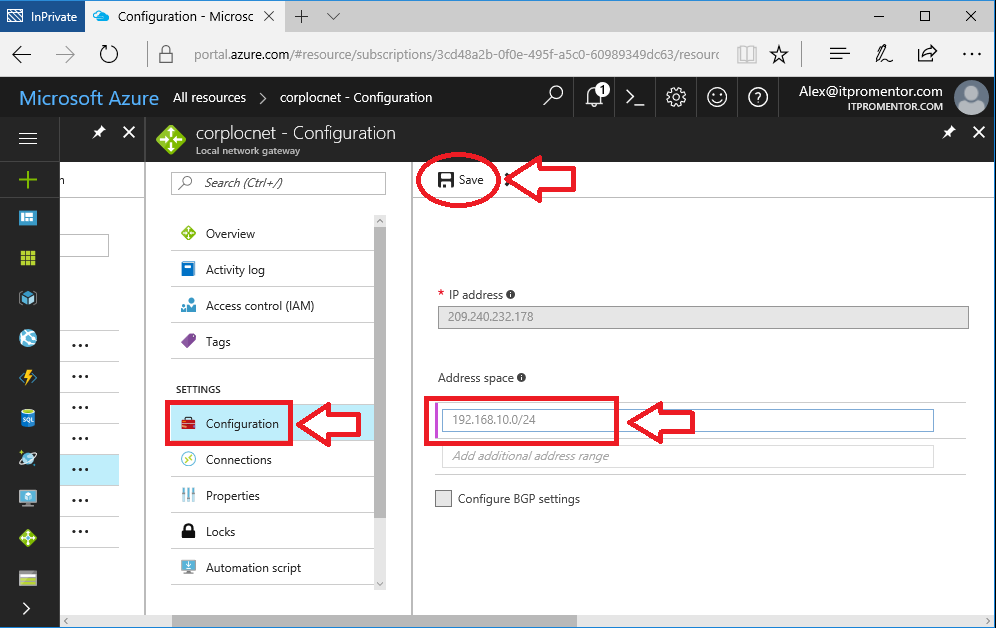
Go to Azure Portal > All Resources and find your local network object that was created with the wizard.

Now choose Configuration from the blade menu. Input your local Address space. For example, if your network is 192.168.10.x with subnet mask 255.255.255.0, you would input 192.168.10.0/24. Click Save.
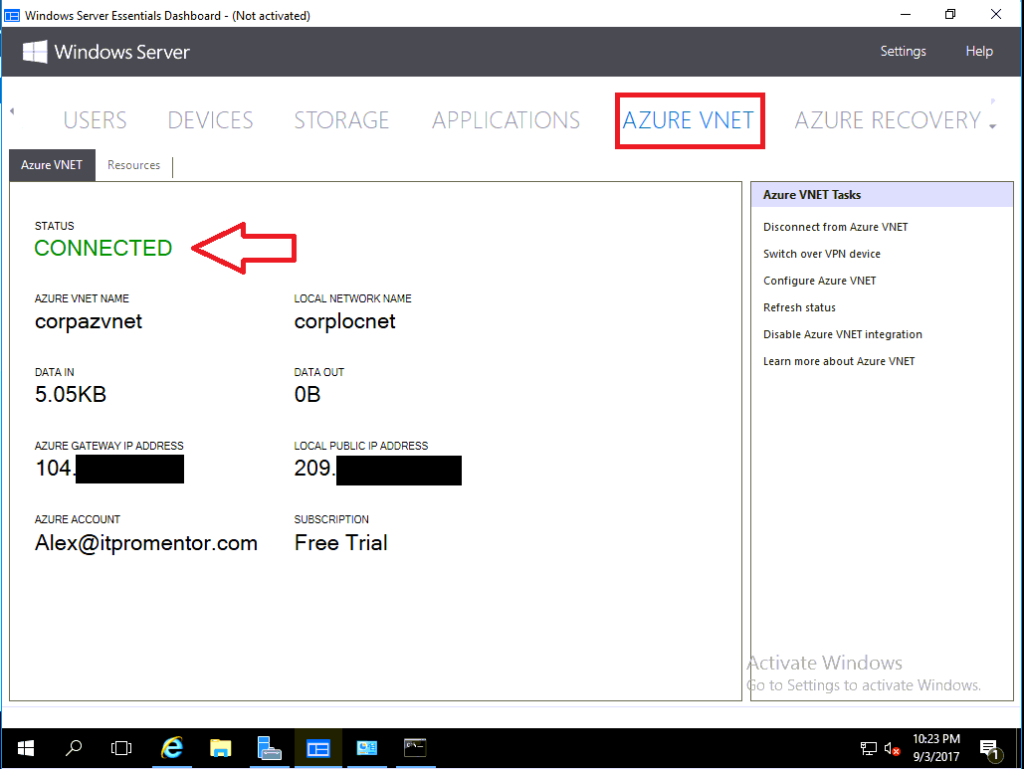
Check back later, click Refresh status, and it will eventually switch to Connecting, finally we should see the status change to Connected. 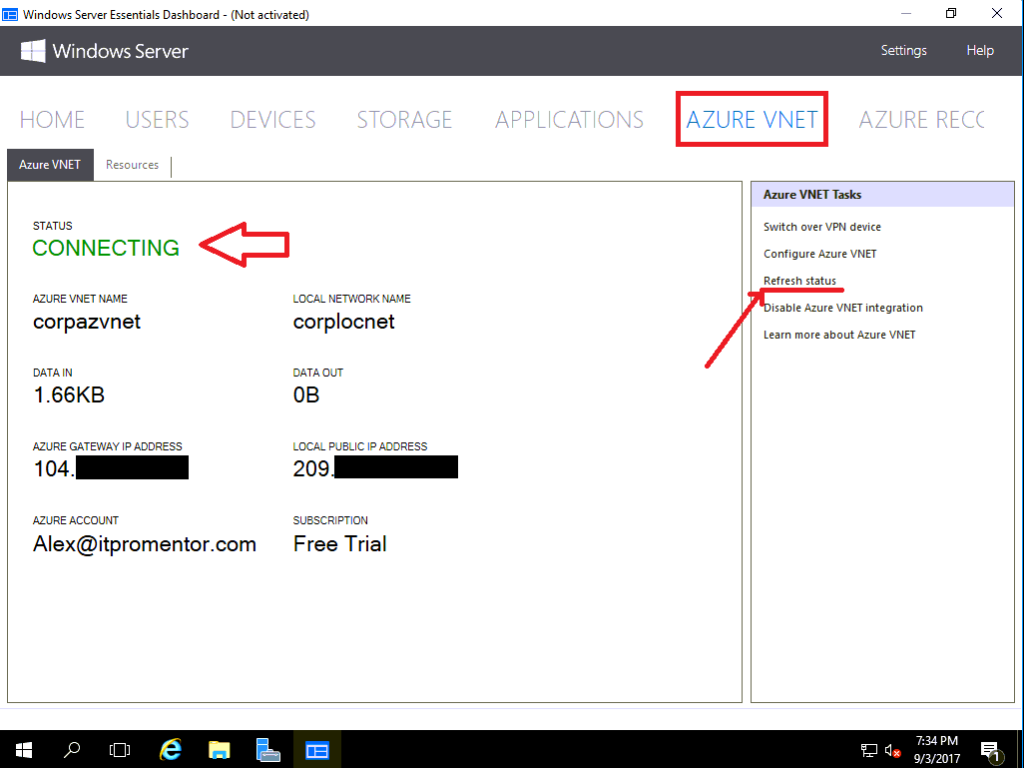
Step 3. Enable replication using Azure Site Recovery from the Essentials Dashboard
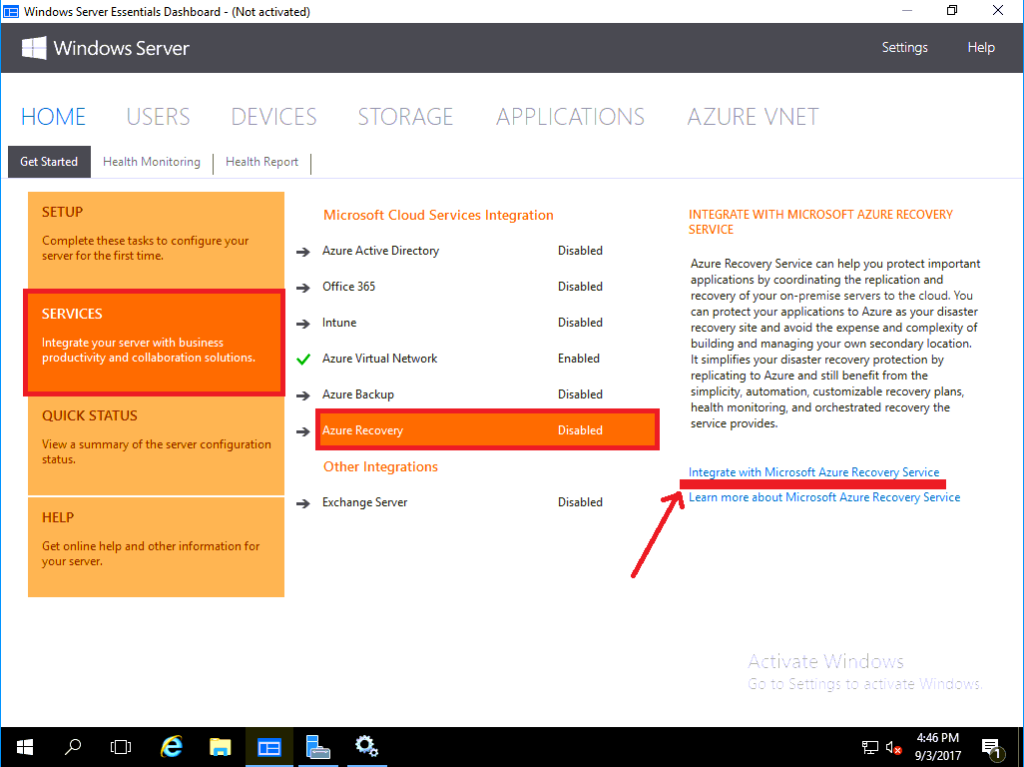
Enable the Azure Recovery integration. Go to Services > Azure Recovery, click Integrate with Microsoft Azure Recovery Service.
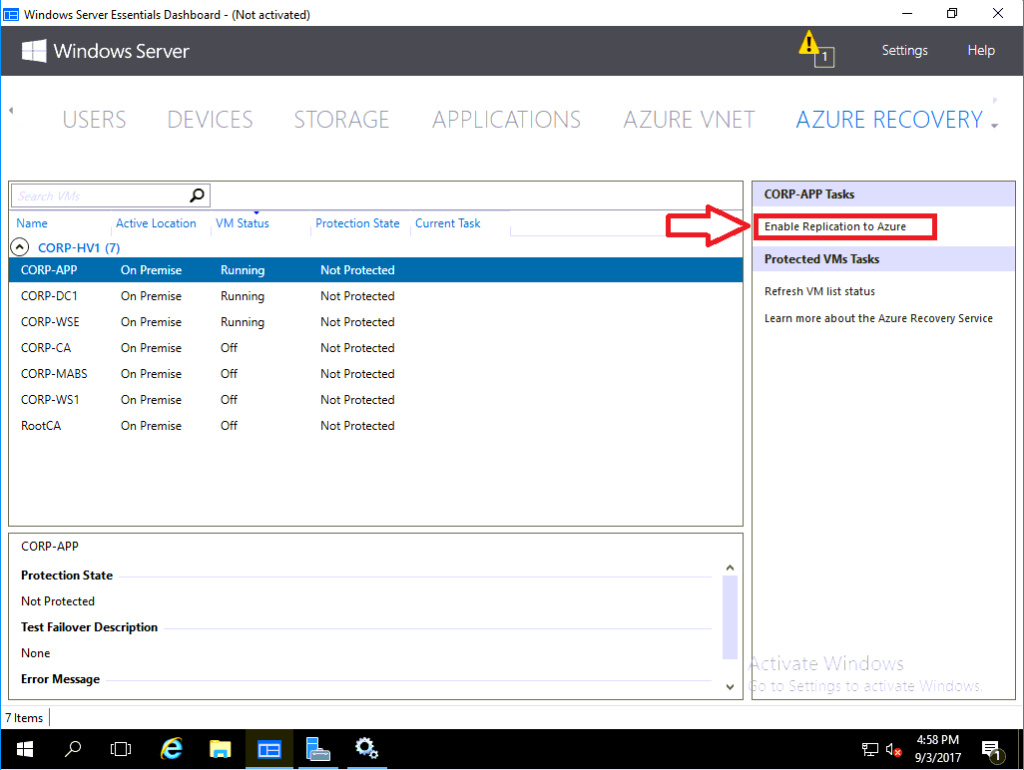
Choose a VM to protect, and click Enable Replication to Azure
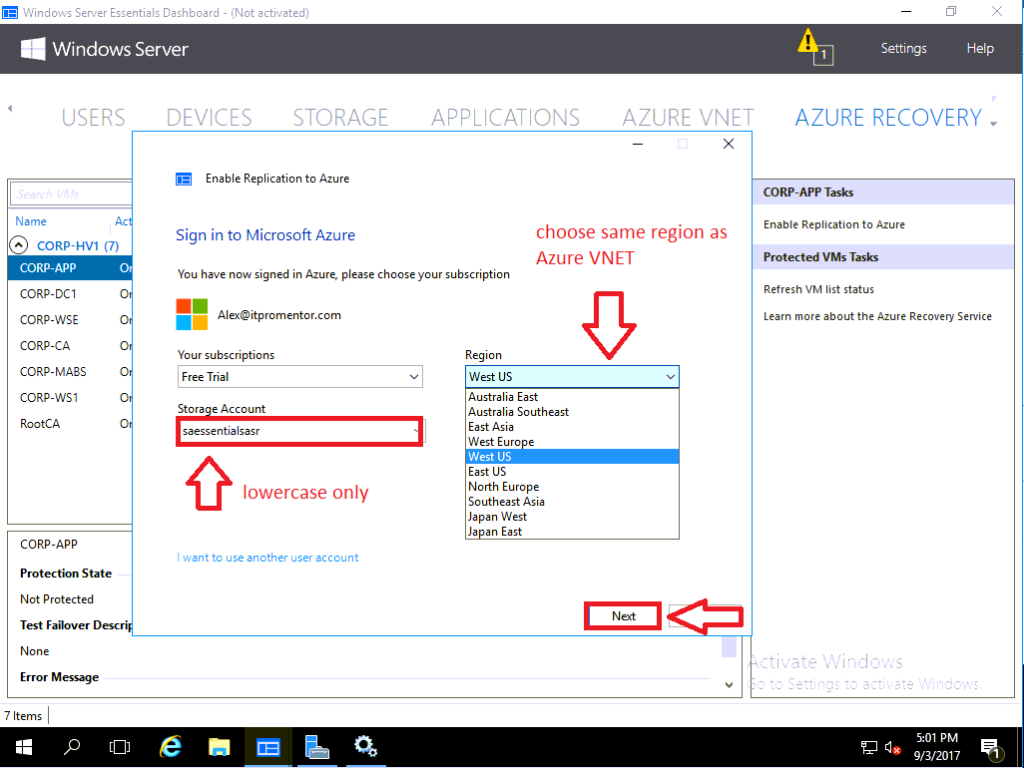
Choose your subscription. Name your storage account using all lowercase letters (this storage location is where VM’s will be restored out of the recovery vault). Be sure to choose the same Azure Region as you did for Azure VNET.
The wizard will now begin installing the MARS agent onto your Hyper-V host server, and registering it with the recovery vault.
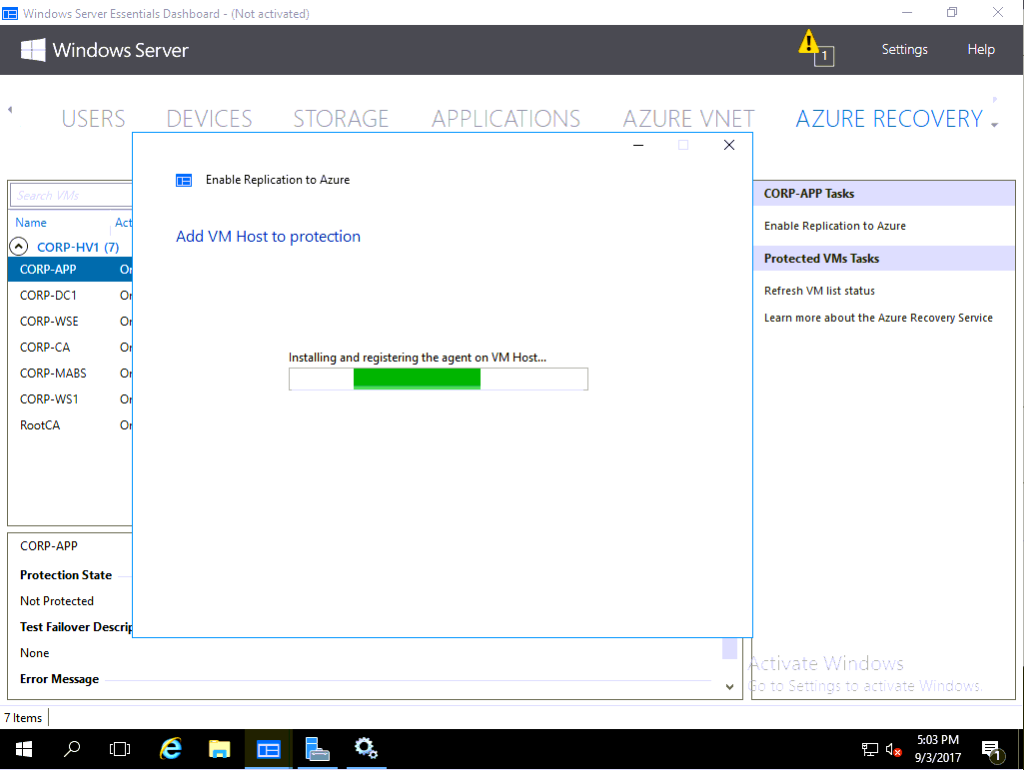
NOTE: If this errors out with an “Unknown error” that says to try again later, you might just have to try again later, like it says. The reason for this error is that sometimes it takes longer than expected to provision the resources in Azure and register the Hyper-V host server.
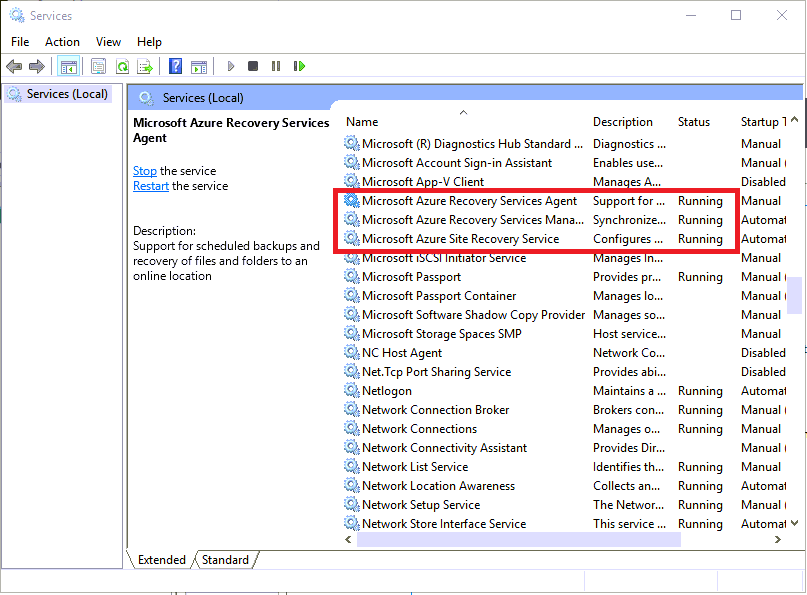
You will see the new Azure Recovery services appear in the services.msc MMC console on the Hyper-V server.
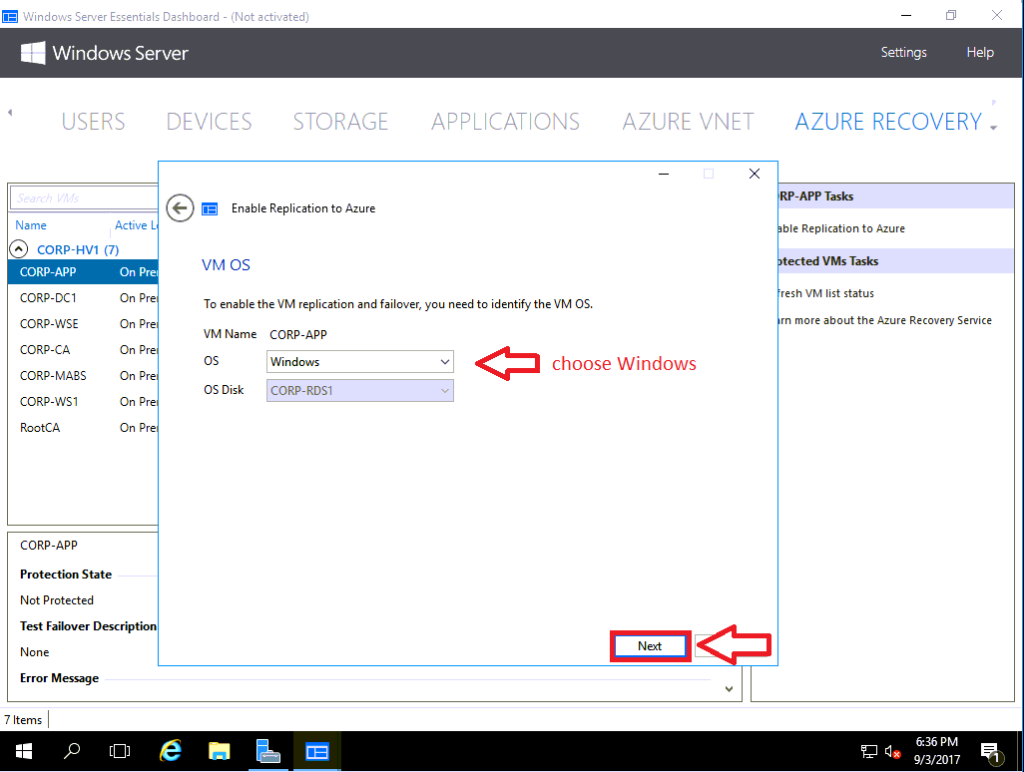
Eventually you will be able to see the next screen, and choose your Operating System. You have to confirm that the VM does indeed run a Windows, not Linux, OS.
Finish the wizard.
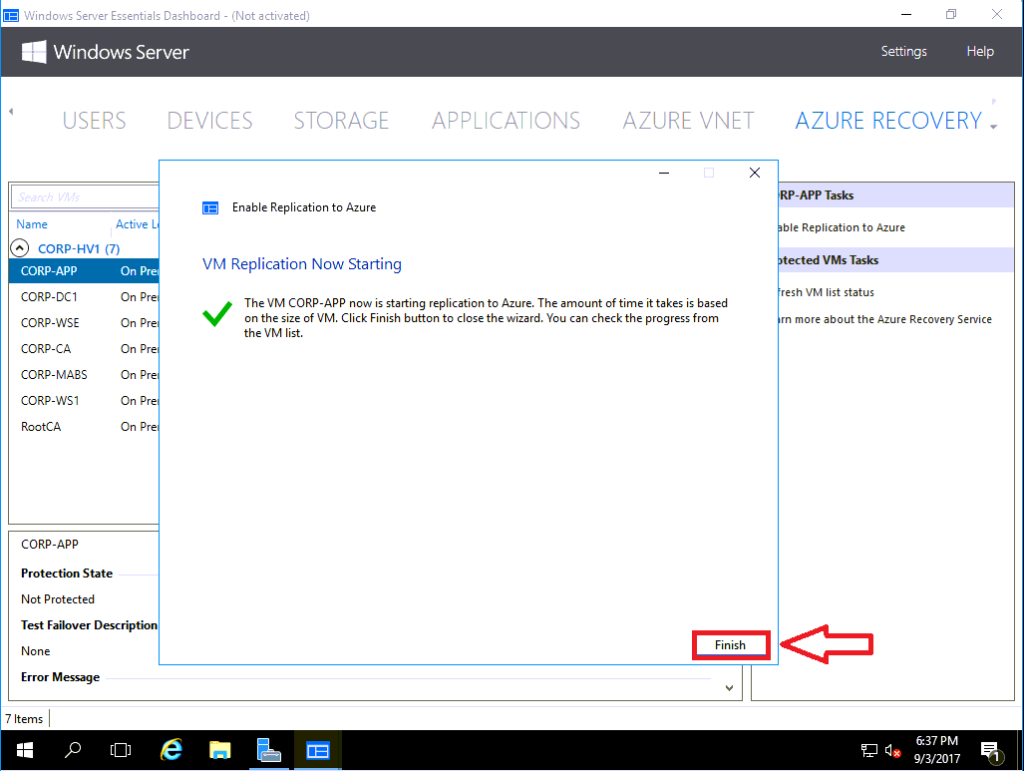
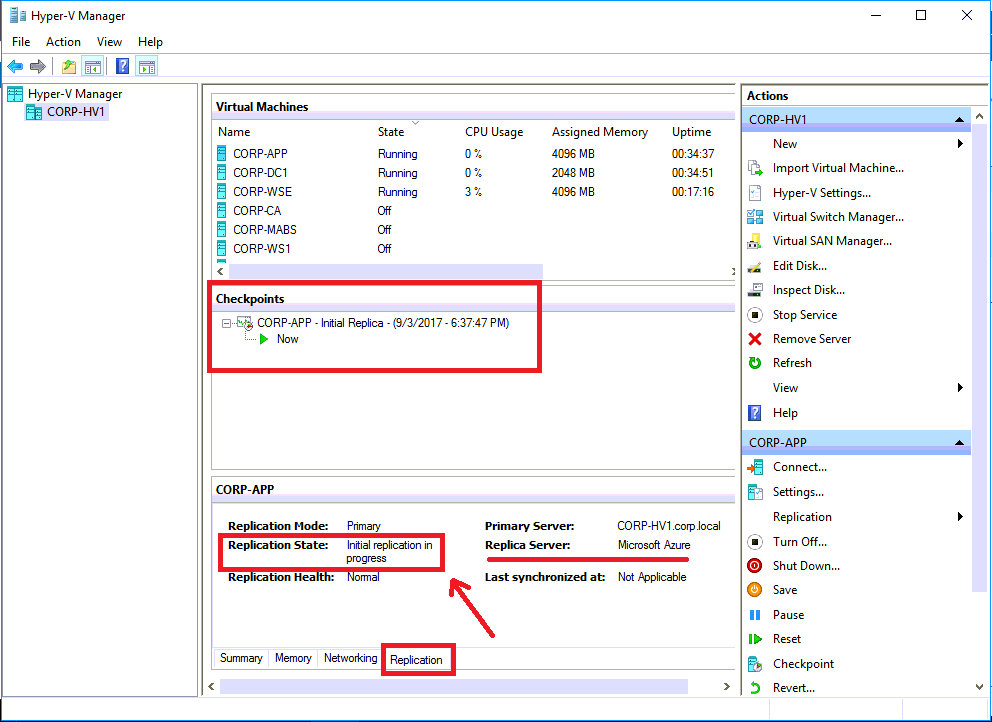
The virtual machines that you enable for replication will change status in the WSE console.

They will also show a checkpoint in Hyper-V, and a replication status.
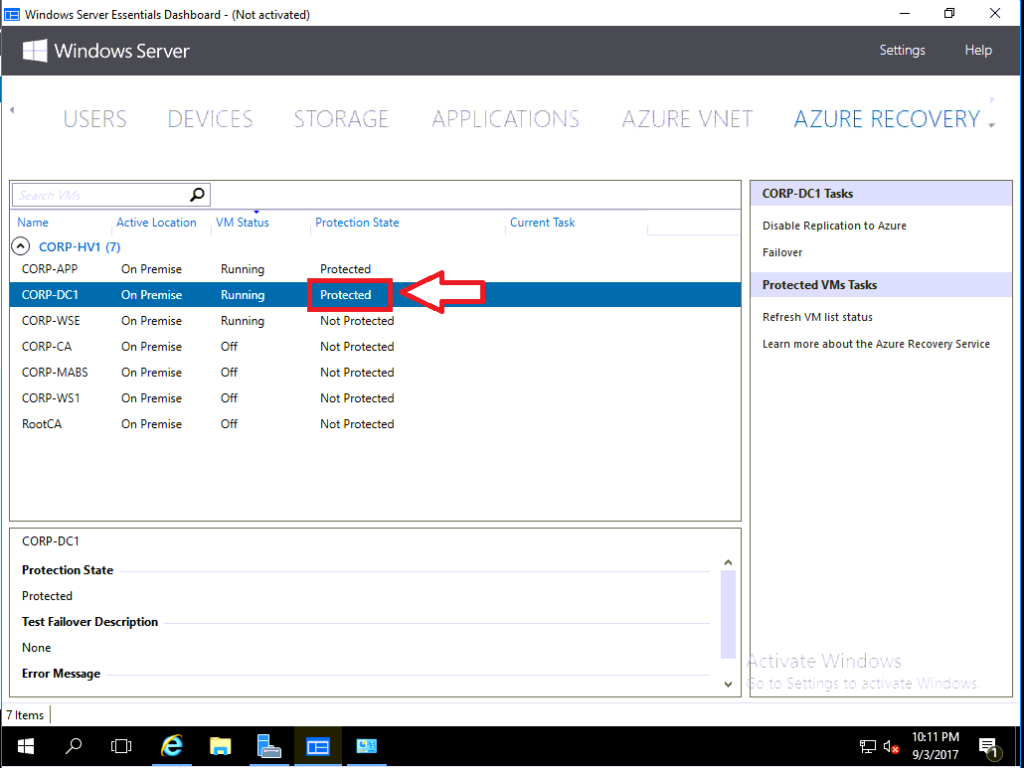
Eventually when initial replication completes, the status will change to Protected in the WSE console under Azure Recovery.
That concludes our second part, wherein we configured the Azure Virtual Network and the Azure Recovery Service using the Windows Server Essentials integrations. In the next post we will prepare for, and then perform a planned failover.

Leave a Reply