How-to Complete your Office 365 Setup and Exchange E-Mail Migration
When setting up a new Office 365 tenancy or migrating from an on-premises or hosted Email system to Office 365, one last step will be to add all the necessary DNS records to your DNS zone file, and then make the appropriate changes to your on-premises Active Directory and Exchange environments.
This “cut-over” will require three sets of changes:
- Complete the domain setup in Office 365
- Update local Active Directory & Exchange servers (if applicable)
- Configure SMTP Relay (optional)
1. Complete Domain Setup in Office 365
You will have already verified your domain in Office 365 prior to this, and I highly recommend completing data migration of your mailboxes and public folders in advance of cutting over the MX, SPF (TXT) and Autodiscover CNAME records. Once all of your users’ data has been copied to the cloud mailboxes, you will be ready to complete this step, which is fairly straightforward. Be aware that once this change is made, mail and other services will be pointed directly to Office 365, so mail will no longer flow to your old server or provider.
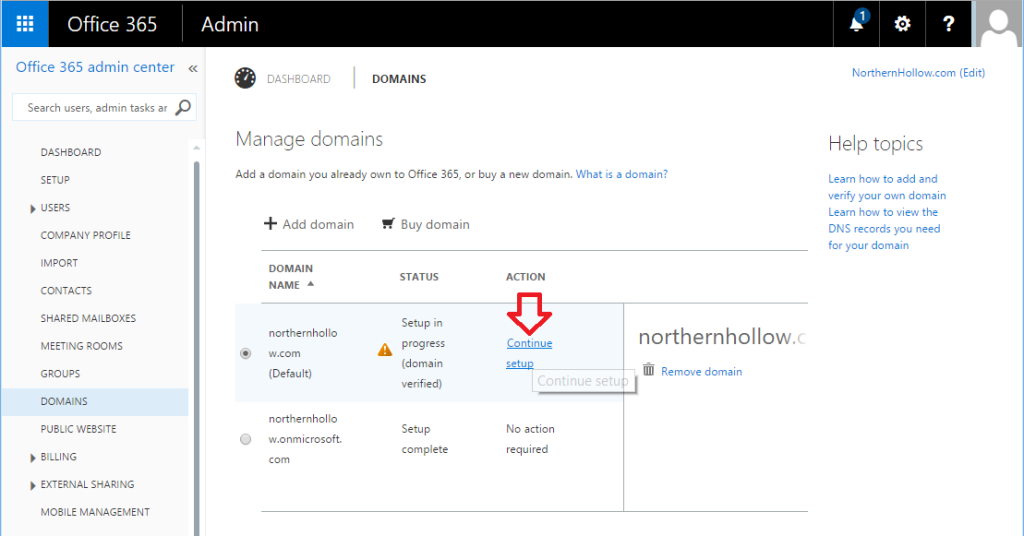
From the (classic) Office 365 Admin portal, you can choose Domains from the left menu. Select the domain and choose Continue Setup.
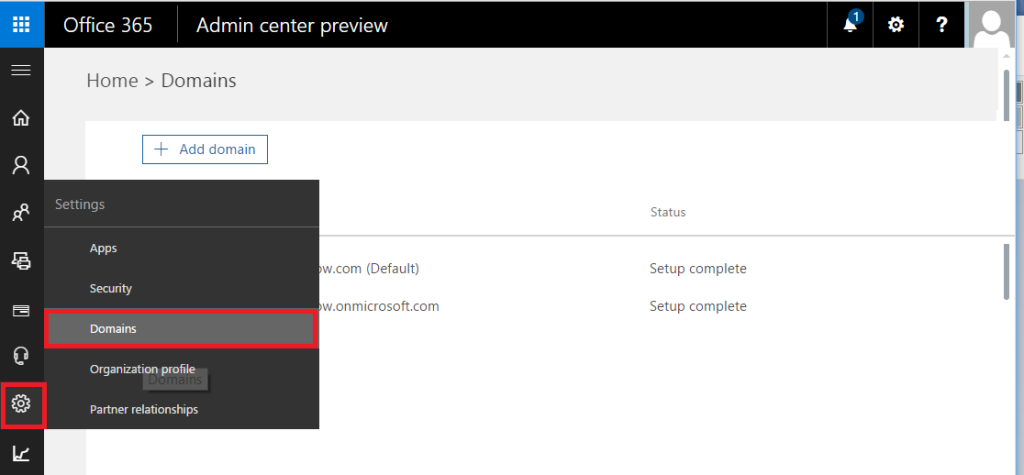
In the new Admin center, you can find Domains under Settings.
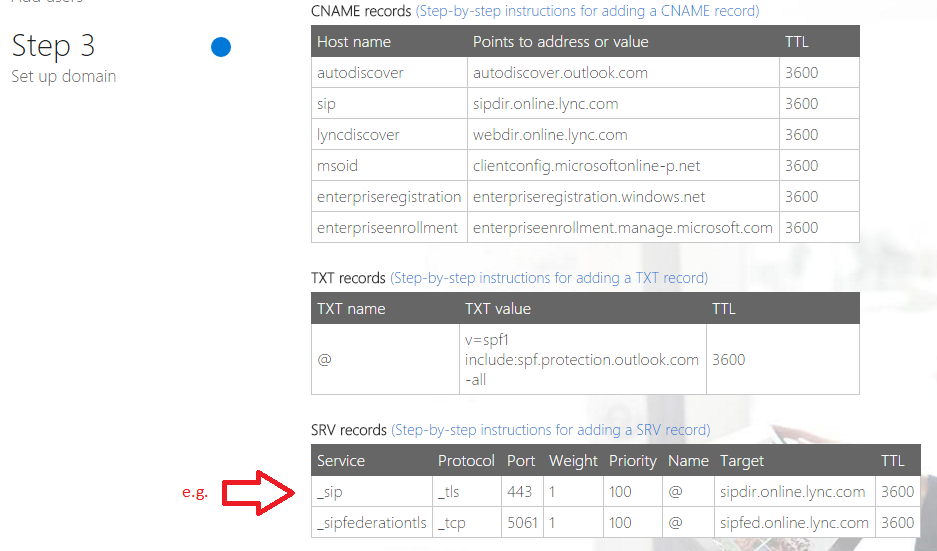
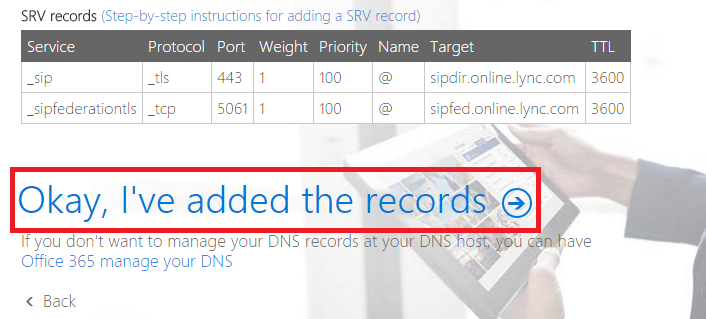
You will be presented with a number of DNS records that you will need to update with your registrar / hosting provider. You will want to have access to make these changes, or have the support contact who can make these changes on your behalf handy.

Once you are done adding the records, you can complete the setup. Note that DNS changes can take some time to “show up”–so don’t be discouraged if it doesn’t take right away.
Here is an example of adding one of these records to my hosting provider, BlueHost.com. The interface may look different for different hosting providers such as GoDaddy.com or others.
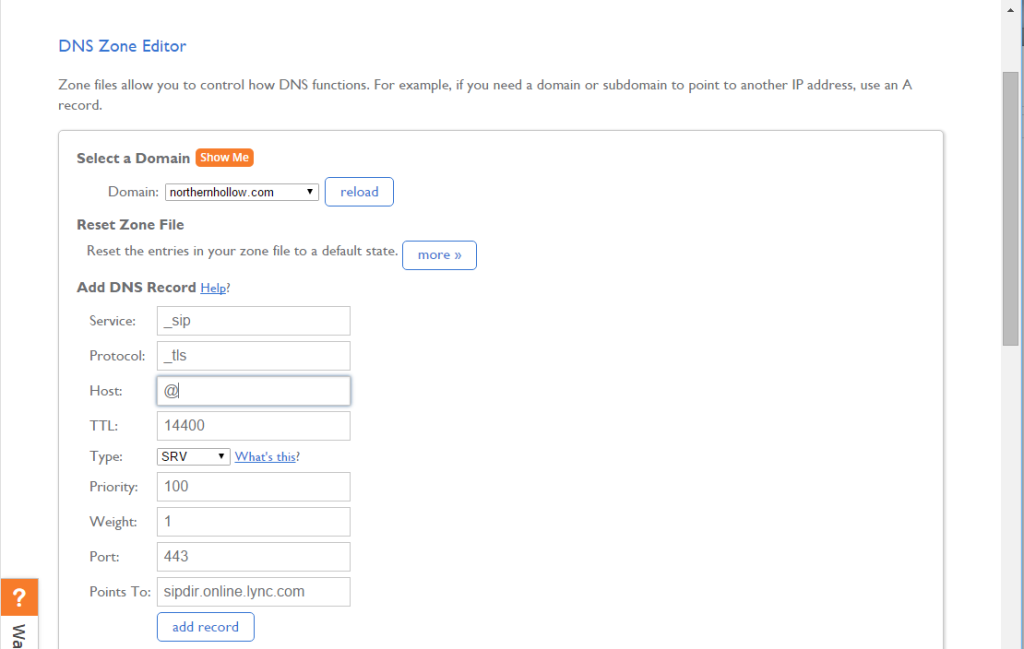
This hosting provider does not allow me to adjust TTL lower than 14400, but that is okay, this value will still work; it just means that DNS zone updates may be further apart for this domain than one where we could adjust it down to 3600 seconds as Microsoft suggests.
Once you are done, simply follow the link at the bottom of the page that says Okay I’ve added the records.
If you’ve entered something wrong, it will highlight the error for you, and you’ll need to adjust it, as in this example (see the red “x” for autodiscover):

After you’ve made necessary adjustments, you will be able to continue by clicking Okay, I’ve fixed the records, below.
Now you should be all setup and ready to go. If users add their accounts to Outlook or a mobile device, for example, they should now be able to choose Exchange as their account type and input their email address and password.
Step 2. Changes to On-premises Active Directory and Exchange
On-premises, there are some changes that need to be made at this time, also. First, DNS will need to be updated, but only if the zones for your Email domain names exist on-premises. Note that you only need to add the autodiscover records for the Email domains, and not for “.local” or “.lan” DNS zones. If you only have a “.local” DNS zone, and no zones for the Internet domain name that you use for Email, you can skip this step.
A. Update DNS Records
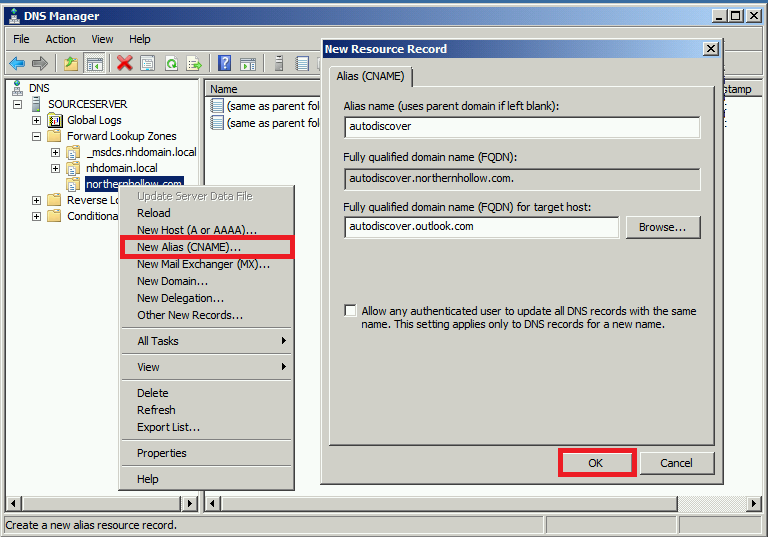
Open the DNS management console on your Active Directory server. If you have existing (A) records for autodiscover, remove them first. Expand the DNS zone for your Email domain, and edit or add the CNAME record for autodiscover here: autodiscover.outlook.com.
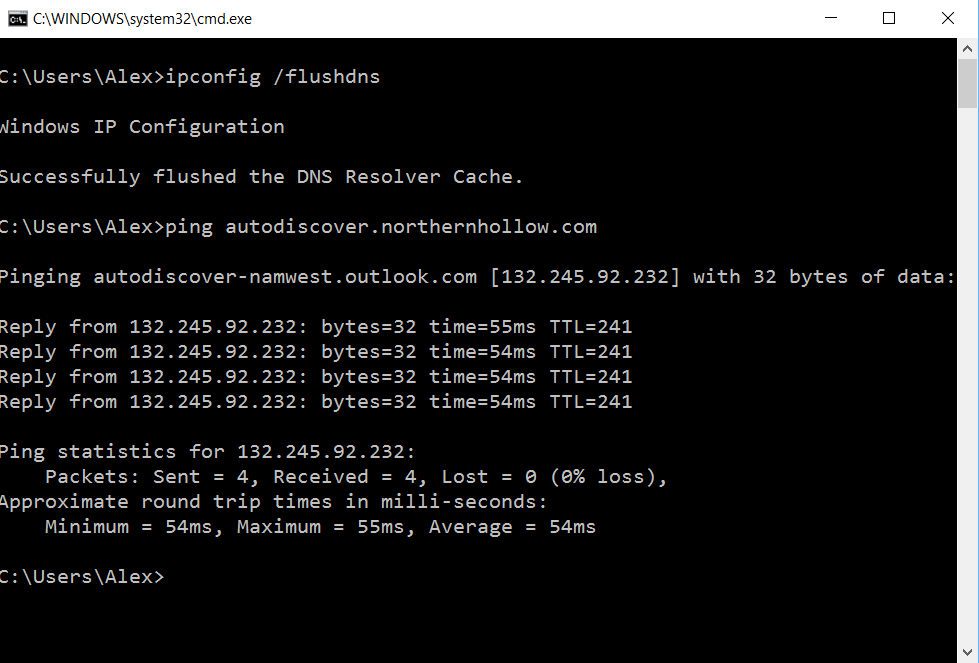
You can verify it is working by clearing the DNS cache on the server and then pinging autodiscover.yourdomain.com. It should return a value for one of the Microsoft datacenters, such as nameast, namwest, namnorth, etc.
You can add all of the DNS records if you choose to use Skype for Business, Intune, etc., but this one record alone would be sufficient for the purposes of Email migration to Office 365.
B. Changes to Exchange Server
The other required changes would need to be made to your on-premises Exchange server, again only if applicable. If you are migrating from Exchange 2003 or Small Business Server 2003, then you need to disable RPC over HTTP. If you are migrating from Exchange Server 2007, 2010 or SBS Server 2008 or 2011, then you will want to disable Outlook Anywhere and change your autodiscover SCP record. We will cover each of these below.
SBS 2008/2011 or Exchange 2007/2010
Open the Exchange Management Shell and type the following:
Get-ClientAccessServer | Set-ClientAccessServer -AutoDiscoverServiceInternalUri https://autodiscover.outlook.com
And press Enter. If you are using the Remote Move migration method from Exchange 2010, SBS 2011 or Exchange 2013, then you can alternatively choose to set this value to the Internet DNS name of your hybrid Exchange server.
Next, to disable Outlook Anywhere, simply type the following into your Exchange Management Shell:
Disable-OutlookAnywhere –Server <ServerName>
And press Enter. You’re done.
SBS 2003 / Exchange 2003
Open the Exchange System Manager. Expand the tree to find your server, and right-click to open the Properties dialogue.

Finally, you will be able to navigate to the RPC-HTTP tab and select Not part of an Exchange managed RPC-HTTP topology.
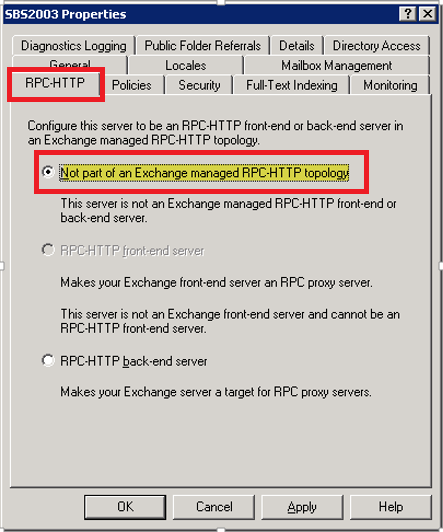
Click OK–you’re done.
Step 3: Add SMTP Relay connector (optional)
Before you proceed to uninstall Exchange, you might also want to add an SMTP Relay connector to Office 365, if you were previously using your Exchange server to relay mail from on-premises LOB apps, or from scan-to-email devices, etc. Office 365 can provide a relay connector to replace this functionality. Otherwise, if you plan to keep using a hybrid Exchange server, then Exchange can continue to act as your local SMTP relay.
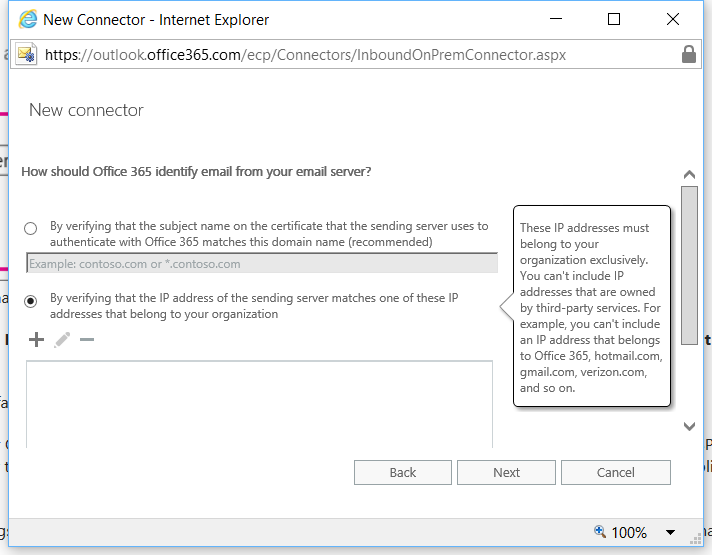
1. From the Exchange Online admin portal, go back to Exchange Admin Center > Mail flow > Connectors. Use the “plus” symbol to add a new connector, choose From: Your organization’s email server and To: Office 365. Step through the wizard, specifying the external IP address(es) of your organization under By verifying that the IP address… and clicking the “plus” symbol. You can leave default values in the rest of the wizard.
2. Ensure that your spf record in DNS includes spf.protection.outlook.com as well as ip4:<YourExternalIp>:
v=spf1 ip4:[ExternalIPAddress] include:spf.protection.outlook.com -all
3. Check that your firewall allows SMTP (25) outbound from the device(s) that require access to the connector.
4. On the device itself, you will need to change the SMTP or smarthost address from the internal Exchange server’s IP to the host of your MX record (e.g. companyinc-com.mail.protection.outlook.com). You can ping this address to obtain an IP if the device only accepts inputs of IP rather than hostnames.
After you’ve completed these steps, you should be 100% done with your Office 365 setup and Email migration. You will be able to uninstall and properly decommission your legacy servers at your convenience.

Leave a Reply